
Understanding and Resolving Marks on Your .308 Case Necks
A Comprehensive Guide to Diagnosing and Fixing Reloading Scratches
- Scratches and Marks are Common: Minor, light vertical marks on .308 case necks during reloading are frequently encountered and often do not compromise safety or performance.
- Primary Causes are Contamination and Die Condition: The most prevalent reasons for these marks are grit or debris embedded in the die, rough or galled die surfaces, or issues with case preparation like untrimmed necks or inadequate lubrication.
- Effective Solutions Involve Cleaning and Inspection: Thorough cleaning of the die and brass, proper lubrication, and inspecting both the die and cases for imperfections are key steps to resolving the issue.
Reloading ammunition for your .308 Winchester can be a rewarding pursuit, offering enhanced accuracy and cost savings. However, encountering marks or scratches on the case necks after using a neck sizing die is a common concern for reloaders. These marks, ranging from light striations to more pronounced scoring, can raise questions about the integrity of the brass and the quality of your reloading process. This guide will delve into the various reasons why your .308 neck sizing die might be leaving marks on the case necks and provide practical solutions to mitigate or eliminate them, ensuring consistent, high-quality reloads.
Decoding the Marks: Types and Their Implications
The marks on your .308 case necks can manifest in different forms, each potentially pointing to a distinct underlying cause. Understanding these variations is the first step toward effective troubleshooting.
Vertical Scratches and Striations
These are the most common type of marks. They appear as thin, often parallel lines running along the length of the case neck. While sometimes alarming in appearance, very light vertical scratches often don't significantly impact brass life or accuracy. However, deeper scratches can indicate a more serious issue that might lead to premature neck splitting.
One of the most frequent culprits for vertical marks is grit or dirt becoming embedded in the die wall. Even microscopic particles from primers, powder, or range debris can abrade the brass as it passes through the die. Similarly, if case necks are untrimmed or have burrs from trimming, these can get pulled off and gall or embed into the die, causing further scratches. Insufficient or improperly applied lubrication can also contribute, as friction increases, making the brass more susceptible to marking.
For instance, some users report "picket fencing type marks" on their .308 necks, which can even occur on virgin Lapua brass if the die setup is too aggressive or if the brass is inherently tight for the die's dimensions. Lee collet dies, while popular for their neck sizing capabilities, are also known to sometimes leave vertical marks on the outside of the neck from the collet fingers.
Circular or Horizontal Marks
Less common with neck sizing dies but possible, especially if the case is not entering the die smoothly or if there's an issue with an expander ball or a bushing. These marks might suggest a problem with the alignment of the die or the case, or a rough surface on an internal component of the die, such as an expander button that is not properly polished.
Galling and Brass Buildup
In more severe cases, you might observe actual brass buildup inside the die, or a feeling of "galling" as the case is sized. This occurs when small pieces of brass adhere to the die wall due to excessive friction, often related to inadequate lubrication or a rough die surface. Once brass galls onto the die, it acts as an abrasive, causing deeper scratches on subsequent cases.
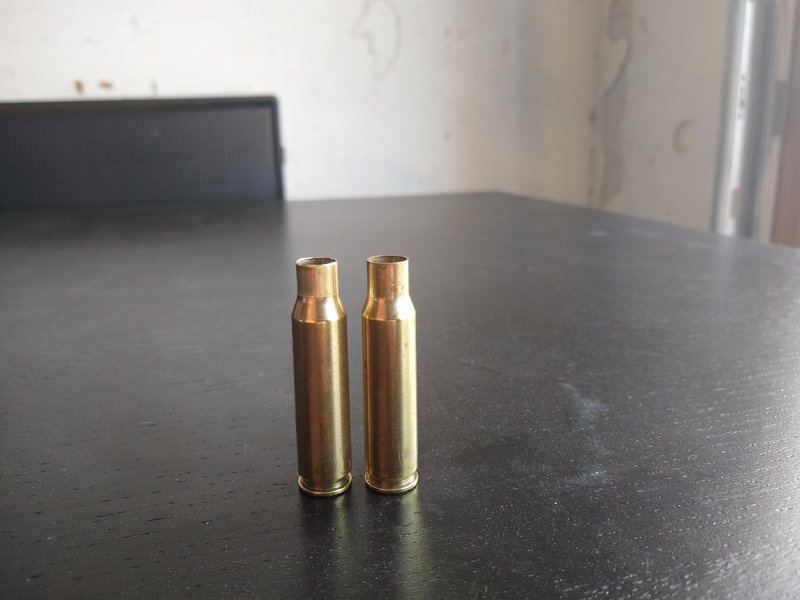
An example of striation marks on a .308 case neck, often a result of issues during the sizing process.
Root Causes of Die Marking
The reasons behind your .308 neck die leaving marks can be multifaceted, often stemming from a combination of factors related to your equipment, brass preparation, and technique.
Contaminated or Damaged Dies
This is arguably the most common culprit. Over time, microscopic particles of dirt, carbon, unburnt powder, or even dried lubricant can accumulate inside the sizing die. These particles, especially if abrasive, can become impregnated into the die wall and act like sandpaper, scratching the brass as it passes through.
- Embedded Grit: If cases are not thoroughly cleaned before sizing, residual grit from the firing range or tumbling media can be carried into the die.
- Galled Die Surface: Poor lubrication or forcing a case through a die can cause brass to weld or "gall" onto the die's interior surface, creating a rough patch that scratches subsequent cases.
- Manufacturing Imperfections: While less common with reputable brands, a new die might have a rough finish or burrs from the manufacturing process that can scratch brass. Some users have reported issues with certain Redding dies leaving marks, even suggesting the need for re-polishing by the manufacturer.
Improper Lubrication
Lubrication is critical for smooth sizing and preventing brass from sticking or scratching. Insufficient or incorrect lube application is a direct cause of friction-related marks.
- Too Little Lube: Without adequate lubrication, the friction between the brass neck and the die wall increases significantly, leading to galling and scratches.
- Incorrect Lube Type: Not all lubricants are equal. Some might not provide enough protection for the high pressures involved in sizing, or they might not spread effectively.
- Uneven Lube Application: If lube is not applied uniformly around the entire neck and shoulder area, dry spots can lead to localized scratching. Remember to apply lube to the inside of the case neck as well, especially when using expander balls or mandrels.
Brass Preparation Issues
The condition of your brass before sizing plays a crucial role in preventing marks.
- Untrimmed or Burred Necks: If case necks are not properly trimmed and chamfered/deburred after resizing, the sharp edges can scrape against the die, potentially pulling off brass shards that embed in the die or create new scratches.
- Dirty Brass: As mentioned, cases that aren't sufficiently cleaned (e.g., tumbled) can carry abrasive particles into the die. Wet tumbling or ultrasonic cleaning before sizing is often recommended to ensure the cleanest possible brass.
- Case Neck Thickness: In some instances, overly thick case necks can cause issues. If the loaded neck OD is significantly larger than the chamber neck diameter, it can lead to excessive sizing force and potential scratching. Neck turning might be required for optimal fit and consistency, especially when necking down cases from a larger caliber like .308 to .260.
Die Type and Design
Different types of neck sizing dies operate with varying mechanisms, and some designs are more prone to certain types of marks.
- Lee Collet Dies: These dies work by squeezing the case neck around a mandrel. The "fingers" of the collet can sometimes leave vertical marks on the case neck. These marks are generally considered normal and harmless, but if they are excessively deep, it might indicate too much force or a rough mandrel.
- Bushing Dies: Bushing dies use interchangeable bushings to control neck tension. If the bushing itself is rough, or if the case is not perfectly aligned when entering the bushing, it can cause scratches.
- Standard Neck Sizing Dies: These dies often feature an expander ball or button that sizes the inside of the neck. If the expander ball is rough, dirty, or improperly lubricated, it can cause scratches on the inside or outside of the neck.
Diagnostic Measures and Solutions
Addressing marks on your .308 case necks requires a systematic approach to identify and rectify the underlying problem. Here's how to diagnose and implement solutions:
Thorough Die Cleaning and Inspection
Before anything else, ensure your sizing die is impeccably clean. This is often the simplest fix.
- Disassemble the Die: Remove all internal components, including the decapping pin and expander ball/mandrel.
- Clean with Solvents: Use a good gun cleaning solvent and a brush (like a bore brush or a nylon brush) to meticulously clean the inside of the die. Pay close attention to the neck area where marks are appearing. Many reloaders recommend using fine steel wool wrapped around a rod and spun with a drill to polish out light imperfections, or a cotton bore mop with lapping paste.
- Inspect for Damage: Shine a light into the die and inspect the interior surface for any visible scratches, burrs, or brass buildup (galling). Also, check the expander ball or mandrel for roughness or adhesion of brass. If the die is severely scratched or galled, it might need to be sent back to the manufacturer for re-polishing.
Understanding how to identify and potentially fix a problematic reloading die, which can be the cause of marks on case necks.
Optimizing Lubrication
Proper lubrication is non-negotiable for smooth sizing.
- Ample and Even Application: Ensure you are applying enough sizing lube to the entire neck and shoulder area of the case. Roll cases on a lube pad or use a spray lube, ensuring full coverage.
- Internal Neck Lube: For dies with expander balls, a very light application of dry lubricant (like graphite) inside the case neck can significantly reduce friction and prevent internal scratches or stretching.
- Consider Lube Type: Experiment with different types of sizing lubes if your current one isn't performing well. Some lubes are more effective at preventing galling.
Refining Brass Preparation
Clean and properly prepared brass is fundamental to successful reloading.
- Thorough Cleaning: Always clean your brass thoroughly before sizing. Wet tumbling or ultrasonic cleaning are highly effective at removing all traces of carbon, dirt, and grit.
- Trim and Deburr/Chamfer: After firing, brass stretches. Trimming cases to a uniform length and then chamfering/deburring the inside and outside of the case mouth is crucial. This removes sharp edges that can scrape the die and ensures smooth bullet seating.
- Neck Turning (If Necessary): If you consistently experience excessive neck thickness and difficult chambering, or if you are necking down brass from a larger caliber, neck turning might be beneficial. This process ensures uniform neck thickness and optimal neck clearance in your chamber. SAAMI specifications for a .308 Win chamber neck typically allow for about 0.003 inches of clearance with a loaded round.
Adjusting Die Setup and Technique
Subtle adjustments to your die setup and reloading technique can also make a difference.
- Die Adjustment: Ensure your neck sizing die is set up correctly. For neck-only sizing, the die should be backed out slightly so it only sizes the neck and does not touch the shoulder.
- Controlled Stroke: Apply steady, consistent pressure when sizing. Avoid jerky movements or excessive force, which can exacerbate scratching or even damage brass. For Lee collet dies, some reloaders find that rotating the case 1/2 turn and sizing a second time can help improve uniformity and minimize marks.
- Neck Tension Considerations: While marks can occur, understand that proper neck tension is vital for consistent accuracy. For .308, neck tension is typically around 0.002-0.004 inches. If marks are associated with unusually hard chambering, it might indicate excessive neck tension, suggesting the need for a larger bushing or a different die.
Understanding Neck Tension and Its Impact
Neck tension, the grip the case neck has on the bullet, is a critical factor for accuracy and consistent performance in reloaded ammunition. While marks on the case neck might seem problematic, they can sometimes be a byproduct of achieving optimal neck tension. However, excessive marks can also be a sign of too much tension or an issue with the sizing process itself. The ideal neck tension for a .308 Winchester cartridge typically ranges from 0.002 to 0.004 inches of bullet pull, meaning the loaded neck outside diameter (OD) is 0.002 to 0.004 inches smaller than the bullet diameter (.308 inch).
This radar chart illustrates the relative impact of various factors on the occurrence of marks on .308 case necks during reloading, and the potential severity of the issues they might cause. Higher values indicate a greater influence or severity.
The radar chart above visualizes the relative impact of different factors on the likelihood and severity of neck marks. As you can see, 'Die Condition' and 'Brass Cleanliness' have the highest scores, indicating they are often the primary drivers of marking issues. 'Lubrication Quality' is also critical. While 'Neck Tension' itself might not directly cause marks unless excessive, it's an important parameter to consider as improper tension can lead to other reloading challenges.
When to Worry (and When Not To)
It's important to distinguish between minor cosmetic marks and those that genuinely indicate a problem.
Minor, Superficial Marks
Very light, vertical striations that are barely perceptible to the touch are often harmless. They typically don't affect brass life, accuracy, or safety. Many reloaders consider these normal, especially with certain die designs (like collet dies). Tumbling the brass after sizing can even make these marks less noticeable.
Deep Scratches and Galling
If the marks are deep enough to catch a fingernail, if you feel significant resistance or "chatter" when sizing, or if you see visible brass flakes or buildup in the die, then it's a cause for concern. These issues can reduce case life by causing premature neck splits, affect neck tension consistency, and in extreme cases, lead to stuck cases or safety concerns. Deep scratches also indicate a problem with your die or process that needs immediate attention.
Table: Troubleshooting Common Neck Marking Scenarios
This table summarizes common scenarios of neck marking and their typical causes and solutions, providing a quick reference for reloaders.
| Mark Description | Common Cause(s) | Suggested Solution(s) |
|---|---|---|
| Light vertical lines/striations | Minor grit in die, slightly rough die surface, normal for some die types (e.g., Lee collet dies) | Thorough die cleaning, light internal neck lube, ensure brass is clean. If using a collet die, may be normal. |
| Deep vertical scratches / "picket fencing" | Embedded grit/brass in die, galled die surface, insufficient lubrication, sharp edges on case mouth | Aggressive die cleaning/polishing, generous and uniform lubrication, proper case trimming/chamfering/deburring. |
| Circular or spiral marks | Rough expander ball/mandrel, misalignment of case/die, uneven internal neck lubrication | Polish expander ball, apply internal neck lube, check die/press alignment. |
| Bulges at base of neck | Die not sizing full neck length, excessive neck tension for bolt gun, improper die setup (e.g., for semi-auto) | Adjust die depth, consider smaller bushing, check fired case neck dimensions. |
| Very hard to chamber loaded round | Excessive neck tension, overly thick case necks, shoulder not set back enough (if FL sizing) | Reduce neck tension (larger bushing), neck turn brass if necessary, adjust FL sizing die for proper shoulder setback. |
FAQ Section
Is it safe to shoot .308 brass with marks on the neck?
Do neck sizing dies extend brass life compared to full-length sizing dies?
Can I use a .308 neck die on other .30 caliber cartridges, like .30-06?
How do I know if my .308 case necks are too thick?
Conclusion
Marks on your .308 case necks during reloading, while sometimes unsettling, are a common issue with identifiable causes and effective solutions. The key is to approach the problem systematically: first, thoroughly clean and inspect your dies and reloading components; second, ensure proper and consistent lubrication; and third, maintain meticulous brass preparation, including cleaning, trimming, and chamfering. Understanding the nature of the marks can provide clues, helping you pinpoint whether the issue is minor and cosmetic or indicative of a deeper problem that needs addressing. By following these guidelines, you can significantly reduce or eliminate marks on your .308 brass, leading to more consistent, accurate, and longer-lasting reloads.
Recommended Further Reading
- Explore the science behind optimal neck tension for superior .308 accuracy.
- Discover advanced brass preparation techniques to maximize case life and consistency.
- Delve into a detailed comparison of full-length versus neck sizing for .308 Winchester.
- Learn to troubleshoot a wider range of common reloading die issues.
References
 amazon.com
Last updated May 22, 2025