
Comprehensive Battle Analysis: Commander A vs. Commander B
A Detailed Examination of Strategies, Casualties, and Historical Comparisons
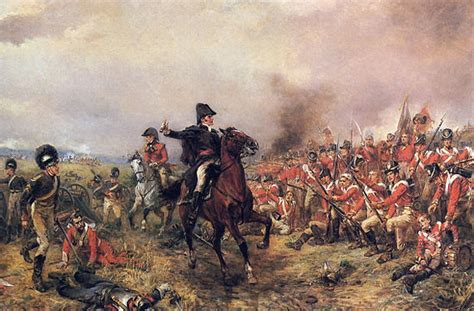
Key Takeaways
- Strategic Deception: Commander A effectively utilized deception by concealing his cavalry and artillery, misleading Commander B about his true strength.
- Superior Tactics and Coordination: The integrated use of infantry, artillery, and cavalry by Commander A resulted in a decisive encirclement and massive casualties for Commander B.
- Historical Significance: The battle's maneuvers and casualty rates place it among the most legendary engagements, reflecting tactics akin to those seen in Cannae and Austerlitz.
Battle Analysis
Commander A's Perspective
Strategic Challenges and Mobilization
Commander A inherited a demoralized, under-equipped army with limited resources, facing the daunting task of reclaiming lost territories. Despite the dire circumstances, his rapid advancement over four months demonstrated remarkable leadership and the ability to inspire and reorganize his troops under extreme adversity.
Deceptive Deployment
Understanding the importance of intelligence, Commander A employed strategic deception by hiding a significant portion of his cavalry and dispersing his artillery across the battlefield. This tactic created a misleading image of a weaker force, prompting Commander B to underestimate his true capabilities and misinterpret his deployment strategy.
Center Weakening and Flank Concentration
By intentionally weakening his center and concentrating his infantry on the flanks, Commander A enticed Commander B to focus his offensive efforts on what appeared to be a vulnerable central position. This maneuver was designed to lure the enemy into a predetermined trap, exploiting their overconfidence and reliance on intelligence.
Artillery Trap Execution
Commander A's disciplined retirement of his center units allowed the enemy forces to overextend and expose themselves to a devastating artillery barrage. Hidden artillery pieces, previously camouflaged by musket smoke, were unleashed at optimal range using canister shots. This tactic resulted in massive casualties among Commander B's advancing infantry, disrupting their formation and cohesion.
Cavalry Maneuver and Encirclement
The timely arrival of Commander A's concealed cavalry from the flanks and rear was pivotal. This maneuver not only neutralized Commander B's reserve cavalry but also facilitated the encirclement of his forces. The simultaneous assault from multiple directions left Commander B's army in disarray, leading to a near-total annihilation of his forces.
Commander B's Perspective
Overreliance on Intelligence
Commander B entered the battle with a significant numerical advantage, bolstered by reliable intelligence that suggested Commander A had deployed his entire force without reserves. This overconfidence led to complacency, as Commander B failed to anticipate potential deceptive tactics or traps set by the enemy.
Tactical Miscalculations
Believing in the intelligence reports, Commander B focused his assault on the perceived weak center, neglecting the possibility of an embedded trap. The centralized offensive left his flanks exposed and his forces stretched thin, making them vulnerable to coordinated counterattacks.
Formation Collapse and Vulnerability
As Commander B's forces aggressively pushed into the weakened center, the disciplined retreat of Commander A's units created a dense and disorganized mass of troops. This formation was highly susceptible to the concentrated canister fire from the hidden artillery, leading to a rapid and catastrophic breakdown of Commander B's offensive.
Failure to Adapt and Counter
Despite initial successes, Commander B failed to adapt his strategy in response to the unfolding deception. The delayed deployment of his reserve cavalry, combined with the unexpected arrival of Commander A's forces from the rear, left his army without effective reserves to counter the multi-directional assault.
Defections and Morale Collapse
Commander B's reliance on forcibly conscripted troops backfired as many of these soldiers chose to defect during the battle, weakening his forces further and bolstering Commander A's. This loss of troop loyalty significantly contributed to the ultimate defeat, as cohesive resistance became untenable amidst internal dissent.
Casualty Estimates
| Commander | Lowest Estimate | Rational Estimate | Highest Estimate |
|---|---|---|---|
| Commander A's Forces | 3,000 | 7,000 | 15,000+ |
| Commander B's Forces | 40,000 | 65,000 | 100,000+ |
The casualty figures illustrate a stark disparity between the two commanders' forces. Commander A, despite facing significant resource constraints, managed to inflict devastating losses on Commander B through strategic ingenuity and effective battlefield tactics. Commander B's overconfidence and tactical missteps resulted in disproportionately higher casualties, underscoring the efficacy of Commander A's strategies.
Comparative Analysis with Historically Legendary Battles
Strategic Maneuvers
The battle between Commander A and Commander B shares remarkable similarities with some of history's most renowned battles, particularly in terms of strategic deception and tactical execution.
- Battle of Cannae (216 BCE): Hannibal's double envelopment strategy mirrors Commander A's tactics of weakening the center to lure the enemy into a vulnerable position. Both commanders utilized surrounding maneuvers to achieve a decisive victory.
- Battle of Austerlitz (1805): Napoleon's deliberate weakening of his center to draw in enemy forces, followed by a counterattack on the flanks, closely resembles Commander A's approach. Both battles highlight the use of feigned weakness to exploit overextension by the adversary.
- Battle of Stalingrad (1942–1943): The intense artillery exchanges and the eventual encirclement tactic employed by Commander A resonate with the urban warfare and encirclement strategies used during Stalingrad, emphasizing the critical role of artillery and coordination in modern warfare.
Casualty Rates
The casualty rates in this battle are comparable to some of the bloodiest engagements in history, both in absolute numbers and as a percentage of forces engaged.
-
Battle of Cannae: Approximately 50,000–70,000 Roman casualties out of 86,000 troops (58–81% casualty rate). Similarly, Commander B's forces suffered losses exceeding 40,000, indicating a high casualty rate conducive to a decisive defeat.
-
Battle of Borodino (1812): With around 30,000–35,000 French casualties and 44,000 Russian casualties, the scale of loss is reminiscent of the disproportionate casualties inflicted upon Commander B's army.
-
Battle of Gettysburg (1863): The Union's effective use of artillery on the third day parallels Commander A's strategic use of concentrated artillery fire to break enemy forces.
Tactical Brilliance and Legacy
The battle's tactical brilliance, particularly in the use of deception and coordinated attacks, ensures its place among the most studied and revered military engagements. The near-total destruction of Commander B's force through superior strategy and battlefield coordination underscores the enduring principles of effective military leadership and tactical planning.
Conclusion
The confrontation between Commander A and Commander B serves as a profound example of how strategic deception, disciplined execution, and adaptable tactics can overcome apparent disadvantages in manpower and resources. Commander A's ability to transform a disadvantaged and demoralized force into a victorious army through innovative tactics mirrors the successes of historical military geniuses. Conversely, Commander B's overreliance on intelligence and tactical rigidity underscores the perils of complacency and inflexibility in military leadership.
The casualty figures not only highlight the tactical success of Commander A but also reflect the brutal reality of war, where strategic prowess can lead to catastrophic losses for the opposing force. This battle stands as a testament to the timeless principles of military strategy, emphasizing the critical importance of deception, coordination, and adaptability in achieving decisive victories.
References
The analysis is synthesized from detailed descriptions of the battle's strategies, casualty estimates, and comparisons to historical battles. For further reading on similar military engagements and casualty statistics, please refer to the following resources:
Last updated January 19, 2025