
Comprehensive Guide to Bennington SLX Maintenance and Yamaha Outboard Service
Troubleshooting Navigation Lights, Stereo Systems, and Essential Engine Care for Your Boat
Key Maintenance Insights
- Navigation Light Troubleshooting: Start by checking fuses, wiring connections, and the bulb itself. If the light housing is corroded or damaged, consider replacing the entire unit, potentially upgrading to LED for longevity.
- Stereo System Diagnostics: Focus on power supply, fuse integrity, wiring connections to the head unit and speakers, and the condition of the speakers themselves. A systematic approach helps isolate issues quickly.
- Yamaha 60HP Outboard Oil Change: Regular oil and filter changes are crucial for engine longevity, typically recommended every 100 hours or annually. Ensure you use marine-specific oil (Yamalube 4M) and replace the oil filter and drain plug gasket.
Maintaining your 2013 Bennington SLX and its Yamaha 60HP outboard is essential for safe and enjoyable boating. While a single, comprehensive manual covering all these specific issues might be hard to find, combining information from various sources provides a thorough approach to troubleshooting and performing necessary maintenance. This guide will walk you through common issues with navigation lights, stereo systems, and the detailed process of changing the engine oil and filter on your Yamaha 60HP outboard.
Illuminating the Way: Fixing Bennington Navigation Lights
Navigation lights are critical safety features, especially when operating your boat between sunset and sunrise or in low-visibility conditions. If your navigation lights aren't working on your Bennington SLX, several common culprits could be at play.
Understanding Bennington Navigation Lights
Bennington pontoons typically feature bow-mounted red (port) and green (starboard) navigation lights, and an all-round white anchor light, often located on top of the bimini top. It's crucial to understand that navigation lights and anchor lights serve different purposes and should generally not be on simultaneously, although some systems may allow for this. Always adhere to federal, state, and local laws regarding their use.
Common Issues and Troubleshooting Steps
When your navigation lights fail, a systematic approach is best:
- Check the Bulb: This is often the simplest fix. Many Bennington models from 2013 likely use replaceable bulbs, possibly "festoon" bulbs. If it's an older non-LED light in a fiberglass housing, you might need to remove screws on the light itself or those holding it to the deck to access the bulb. Newer models may have LED modules that require full unit replacement if faulty.
- Inspect Fuses and Circuit Breakers: Your boat's electrical system will have a fuse box or circuit breakers. Locate the one for your navigation lights. Some panels use push-to-reset circuit breakers, while others might require a gentle twist and lift to reveal the fuse. A blown fuse indicates a circuit overload or short, so always carry spares.
- Examine Wiring Connections: Loose or corroded wires are a frequent cause of electrical problems. Check the connections at the back of the navigation light switch, at the light fixture itself, and at any inline fuses or connectors. You can try swapping the navigation light wire with a known working circuit, like the docking lights, at the switch to diagnose if the issue is with the switch or the wiring/light fixture.
- Look for Water Intrusion or Corrosion: Exposure to marine environments can lead to water getting into light housings, causing corrosion and burning out bulbs or damaging wiring. If you suspect water ingress, sealing the light housing properly is crucial. Replacing bulbs with LEDs can be a good upgrade to reduce this issue and improve longevity.
If you're replacing the entire light unit, especially if upgrading to LED, ensure the mounting hardware is compatible. Some lights are held in place by screws/bolts accessed from under the deck.
Reviving Your Bennington Stereo System
A functional stereo system adds greatly to your boating experience. If your 2013 Bennington SLX stereo isn't working, here's how to approach the problem:
Systematic Stereo Diagnostics
- Verify Power Supply:
- Check the Main Breaker/Fuse: Like navigation lights, your stereo system will have a dedicated fuse or breaker on your boat's electrical panel. Ensure it hasn't tripped or blown.
- Examine Head Unit Connections: The stereo head unit typically has a main power wire (red or yellow) connected to a constant 12V supply and an accessory wire (often red) connected to a switched 12V supply. Ensure these are securely connected and receiving power. A ground wire (black) must also be firmly connected to a good ground point.
- Inspect Wiring and Speakers:
- Speaker Wires: Check all speaker wires for cuts, pinches, or corrosion, especially where they connect to the speakers and the head unit. Loose connections are common.
- Speaker Functionality: If the head unit powers on but there's no sound, the issue might be with the speakers. Test individual speakers if possible by connecting them to another audio source, or by connecting a known working speaker to the stereo's outputs.
- RCA Cables: If you have an amplifier, check the RCA cables connecting the head unit to the amplifier for damage or loose connections.
- Troubleshoot the Head Unit: If all connections and fuses appear good, the head unit itself might be faulty. Try a factory reset if your unit has that option, or consider temporarily swapping it with a known working unit to confirm.
Engine Vitality: Changing Oil and Filter on a Yamaha 60HP Outboard
Regular oil and filter changes are the cornerstone of outboard engine maintenance, ensuring longevity and optimal performance. For your Yamaha 60HP outboard, this is a relatively straightforward but crucial task.
Why Regular Oil Changes Matter
Engine oil is the lifeblood of your Yamaha outboard. It lubricates moving parts, dissipates heat, and protects against corrosion. Over time, oil degrades and becomes contaminated with combustion byproducts, losing its effectiveness. Yamaha recommends changing your engine oil every 50-100 hours of operation or at least once per year, whichever comes first. For brand new outboards, an initial oil change is recommended after the first 20 hours of operation to remove any break-in contaminants.
Ignoring regular oil changes can lead to irreversible damage and recurring performance issues.
Tools and Supplies Needed
Before you begin, gather the necessary supplies:
- Yamalube 4M marine-specific 10W-30 engine oil (approximately 1.9 quarts for a T60 model, check your specific manual for exact capacity). Automotive oils are not suitable due to the harsh marine environment.
- New Yamaha oil filter.
- New drain plug gasket.
- Oil drain pan.
- Funnel.
- Wrench (typically 14mm for the drain plug).
- Oil filter wrench (strap wrench or cap-style).
- Rags or paper towels.
- Gloves (optional but recommended).
Step-by-Step Oil and Filter Change Process
This radar chart visually represents the relative complexity, feasibility for DIY, and potential costs associated with the discussed boat maintenance tasks. Higher values indicate greater ease for DIY or higher frequency/cost. For instance, an engine oil change is generally highly feasible for DIY, while complex stereo issues might lean more towards professional service. This helps visualize where an owner might best invest their time and resources.
1. Warm Up the Engine:
Start your Yamaha outboard and let it run for a few minutes until it reaches normal operating temperature. This thins the oil, allowing it to drain more completely. Then, shut off the engine.
2. Prepare for Drainage:
Tilt the engine up halfway to allow any remaining oil to drain down to the pan. Place an oil drain pan directly under the lower unit of the engine.
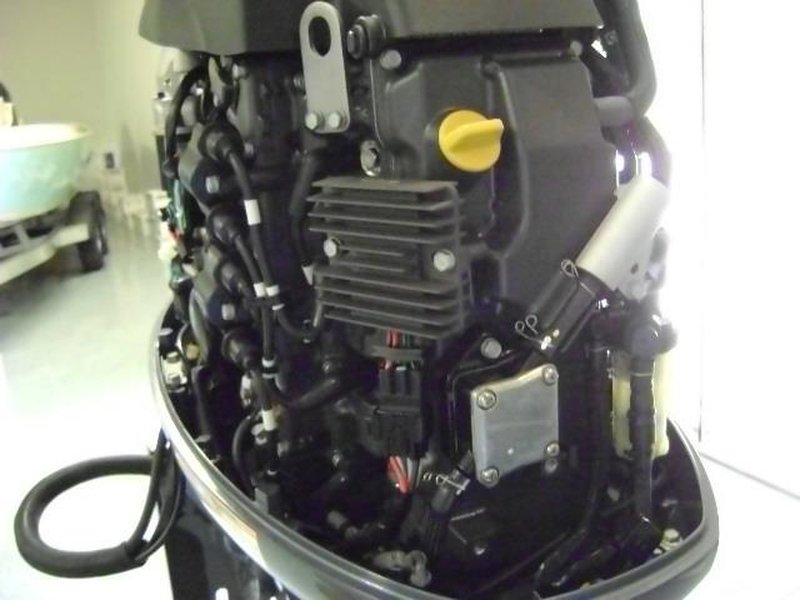
A Yamaha 60HP Outboard Engine.
3. Remove Oil Fill Plug and Dipstick:
Remove the engine cowling. Locate and remove the oil fill plug (usually at the top of the engine) and the dipstick (typically on the right side). This allows air to enter, facilitating a smoother drain.
4. Drain the Old Oil:
Locate the 14mm drain plug on the lower unit of the engine. Place your drain pan directly underneath and carefully remove the drain plug. Allow all the old oil to drain out completely. It's helpful to slowly lower the engine while the plug is out to get as much oil as possible. Once drained, clean the drain plug and replace the old gasket with a new one. Reinstall the drain plug and tighten it securely.
This video provides a visual step-by-step guide on changing the oil in a Yamaha T60 outboard, demonstrating the process for many Yamaha 4-stroke outboard models.
This video from Boats.net is a valuable resource as it directly addresses the oil change procedure for a Yamaha T60 outboard, which is very similar to your 60HP model. It visually demonstrates each step, from warming up the engine to draining and refilling the oil, and emphasizes key components like the oil filter and drain plug gasket. Watching this video can significantly aid your understanding and execution of the process.
5. Replace the Oil Filter:
Place a rag or paper towels underneath the oil filter to catch any drips. Use an oil filter wrench to loosen and remove the old oil filter. Be prepared for a small amount of oil to spill. Apply a thin coat of new oil to the rubber gasket of the new oil filter. Screw on the new filter by hand until it is snug, then tighten it an additional 1/4 to 1/2 turn according to the filter's instructions or your owner's manual.
6. Refill with New Oil:
Using a funnel, carefully pour the recommended amount of new Yamalube 4M 10W-30 oil into the oil fill opening. Start with slightly less than the full capacity, then check the dipstick. Slowly add more oil, checking the dipstick frequently, until the oil level is between the full and low marks. Be careful not to overfill.
7. Final Checks:
Reinstall the oil fill plug and dipstick. Replace the engine cowling. Start the engine and let it run for a few minutes to circulate the new oil. Check for any leaks around the drain plug and oil filter. Shut off the engine, wait a few minutes for the oil to settle, and recheck the oil level on the dipstick. Adjust if necessary.
Performing this maintenance regularly will significantly extend the life and reliability of your Yamaha outboard.
Finding Your Bennington Owner's Manual
While specific repair manuals for every component may not be readily available for your 2013 Bennington SLX, the owner's manual provides crucial information regarding basic operation, safety, and general maintenance guidelines. Bennington also makes various resources available to owners.
Where to Locate Your Manual
Bennington owner's manuals are typically very generic and don't delve into detailed repair specifics for individual components like navigation lights or stereo systems. However, they contain essential information about your boat's systems, safety procedures, and contact information for authorized dealers.
- Bennington Owner Resources Website: Bennington Marine offers an "Owner Resources" section on their official website, which includes articles, frequently asked questions, and potentially links to download owner's manuals.
- Dealer Network: Your local authorized Bennington dealer is the best resource for specific parts, warranty information, and potentially detailed service advice. They can order OEM (Original Equipment Manufacturer) parts directly or guide you to suppliers like Perko, from whom Bennington often sources components.
- Online Forums and Communities: Websites like Club Bennington and other boating forums often have discussions and shared PDFs of owner's manuals or service information from other owners. While not official, these can sometimes fill gaps in generic manuals.
Below is a table summarizing key troubleshooting steps and where to find replacement parts for your Bennington SLX:
| Component | Common Troubleshooting Steps | Where to Find Parts |
|---|---|---|
| Navigation Lights | Check bulb, fuse/breaker, wiring connections, for corrosion. | Authorized Bennington dealers, Great Lakes Skipper, Boat Outfitters, marine supply stores (e.g., Autozone for bulbs if non-LED). |
| Stereo System | Check main fuse/breaker, power/ground wires, speaker connections, speaker functionality. | Marine audio retailers, authorized Bennington dealers for specific OEM parts, electronics stores. |
| Yamaha 60HP Outboard | Regular oil/filter changes, lower unit lube change, spark plug replacement. | Yamaha Outboard Maintenance, Boats.net, PartsVu, Amazon (for kits), authorized Yamaha dealers. |
This table highlights common issues and typical sources for parts, streamlining your troubleshooting and repair efforts.
Conclusion
While a single "manual" for all your specific repair needs may be elusive, a combination of your Bennington owner's manual, online resources, and a systematic troubleshooting approach will enable you to address most common issues with your 2013 Bennington SLX's navigation lights, stereo, and Yamaha 60HP outboard. Always prioritize safety, disconnect power before working on electrical systems, and refer to specific manufacturer guidelines when available. Regular maintenance, especially for your engine, is key to ensuring many more years of trouble-free boating.
Recommended Further Exploration
- Explore detailed electrical diagrams for Bennington pontoons to trace complex wiring issues.
- Discover options and considerations for upgrading your pontoon boat's lighting to energy-efficient LED systems.
- Learn the critical process of changing the lower unit gear oil on your Yamaha outboard for complete drivetrain health.
- Understand common problems and solutions for marine stereo amplifiers if your sound issues persist.
References
 amazon.com
 cdn-gen.polaris.com
 s3.amazonaws.com
 cdn1.polaris.com
What is the recommended oil change interval for a Yamaha 60HP outboard?
Can I use automotive oil in my Yamaha outboard?
Where are the navigation lights typically located on a Bennington pontoon?
My Bennington navigation light is out, what should I check first?
Where can I find replacement parts for my Bennington pontoon boat?
Last updated May 21, 2025