
Unlocking BJJ's Most Coveted Position: Your Definitive Guide to Taking the Back
Master every pathway to back control, the pinnacle of dominance in Brazilian Jiu-Jitsu, from common guards to dynamic standing encounters.
In Brazilian Jiu-Jitsu (BJJ), achieving back control, often referred to as "back mount," is widely regarded as the most advantageous position. It offers a high degree of control over an opponent, severely limiting their offensive and defensive options while opening up a plethora of submission opportunities, most notably chokes like the rear-naked choke. This guide will explore the various positional pathways and fundamental concepts used to transition to an opponent's back, synthesizing proven techniques for both gi and no-gi grappling.
Essential Insights: Key Takeaways for Back Dominance
- Universality of Back Takes: Effective back takes can be initiated from almost any common BJJ position, including mount, side control, guard, turtle, and even standing.
- The Power of Control: Techniques like the "gift wrap" and "seatbelt grip," combined with securing hooks, are fundamental for both taking and maintaining back control.
- Exploiting Openings: Many successful back takes capitalize on an opponent's escape attempts or defensive postures, turning their movements into opportunities.
Navigating the Mats: Common Positional Paths to Back Control
Understanding how to transition to the back from various scenarios is a hallmark of a skilled BJJ practitioner. Each position offers unique setups and challenges.
1. From the Mount Position
The mount, while a dominant position in itself, frequently serves as a gateway to the back, especially when the opponent attempts to escape.
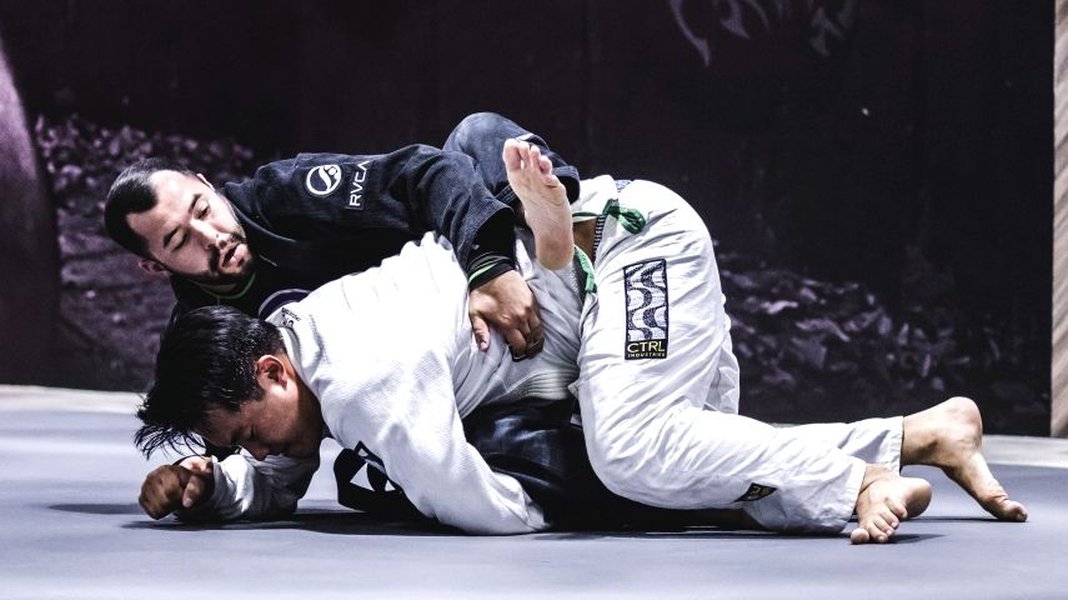
Transitioning from mount by exploiting an opponent's defensive reactions to secure back control.
Gift Wrap Technique
This is a highly effective method where one of the opponent's arms is isolated and controlled across their body, often brought towards their own neck or shoulder. By applying chest pressure and potentially shifting weight, you can encourage the opponent to turn, exposing their back. This creates a clear path to slide around, insert hooks, and secure a seatbelt grip. Henry Akins, a Rickson Gracie black belt, is known for sophisticated gift wrap back takes.
High Mount and S-Mount Transitions
Advancing to a high mount (sitting higher on the opponent's chest) or an S-mount (one leg under their armpit, the other over their body, forming an 'S' shape with your legs) can create angles and isolate limbs. If the opponent frames or pushes to prevent you from moving higher, you can often capitalize on an exposed arm to pull them to the side and transition to their back.
Exploiting Escape Attempts
When an opponent in mount attempts to bridge and roll, their movement can be redirected. Instead of resisting the bridge directly, you can sometimes use their momentum to help you spin to their back, particularly if you can control an arm or their head.
2. From Side Control
Side control is a stable top position from which many back takes are initiated, often as the opponent tries to create space or turn away.
Kimura Grip Transitions
Securing a Kimura grip from side control can lead to a back take. If the opponent turns to their knees to defend the Kimura or escape side control, you can use the grip to help roll them further, exposing their back. A "miniature sumi gaeshi" or Kimura throw can land you in an "El Gato" position, leading directly to the back.
Catching the Trail Arm / Rolling Back Take
When an opponent attempts to escape side control by turning into you (shrimping) or turning away, they may expose an arm (the trail arm if they turn away) or create an opening. If they manage to get to their knees, you can hook their far leg, get your near knee to the ground, and roll over your shoulder to secure the back.
Chair Sit from North-South
While sometimes considered a distinct position, transitioning from North-South (often reached from side control) using a "chair sit" is a common path. This involves sitting the opponent up onto their butt and using the momentum to spin behind them.
3. From Guard Positions
Taking the back from your guard (closed, half, open, De La Riva, etc.) is a fundamental BJJ skill, often involving sweeps or positional manipulation that expose the opponent's back.
Sleeve Drag from Closed Guard
A classic technique, famously utilized by Roger Gracie. From closed guard, you break the opponent's posture, secure a strong grip on one of their sleeves (and often their collar or lapel), and pull them across your body, creating an angle. As they are off-balanced, you hip escape and climb to their back.
Half Guard Pathways
From bottom half guard, especially with an underhook, you can work to come up on a single leg or sweep the opponent. If they posture up or try to pass, openings for the back can arise. The "deep half guard" offers specific paths, often involving using pant grips and body positioning to elevate and maneuver behind the opponent, sometimes entering "the truck" position as a precursor to back control.
Open Guard Sweeps and Off-Balancing
Guards like De La Riva, Spider Guard, and Butterfly Guard excel at off-balancing opponents. Many sweeps from these positions can be adapted to transition directly to the back if the opponent falls incorrectly or overcommits to their base.
4. From the Turtle Position
The turtle position (opponent on all fours) is a defensive posture that inherently exposes the back, making it a prime target.
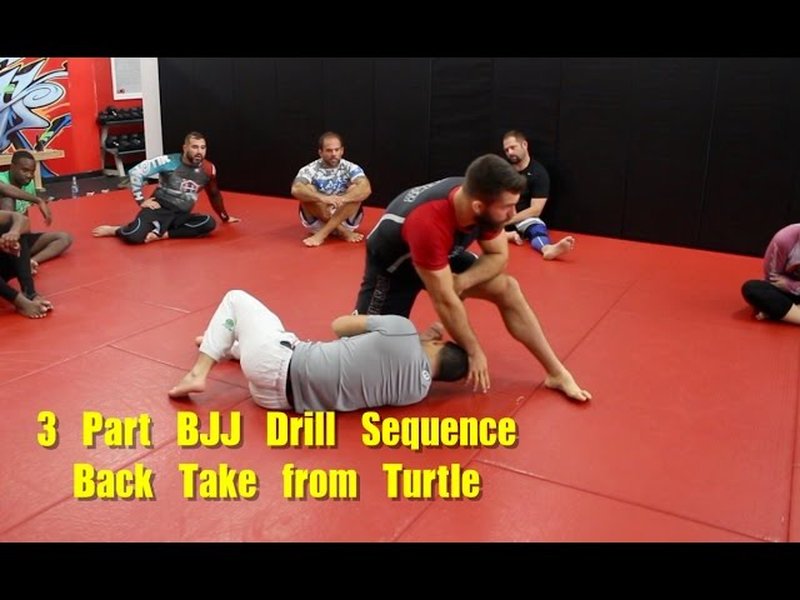
Attacking the turtle position to secure hooks and establish back control.
Standard Turtle Back Take
Typically involves establishing a seatbelt grip and inserting hooks. Common methods include a "spiral ride" or "cheap ride" from wrestling, where you break down their base by pulling one hip towards you while circling to the back.
Kick Start Back Take
This technique, often initiated from side control against a turtling opponent, involves using your heel to kick their supporting leg out from under them while controlling an arm and their upper body. This disruption allows you to roll them and secure the back.
Rolling Attacks
If the opponent turtles tightly, sometimes a forward roll over their body (while maintaining control, e.g., with a harness grip) can be used to unravel them and expose the back.
5. From Standing Positions
Transitioning directly to back control from a standing engagement often involves specific takedowns or clinch work that bypasses other ground positions.
Duck Under to Back Take
A classic wrestling move. Often set up from a collar tie or Russian two-on-one grip, you change levels, "duck" under their arm, and circle to their back. Maintaining a grip on their far hip is crucial for completing the back take.
Arm Drag to Back Take
From a standing clinch or grip fight, a powerful arm drag can pull the opponent past you, allowing you to step behind them and secure back control, often with a body lock, before or as they fall to the mat.
Takedowns Leading to Back Exposure
Certain takedowns, like some variations of single legs, double legs, or hip throws, can be finished in a way that your opponent lands exposing their back, allowing for an immediate transition to back control with hooks and a seatbelt grip.
Visualizing Back Take Opportunities and Challenges
Different starting positions offer varying levels of ease and opportunity for transitioning to the back. The radar chart below provides a conceptual comparison of these factors across common BJJ scenarios. This is not based on hard data but rather on generally accepted principles and common experiences in BJJ training.
This chart suggests, for example, that while Mount is a very dominant starting position, the Turtle position might offer more frequent direct opportunities for back takes, albeit from a less dominant initial scenario for the attacker if the opponent is merely turtling and not already controlled from a prior position. Standing transitions are complex but can be very rewarding.
Core Concepts and Techniques for Securing the Back
Regardless of the starting position, certain fundamental concepts and techniques are universally applicable when pursuing back control.
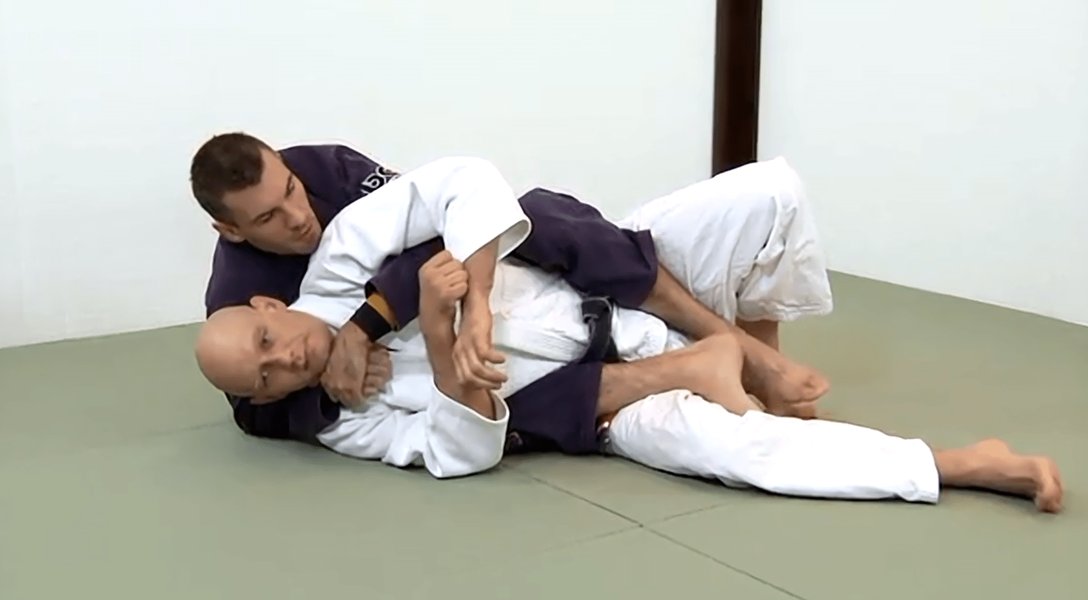
The quintessential rear mount: seatbelt grip and hooks providing superior control.
The Seatbelt Grip
This is the cornerstone of back control. One arm goes over the opponent's shoulder (the "choking arm"), and the other arm goes under their opposite armpit (the "controlling arm"). Your hands connect, forming a "seatbelt" across their chest. This grip provides excellent upper body control and positions you for chokes.
Securing Hooks
Your legs play a crucial role. "Hooks" refer to placing your feet inside your opponent's thighs, ideally with your heels close to their hips. This controls their lower body, prevents them from turning into you, and helps maintain the position. A "body triangle" (locking your legs in a triangle around their torso) is an even tighter form of leg control but can sometimes be harder to transition from or adjust.
The Gift Wrap
As mentioned earlier, the gift wrap (controlling one of the opponent's arms by bringing their wrist towards their own neck or across their body) is a powerful tool not just from mount, but from various positions like side control or even when the opponent is turtling. It significantly limits their ability to defend and often forces them to expose their back.
Chest-to-Back Connection
Maintaining tight chest-to-back (or chest-to-shoulder) contact is vital. Any space you allow can be exploited by the opponent to escape. Constant pressure makes it harder for them to move and easier for you to feel their intentions.
The Arm Drag
A versatile technique used both standing and on the ground (e.g., from butterfly guard). By gripping an opponent's wrist and triceps (or elbow), you can pull them forcefully past you, creating an angle to get behind them.
The Chair Sit
This technique, often initiated from side control, North-South, or when an opponent is trying to sit up, involves facilitating their upward movement and then quickly circling behind them as they come to a seated position, effectively taking their back as they "sit in your chair."
Pathways to Back Control: A Mindmap Overview
The following mindmap illustrates the primary starting positions in BJJ and some key transitional techniques or concepts that lead to achieving back control. This visual representation helps to conceptualize the interconnectedness of these pathways.
This mindmap showcases how various common BJJ scenarios can branch into opportunities to take the back, emphasizing the importance of recognizing these transitions during live rolling or competition.
Visualizing Diverse Back Take Strategies
Understanding the multitude of ways to achieve back control can significantly enhance your BJJ game. The following video provides a look at various techniques from different positions, illustrating the dynamic nature of these transitions.
This video, "Jiu-Jitsu Techniques | Lots of Ways to Take The Back - Basic ...", demonstrates fundamental and effective options for taking an opponent's back. It covers transitions from various positions and energies, highlighting the adaptability required in BJJ. Watching how experienced practitioners execute these moves can provide valuable insights into timing, grip placement, and body mechanics, complementing theoretical knowledge with practical application.
Summary Table: Positional Paths to the Back
This table consolidates the primary pathways to achieving back control, highlighting key transition methods and essential elements for success from each major starting position.
| Starting Position | Common Transition Methods | Key Techniques/Concepts | Notes/Considerations |
|---|---|---|---|
| Mount (Full, High, S-Mount) | Gift wrap; Exploiting opponent's bridge/escape attempts; High mount or S-mount transitions. | Chest pressure; Arm isolation; Hip movement; Timing. | Opponent's defense often creates openings. |
| Side Control | Rolling back take; Kimura trap to back; Spin behind; Chair sit (often via North-South). | Underhook control; Seatbelt grip; Weight distribution; Exploiting turns. | Effective against opponents trying to reguard or turn away. |
| Guard (Closed, Half, Open) | Sleeve drag; Arm drag; Sweeps (Flower, Butterfly, etc.) leading to back exposure; Deep half guard entries. | Off-balancing; Grip fighting; Creating angles; Hip escapes. | Requires good guard retention and offensive guard work. |
| Turtle Position | Inserting hooks and seatbelt; Spiral ride; Kick start back take; Rolling opponent over. | Breaking opponent's base; Controlling hips and shoulders; Maintaining pressure. | Opponent is defensive but back is inherently exposed. |
| Standing Position | Duck under; Arm drag to back; Body lock takedowns; Specific takedown finishes (e.g., single leg to back). | Clinch control; Level changes; Speed and commitment; Securing control during the fall. | Can lead directly to dominant ground position. |
| Deep Half Guard | Pant grip elevation; Wrestle-up to back; Truck entry. | Hip elevation; Leg control; Misdirection. | Specialized guard that directly targets back exposure. |
Frequently Asked Questions (FAQ)
Why is back control considered the most dominant position in BJJ?
Back control is widely regarded as the most dominant position because it severely limits the opponent's ability to attack or effectively defend. The person with back control can see all of their opponent's movements and potential defenses, while the opponent cannot see the attacker. This positioning provides numerous high-percentage submission opportunities, particularly chokes like the rear-naked choke, bow and arrow choke, and collar chokes, which are difficult to defend from this disadvantaged posture. Furthermore, scoring systems in BJJ competitions often award significant points for achieving and maintaining back control.
What is the "gift wrap" and why is it so effective for taking the back?
The "gift wrap" (also known as a harness grip or seatbelt with an arm trapped) involves controlling one of the opponent's arms by bringing their wrist across their body, typically towards their own neck or head, and securing it. It's highly effective because it:
- Neutralizes a defending limb: The opponent loses the use of one arm for framing, posting, or defending chokes.
- Creates turning leverage: Controlling the arm allows the attacker to more easily turn the opponent, exposing their back.
- Opens submission opportunities: Even if the back take isn't immediate, the gift wrap sets up chokes and other controls.
- Can be applied from multiple positions: Commonly used from mount and side control, but variations exist from other positions.
How crucial are the "seatbelt grip" and "hooks" for maintaining back control?
The seatbelt grip and hooks are fundamental for effective back control and are considered crucial for several reasons:
- Seatbelt Grip: Provides powerful upper body control. The arm over the shoulder (choking arm) is positioned for submissions, while the arm under the armpit (controlling arm) prevents the opponent from turning or shrimping effectively. It also helps maintain chest-to-back connection.
- Hooks: Refers to placing your feet inside the opponent's thighs, with heels ideally digging in. Hooks control the opponent's hips, preventing them from turning into you, flattening out, or creating space to escape. They are essential for stabilizing the position and allowing you to attack. Without good hooks, even a strong seatbelt grip can be overcome.
Together, they form a system of upper and lower body control that makes escaping back mount extremely difficult.
What are some common mistakes practitioners make when trying to take the back?
Common mistakes include:
- Losing Connection: Allowing too much space between their chest and the opponent's back during the transition or after securing the position.
- Incorrect Hook Placement: Crossing feet (unless transitioning to a body triangle carefully), placing hooks too low (easily shrugged off), or not actively using them.
- Weak Seatbelt Grip: Not having a deep enough grip, incorrect hand-on-hand connection, or allowing elbows to flare out.
- Focusing only on the Choke: Rushing for a submission before fully securing back control, allowing the opponent to escape.
- Poor Timing: Forcing a back take when the opening isn't there, rather than waiting for or creating the right opportunity based on the opponent's reactions.
- Neglecting Head Control: Not controlling the opponent's head or posture can give them opportunities to turn or create space.
- Falling to the Wrong Side: When taking the back and falling to a side, falling to the side of the underhook arm (controlling arm) is generally less secure than falling to the side of the overhook arm (choking arm), as it can expose you to escapes.
Are there significant differences in taking the back in Gi versus No-Gi BJJ?
Yes, there are notable differences:
- Grips: In Gi BJJ, you can use lapel, sleeve, and pant grips to control posture, create leverage, and secure transitions (e.g., collar-drag back takes, using lapels for seatbelt variations). In No-Gi, control relies more on body mechanics, underhooks, overhooks, wrist control, and friction. Techniques like the gift wrap become even more critical in No-Gi due to the lack of fabric grips.
- Pace and Slipperiness: No-Gi is often faster-paced and more slippery due to sweat, making it harder to maintain control during transitions. Transitions might need to be quicker and more decisive.
- Submission Focus: While chokes are prevalent in both, Gi allows for a wider variety of collar chokes from the back. No-Gi back attacks heavily emphasize the rear-naked choke, neck cranks (in some rule sets), and arm traps leading to chokes.
- Guard Play: Certain Gi-specific guards (e.g., Spider Guard, Lasso Guard) that utilize fabric grips can be very effective for setting up back takes. No-Gi guards rely more on leg pummeling, butterfly hooks, and X-guard variations.
However, the fundamental principles of controlling an opponent's hips and upper body, securing hooks, and achieving a chest-to-back connection remain consistent across both disciplines.
Recommended Further Exploration
- What are some advanced techniques and concepts for maintaining back control once it's achieved in BJJ?
- Which submissions have the highest success rate from the back mount position in BJJ competition?
- What are effective drills for improving transitions to the back from various positions in Brazilian Jiu-Jitsu?
- How can one effectively escape or counter an opponent who has taken their back in BJJ?
References
Last updated May 18, 2025