
Unlock the Secrets of Cape Cod's Bounty: Your Ultimate Guide to Shellfishing
Discover how to legally and successfully harvest fresh clams, oysters, and more from the picturesque shores of Cape Cod, MA.
Shellfishing on Cape Cod is more than just a pastime; it's a cherished tradition that connects you with the natural bounty of Massachusetts' famed peninsula. As of May 2025, this activity allows individuals to gather fresh shellfish like clams, oysters, quahogs, and scallops. However, it's an activity governed by local regulations designed to ensure sustainability and safety. This guide provides a comprehensive walkthrough to help you embark on a rewarding shellfishing adventure, from understanding the rules to enjoying your hard-earned catch.
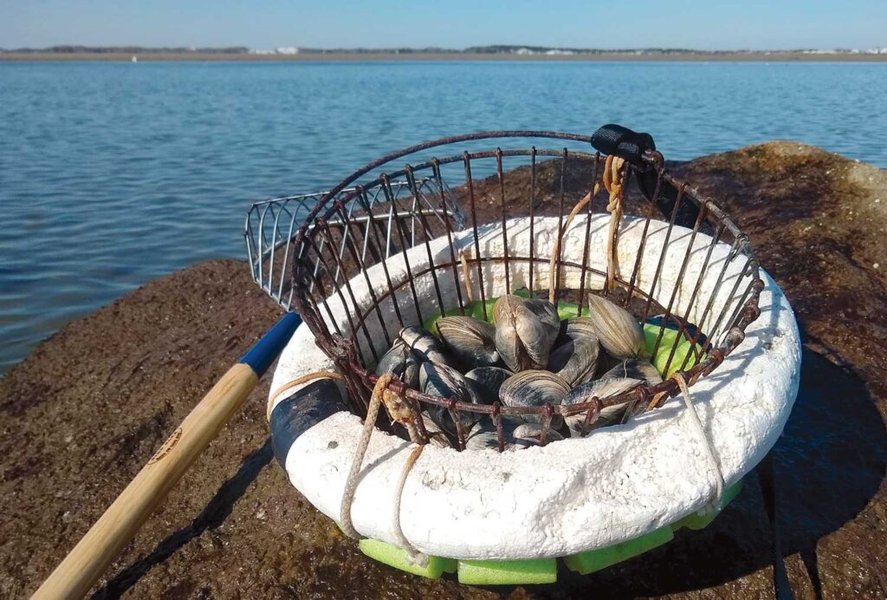
A scenic view of a shellfishing flat on Cape Cod, ready for exploration.
Essential Insights for Aspiring Shellfishers
- Permits are Paramount: Each Cape Cod town issues its own shellfishing permits, which are mandatory. Regulations and fees vary significantly by town and residency.
- Know Before You Go: Familiarize yourself with local rules regarding seasons, open/closed areas, size limits, and catch quotas for different shellfish species.
- Timing is Everything: The best time for shellfishing is typically around low tide, when tidal flats are exposed. Always check local tide charts.
Phase 1: Navigating Regulations and Securing Your Permit
The very first step in your shellfishing journey is understanding that shellfishing on Cape Cod is regulated at the municipal level. Each of the Cape's towns has its own set of rules, permit requirements, and designated shellfishing areas.
Obtaining Your Shellfishing Permit
A recreational shellfishing permit is mandatory in every Cape Cod town. Here’s what you need to know:
- Town-Specific: Permits are valid only in the town where they are issued. If you plan to shellfish in multiple towns, you'll need a separate permit for each.
- Where to Purchase: Permits are typically sold at the Town Hall, Natural Resources Department, or a designated Sticker Office. It's wise to call ahead or check the town’s official website for current procedures, hours, and locations.
- Cost and Validity: Fees vary based on residency (resident vs. non-resident) and permit duration (e.g., weekly, seasonal, annual).
- Non-resident permits can range from approximately $20-$25 for a weekly permit to $75-$400 for an annual one, depending on the town.
- Resident permits are generally cheaper, often between $20 and $40 annually. Some towns offer discounted rates for seniors.
- Permit validity periods also differ; many run on a seasonal calendar (e.g., April 1 to March 31, or June 1 to May 31).
- Documentation: You may need to provide identification to prove residency or property ownership if applying for resident rates.
Upon purchasing your permit, you will usually receive maps detailing approved shellfishing areas and a summary of local regulations.
Understanding Local Shellfishing Rules
Beyond the permit, adherence to local regulations is crucial for a legal and sustainable experience:
- Species, Seasons, and Times:
- Quahogs (hard-shell clams): Often available year-round, but check local rules. These include littlenecks (1-2 inches), cherrystones (2-3 inches), and chowder clams (over 4 inches).
- Oysters and Scallops: These often have specific open seasons. For instance, scallop season typically runs from November 1 to the end of March in many areas.
- Shellfishing is generally permitted from sunrise to sunset, though some specific areas might have more restrictive hours (e.g., Salt Pond in Eastham may only be open on Sundays during summer).
- Size and Catch Limits: Each town sets minimum legal sizes for different shellfish and daily/weekly catch limits per person (often measured in pecks or quarts). A shellfish gauge is essential for measuring your catch accurately. For example, quahogs typically must be at least 1 inch thick across the hinge.
- Open and Closed Areas: Towns designate specific beds for recreational shellfishing. These areas can be temporarily closed due to water quality issues (e.g., after heavy rainfall causing pollution runoff), conservation efforts, or red tide. Always check for closure notices on town websites or the Massachusetts Division of Marine Fisheries (DMF) website. Look for yellow flags or signage on beaches, which often indicate open areas.
- Allowable Gear: Regulations specify permitted tools. Commonly allowed are clam rakes (bull rakes, basket rakes), shovels, and hand-digging. Some towns may have restrictions on certain types of rakes or harvesting methods.
Shellfish constables or Natural Resources officers frequently patrol shellfishing areas to ensure compliance. They can also be excellent resources for information.
Phase 2: Equipping Yourself for the Expedition
Having the right gear will make your shellfishing experience more comfortable, efficient, and safe. Essential equipment includes:
- Clam Rake: A specialized rake for digging shellfish from sand or mud. Different styles exist for various shellfish types and bottom conditions.
- Basket or Bucket: A wire mesh basket or a sturdy bucket to hold your catch. Wire baskets allow water to drain and can be easily rinsed. Some attach to a float.
- Shellfish Gauge: A crucial tool for measuring your catch to ensure it meets the minimum legal size limits for the specific town and species.
- Footwear: Waterproof boots (e.g., high rubber boots or waders) are highly recommended to keep your feet dry and protected. Old sneakers can work in a pinch but offer less protection.
- Gloves: Neoprene or waterproof gloves are advisable, especially during cooler months, to protect your hands from the cold water and sharp shells.
- Optional but Useful:
- Tide Chart: Essential for planning your trip around low tide. Available online, at local marinas, or bait shops.
- Cooler: To keep your harvested shellfish cool and fresh during transport.
- Floating Device: For your basket, to prevent it from sinking if you venture into deeper water.
This gear can typically be purchased at local bait and tackle shops, hardware stores, or sporting goods stores on Cape Cod.

A shellfisherman actively raking for clams in shallow waters, demonstrating typical gear in use.
Phase 3: Strategic Timing and Location Selection
The Importance of Tides
The best time to go shellfishing is typically starting about one to two hours before low tide and continuing as the tide goes out and starts to return. This exposes the tidal flats where shellfish live, making them accessible. Consult a local tide chart for the specific area you plan to visit. These charts are readily available online, in local newspapers, or at bait shops and marinas.
Finding Your Spot
Cape Cod boasts numerous productive shellfishing areas. Popular towns known for good recreational shellfishing include Barnstable, Brewster, Eastham, Wellfleet, Dennis, and Falmouth. When you obtain your permit, you'll often receive a map indicating approved shellfishing locations within that town. These can include harbors, bays, tidal creeks, and salt ponds.
Tips for Locating Shellfish:
- Look for small, visible holes or "shows" in the sand or mud, which can indicate the presence of clams (especially steamers or soft-shell clams).
- For quahogs, you'll typically rake through the top few inches of sandy or muddy substrate in shallow water.
- Oysters are often found in clusters on harder bottoms or in designated oyster beds.
- Always respect signage and marked boundaries for open and closed areas.
Phase 4: The Art and Science of Harvesting Shellfish
Once you've got your permit, gear, and chosen your spot at the right tide, it's time to start harvesting.
Techniques for Common Shellfish
- Quahogs (Hard-Shell Clams): Wade into shallow water (knee-deep is common). Drag your clam rake through the sandy mud, teeth pointing down, pulling it towards you. You'll feel a distinct "clink" or resistance when you hit a quahog. Lift the rake, collect your clams, and measure them.
- Steamers (Soft-Shell Clams): Look for small siphon holes in the mudflats. Dig carefully around the hole with a small shovel or by hand, as their shells are fragile.
- Oysters: These are often found attached to rocks or other shells in intertidal zones. They may need to be carefully pried loose. Check local regulations for harvesting techniques.
- Mussels: Blue mussels are often found in clusters attached to rocks, pilings, or even ropes in aquaculture areas. They can typically be harvested by hand.
Always cull (sort) your catch on-site, returning any undersized shellfish or those over your limit back to the area where you found them. This helps ensure healthy future populations.
Visualizing Shellfishing Preparedness
Success in shellfishing isn't just about luck; it's about preparation. The radar chart below illustrates key areas of preparedness. Ideally, a shellfisher aims for high scores in all categories, reflecting thorough research and adherence to best practices. Common pitfalls often involve neglecting one or more of these crucial aspects.
This chart helps visualize that thorough permit acquisition, understanding regulations, having the right gear, strategic timing, careful location assessment, and prioritizing safety are all vital components of a successful and responsible shellfishing outing.
Mapping Your Shellfishing Journey
The process of going shellfishing can be broken down into several key phases and considerations. This mindmap provides a visual overview of the journey from initial planning to enjoying your fresh catch, emphasizing critical checkpoints along the way.
(Permits, Seasons, Limits)"] id1b["Obtain Town-Specific Permit"] id1c["Gather Essential Gear
(Rake, Basket, Gauge, Boots)"] id2["Phase 2: The Expedition"] id2a["Check Tide Charts & Weather"] id2b["Verify Open Areas
(Check for Closures, Use Maps)"] id2c["Travel to Designated Spot"] id3["Phase 3: Harvesting"] id3a["Employ Proper Techniques"] id3b["Measure Catch with Gauge"] id3c["Adhere to Size & Bag Limits"] id3d["Return Undersized/Excess Catch"] id4["Phase 4: Post-Harvest"] id4a["Store Catch Properly (Cooler)"] id4b["Clean & Prepare Shellfish"] id4c["Cook Thoroughly & Enjoy!"] id5["Key Considerations Throughout"] id5a["Safety First
(Awareness of Surroundings, Water Conditions)"] id5b["Environmental Stewardship
(Minimize Habitat Disturbance, Respect Rules)"] id5c["Stay Informed
(Check for Regulation Updates, Closures)"]
This mindmap illustrates that successful shellfishing is a systematic process. It begins with diligent preparation, moves through careful execution during the harvest, and concludes with responsible handling of the catch, all while keeping safety and conservation in mind.
Phase 5: Post-Harvest Care and Enjoyment
Once you've collected your shellfish, proper handling is key to ensuring they are safe and delicious to eat.
- Transport: Keep your shellfish cool, preferably in a cooler with ice, during transport. Do not store them in standing fresh water, as this can kill them. Allow them to breathe; don't seal them in an airtight container.
- Cleaning: Rinse off mud and sand. Quahogs and oysters should be scrubbed with a stiff brush. Soaking hard-shell clams in clean saltwater for a few hours can help them purge any remaining sand.
- Storage: Store live shellfish in the refrigerator, covered with a damp cloth, for up to a couple of days. Discard any shellfish with open shells that don't close when tapped, or those with cracked or damaged shells.
- Cooking: Cook shellfish thoroughly to an internal temperature of 145°F (63°C) to eliminate potential foodborne pathogens. Steamers are typically steamed until their shells open. Quahogs and oysters can be steamed, grilled, baked, or used in chowders and stews.
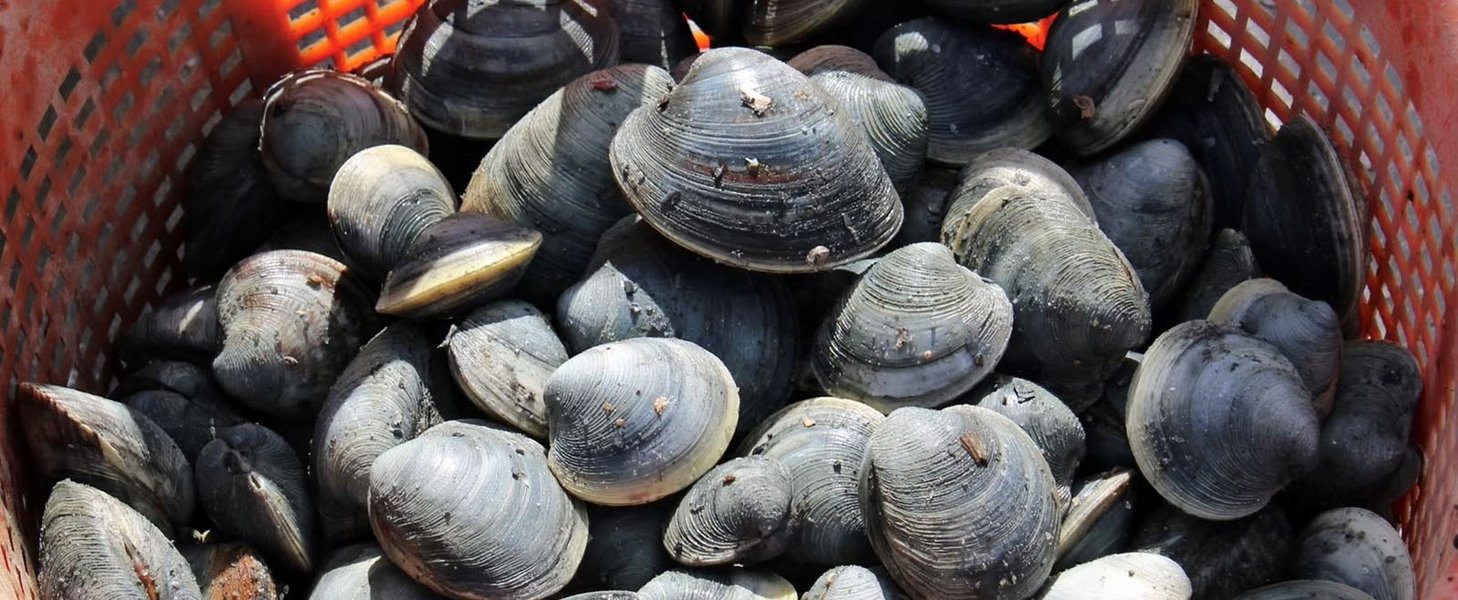
A bountiful harvest of fresh quahogs, ready for cleaning and preparation.
Learning from the Experts: A Visual Guide
For those new to shellfishing, visual demonstrations can be incredibly helpful. The Town of Barnstable, for example, sometimes offers "Learn to Shellfish" classes. The video below, "Learn to Shellfish | Episode 1, Getting Started," provides an excellent introduction to the basics, including understanding permits, reading tide charts, and interpreting maps – foundational knowledge for any aspiring shellfisher.
This video serves as a great starting point, covering the preliminary steps necessary before you even head to the flats. It emphasizes the importance of local knowledge and preparation, which are recurring themes in responsible shellfishing.
Example Shellfishing Permit Costs on Cape Cod
To give you an idea of permit costs, the table below provides examples from various Cape Cod towns. Note that these are subject to change, and it's always best to verify with the specific town.
| Town | Permit Type | Approximate Cost (as of early 2025) | Typical Validity Period |
|---|---|---|---|
| Falmouth | Non-Resident Annual | $80 | Feb 1 - Jan 31 |
| Falmouth | Resident Annual | $25 | Feb 1 - Jan 31 |
| Falmouth | Senior Resident Annual (65+) | $5 | Feb 1 - Jan 31 |
| Eastham / Orleans | Non-Resident Annual | $75 | Jun 1 - May 31 |
| Eastham / Orleans | Resident Annual | $25 | Jun 1 - May 31 |
| Eastham / Orleans | Senior Resident Annual (64+) | $12 | Jun 1 - May 31 |
| Eastham / Orleans | One-Week (Any Residency) | $20 | 7 consecutive days |
| Vineyard Haven (Martha's Vineyard) | Non-Resident Weekly | $25 | 7 consecutive days |
| Vineyard Haven (Martha's Vineyard) | Non-Resident Monthly | $75 | 30 consecutive days |
| Vineyard Haven (Martha's Vineyard) | Non-Resident Annual | $400 | Annual |
| General Cape Towns (Typical Range) | Resident Annual | $20 - $40 | Varies (often annual or seasonal) |
Note: "Cash or money order only" may apply in some towns like Falmouth for permit purchases. Always check the town's specific payment requirements.
Frequently Asked Questions (FAQ)
Conclusion
Shellfishing on Cape Cod offers a unique and rewarding way to connect with the region's rich maritime heritage and natural environment. By understanding and respecting local regulations, obtaining the necessary permits, equipping yourself properly, and practicing safe harvesting techniques, you can enjoy the thrill of gathering your own fresh seafood. It's an activity that promotes appreciation for coastal ecosystems and provides delicious results for your efforts—a true taste of Cape Cod.
Recommended Further Exploration
- What are the specific shellfishing regulations for Barnstable, MA?
- How to identify different types of edible clams on Cape Cod?
- What are the current shellfish bed closures on Cape Cod due to water quality?
- Are there guided shellfishing tours available on Cape Cod for beginners?
References
Last updated May 21, 2025