
Comprehensive End-of-Tenancy Commercial Cleaning Workflow
A detailed guide from top-to-bottom cleaning after applying chemicals
Key Insights
- Systematic approach: Start from the highest surfaces and proceed downward to avoid re-contaminating cleaned areas.
- Chemical preparations: Pre-treat the oven with cleaning chemicals and the bathroom sealant with bleach for deep fat and mold removal.
- Comprehensive coverage: Every area is addressed—from high ceilings and windows to floors and final touches—ensuring a thorough cleaning.
Introduction
End-of-tenancy cleaning is a comprehensive process that involves returning a property to its original pristine condition. Commercial cleaning teams follow a structured workflow to ensure every nook and cranny is addressed, leaving the space impeccably clean for the next tenant or landlord inspection. This guide details a systematic approach, beginning with chemical preparations, proceeding in a top-to-bottom manner, and finally, wrapping up with close inspections and final touches.
Preparation Phase
Before diving into the cleaning workflow, it is crucial to prepare the property for a deep clean. Proper chemical application is essential for breaking down grime, grease, and mold, ensuring the cleaning process is effective and efficient.
Step 1: Chemical Preparation
Oven Treatment: Begin by applying a heavy-duty oven cleaning product to the interior surfaces of the oven. Allow the product to sit for the recommended amount of time as per the manufacturer’s instructions. This waiting period helps in breaking down built-up grease, food residue, and carbon deposits.
Bathroom Sealant Treatment: Next, apply bleach generously on the bathroom sealants and grout lines. Bleach is excellent for removing mold, mildew, and stubborn stains while disinfecting these areas. Let the solution work for several minutes to ensure the breakdown of any contaminants before further cleaning.
Once the chemicals have been given adequate time, proceed with the physical cleaning tasks using appropriate tools and cleaning equipment.
Workflow: Top-to-Bottom Cleaning Process
The following detailed steps outline a linear process that starts at the highest points in the property and gradually works downward. This approach ensures that dust and debris generated from cleaning higher surfaces do not settle on areas that have already been cleaned.
Stage 1: Uppermost Areas
1. Ceiling and High Surfaces
Cleaning should begin with the ceiling and all high surfaces in the property. Start by removing all cobwebs and dust that may have accumulated over time. Use extendable dusters to reach ceiling corners, light fixtures, and any decorative elements.
Tasks:
- Remove cobwebs from all ceilings and corners.
- Dust and wipe down ceiling fans and light fixtures.
- Clean any overhead vents and air diffusers.
2. High Windows and Window Frames
At this stage, it is essential to address windows and related structures. Clean the exterior and interior parts of windows to remove dust and smudges, with special attention paid to window sills and frames. Dust blinds and wash curtains if applicable.
Tasks:
- Spray and wipe down windows using a quality glass cleaner.
- Clean window sills, frames, and ledges.
- Dust or wash blinds and clean the tops of heavy drapery equipment.
Stage 2: Mid-Level Cleaning
1. Walls and Décor
After tackling the highest points, focus shifts to mid-level surfaces such as walls, shelves, picture frames, and other decorative features. Dusting and cleaning these areas prevent smudges and ingrained dirt from being missed.
Tasks:
- Dust walls with microfiber cloths and use a damp cloth to remove any fingerprints or marks.
- Wipe down picture frames, decorative mirrors, and wall art.
- Clean shelves and upper furniture surfaces where dust accumulates.
2. Kitchen Cleaning (Mid-Level)
At this juncture, cleaning tasks extend into the kitchen, a critical area that often accumulates grease and grime. Since the oven has already been treated with a cleaning chemical, it is necessary to allow that chemical to work before beginning the cleaning, ensuring a thorough removal of residues.
Tasks:
- Wipe down kitchen countertops, cabinet surfaces, and handles.
- Dust and clean shelves above or around the refrigerator and other appliances.
- Pay special attention to cleaning any grease buildup on high surfaces or extracted areas.
Stage 3: Low-Level Cleaning
1. Detailed Kitchen Cleaning
With the mid-level cleaning complete, attention now turns back to the kitchen. After allowing sufficient time for the chemicals on the oven to break down the grime, thoroughly scrub the inside of the oven, and wipe clean all other kitchen surfaces.
Tasks:
- Scrub the oven interior to remove grease deposits and food residue fully.
- Clean the exterior surfaces of all large appliances including refrigerators, microwaves, and dishwashers.
- Wipe down kitchen sink and faucets to ensure they are sanitized.
- Mop the kitchen floor to remove any spills, food debris, and grease that may have accumulated.
2. Bathroom Cleaning
Bathrooms require careful attention to detail, particularly after the initial bleach treatment on the sealants. Begin by checking the effectiveness of the bleach treatment on the grout and sealant. Then, proceed to deep clean each element of the bathroom.
Tasks:
- Scrub the bathtub, shower, and tiles, focusing on removing any residual mold or mildew after the bleach treatment.
- Clean and sanitize toilets, including the bowl, seat, and external fixtures using a disinfectant.
- Wipe down all bathroom surfaces, including sinks, countertops, and mirrors.
- Mop the bathroom floor and pay attention to any corners or crevices where dirt might have accumulated.
Stage 4: Floor-Level Tasks
1. General Floor Cleaning
After all upper level, mid-level, and immediate area cleaning have been completed, proceed to clean the floors thoroughly. This involves vacuuming for carpeted areas and mopping hard floor surfaces.
Tasks:
- Vacuum all carpeted rooms carefully, ensuring edges and under furniture areas are addressed.
- Mop hard floors with the appropriate cleaning solution according to the floor type (tile, hardwood, laminate).
- If required, use a steam cleaner on carpets for a deeper clean, especially in high-traffic areas.
2. Special Focus Areas
There are several specific zones within the property that require targeted attention toward the end of the cleaning process. These include stairways, entry points and any areas that are often used that might have been overlooked during the earlier phases.
Tasks:
- Clean and dust stair railings and individual steps.
- Wipe down high-touch surfaces such as door handles, light switches, and cabinet knobs.
- Sanitize entry doors, frames, and any additional fixtures.
Enhancing the Workflow with a Table of Tasks
The following table provides a concise overview of each cleaning stage along with the corresponding tasks. Refer to this table for a quick checklist to ensure that no area or task is overlooked during the cleaning process.
| Cleaning Stage | Tasks |
|---|---|
| Preparation |
- Apply oven cleaning chemicals - Treat bathroom sealants with bleach |
| Upper Areas |
- Remove cobwebs from ceilings - Dust ceiling fixtures and fans - Clean windows, sills, and blinds |
| Mid-Level |
- Dust walls and décor - Clean shelves and furniture surfaces - Wipe down kitchen counters and cabinet exteriors |
| Kitchen |
- Scrub and clean the oven - Clean appliances and sink - Mop kitchen floors |
| Bathrooms |
- Scrub tub, shower, and tiles - Sanitize toilets and sinks - Clean mirrors and mop floors |
| Final Touches |
- Vacuum and mop all floors - Dust stairs and high-touch surfaces - Final inspection and trash removal |
Implementation Considerations
Applying this end-of-tenancy cleaning workflow commercially involves a few additional considerations to maximize efficiency and effectiveness. Depending on the property size and complexity, cleaning professionals may choose to segment the tasks among different teams or allocate extra time to particularly stubborn areas.
Time Management
Planning and time management play a crucial role in ensuring that every segment of the cleaning project is given sufficient attention. A detailed schedule can be created where each cleaning phase is allocated a specific time block:
- Preparation and Chemical Sit Time: Allocate around 15-30 minutes.
- Upper Areas: Depending on ceiling height and number of windows, allocate 30-45 minutes.
- Mid-Level Areas: Allocate about 45 minutes to 1 hour.
- Kitchen and Bath Areas: Allocate 1 to 1.5 hours.
- Floor-Level and Final Touches: Allocate about 45 minutes to 1 hour.
These time blocks are approximate and may be adjusted based on the property’s intricacies. Coordination among different cleaning teams ensures that the process is streamlined and that areas are not neglected.
Safety Precautions
When dealing with potent cleaning chemicals and bleach, safety is paramount. Ensure that all cleaning staff are:
- Wearing appropriate protective gear including gloves, masks, and goggles.
- Aware of the proper ventilation requirements, especially when using chemicals in confined areas such as bathrooms and kitchens.
- Trained on the correct handling, diluting, and storage of chemicals to prevent accidents.
It is also important to provide clear instructions regarding any potential hazards and to have a quick access kit for first aid in case of accidental exposure.
Quality Control and Inspection
The final stage of the cleaning process must always include a rigorous inspection. This step is aimed at:
- Verifying that every area, from the highest ceiling fixture to the floor level, has been cleaned to an acceptable standard.
- Revisiting areas where chemicals might have been used to ensure that no residue remains.
- Checking that all trash has been removed, and the property is left locked and secure.
A checklist based on the discussed workflow provides an effective way for the cleaning team to mark off completed tasks and ensure nothing is left undone.
Additional Operational Tips
Beyond the actual cleaning process, there are several operational tips that can assist in making a commercial end-of-tenancy clean more efficient:
Pre-Service Assessment
Before beginning the cleaning task, a thorough walkthrough of the property should be conducted. This preliminary assessment helps:
- Identify areas with significant buildup of grime or unique cleaning needs.
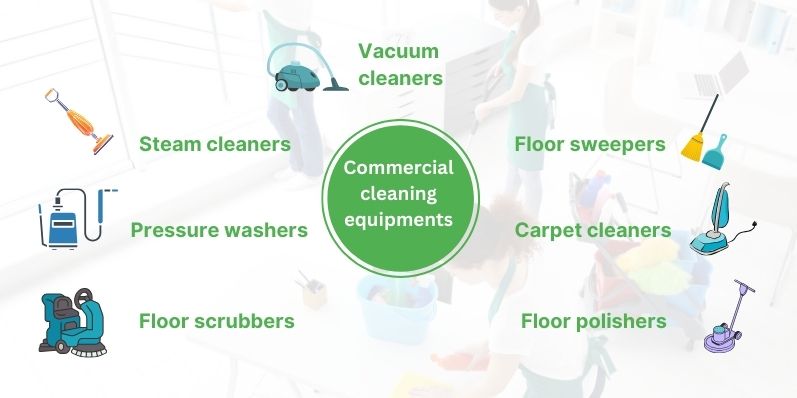
- Determine if specialized equipment (such as steam cleaners or pressure washers) is needed.
- Plan a customized cleaning schedule in line with the property’s layout.
The pre-cleaning survey also allows the cleaning company to manage client expectations and discuss any potential additional charges for extreme cleaning cases.
Equipment and Supplies Management
Having all necessary supplies at hand is crucial. A well-stocked cleaning cart or kit should include:
- Appropriate cleaning chemicals for different surfaces.
- Microfiber cloths, mops, brushes, and scrubbers.
- Protective gear such as gloves, masks, and goggles.
- Vacuum cleaners and steam cleaners for final floor care.
- Trash bags and cleaning checklists to ensure thoroughness.
Maintaining an inventory of supplies and equipment ensures that the crew is never delayed during the informed cleaning process.
Environmental Considerations
Modern cleaning operations must also consider the environmental impact of the chemicals and methods used. Opt for eco-friendly products when possible, and utilize techniques that minimize water and chemical waste.
- Eco-Friendly Products: Use cleaning agents that are biodegradable and have low volatile organic compound (VOC) ratings.
- Efficient Water Use: Employ methods such as steam cleaning and microfiber cloths which require less water than traditional methods.
- Disposal of Waste: Follow local guidelines for the disposal of cleaning chemicals to maintain environmental standards.
Such practices not only contribute to a safer workplace but also boost the brand’s reputation among environmentally conscious clients.
Potential Challenges and Their Solutions
Although the systematic top-to-bottom cleaning approach is effective, certain challenges may arise during the process:
Handling Stubborn Stains
Some surfaces, especially in kitchens and bathrooms, might harbor persistent stains or grease that can be challenging to remove. Solutions include:
- Reapplying cleaning agents and allowing a longer dwell time before scrubbing.
- Using specialty scrubbers or power tools (such as electric scrubbers) for persistent buildup.
- Focusing on pre-treatment during the chemical preparation phase to soften the buildup before cleaning begins.
Unexpected Debris or Damage
Arriving at the property may reveal unexpected debris or potential minor repairs that need immediate attention. In such cases:
- Document any damages or concerns during the initial walkthrough.
- Communicate promptly with the property owner or manager to resolve issues before commencing the cleaning.
- Adjust the cleaning workflow if needed, ensuring safety and thoroughness even if unexpected items or obstructions are encountered.
Double-Checking and Quality Assurance
After finishing the individual stages, always perform a complete walkthrough with a fresh perspective. This ensures:
- No area has been inadvertently skipped, especially those that are hard-to-reach.
- All surfaces are free of chemical residues and water spots.
- The property looks consistent and immaculate from a tenant or landlord’s perspective.
Detailed Cleaning Schedule Example
Below is an example of a detailed cleaning schedule for a typical commercial end-of-tenancy clean. This sample workflow can be adapted based on the specifics of the property:
| Time Block | Area/Task | Description |
|---|---|---|
| 00:00 – 00:15 | Preparation | Apply oven cleaner and bleach on bathroom sealants; wait for chemicals to work. |
| 00:15 – 00:45 | Upper Areas | Clean ceilings, light fixtures, fans, high windows, and frame areas. |
| 00:45 – 01:30 | Mid-Level Areas | Dust walls, shelves, and décor; clean kitchen counters and cabinet exteriors. |
| 01:30 – 02:15 | Kitchen Deep Clean | Scrub oven interior (post chemical treatment), clean appliances, wash sink, and mop kitchen floor. |
| 02:15 – 03:00 | Bathrooms | Deep clean showers, tubs, toilets, sinks, and floors; rinse off bleach where needed. |
| 03:00 – 03:45 | Floor-Level | Vacuum carpets, mop hard floors, and steam clean if necessary; dust and clean staircases. |
| 03:45 – 04:00 | Final Inspection | Conduct a thorough walkthrough to ensure all tasks are complete, remove trash, and secure doors and windows. |
Special Considerations for Commercial Cleaning
When cleaning a property commercially at the end of tenancy, additional considerations enhance productivity and customer satisfaction:
Team Coordination and Training
Ensure that all team members are trained on the specific protocol for top-to-bottom cleaning processes. Regular briefings on safety, task distribution, and quality control minimize overlap and ensure that every area is given proper attention.
Client Communication
Clear, transparent communication with the property owner or manager is key. Discuss any potential challenges, additional services required, or unexpected issues noted during the pre-service assessment. Documentation of work and post-cleaning photographs often help in achieving client satisfaction and reducing disputes.
Flexibility in Approach
Every property is unique. Being flexible with the workflow—particularly if unexpected damage or extra build-up is discovered—ensures that the final outcome meets the desired standard.
Conclusion
In conclusion, executing a thorough commercial end-of-tenancy clean requires a structured, systematic approach that ensures every area, from the highest ceiling fixture to the bottom-most floor, is addressed. By starting with chemical treatments on high-use areas like ovens and bathroom sealants, and then following a top-to-bottom sequence, cleaning professionals are able to ensure that dust and debris do not resettle onto surfaces that have been cleaned. Attention to detail throughout all stages—from preliminary preparation and focused deep cleaning in kitchens and bathrooms, to general vacuuming and mopping—creates a consistent and sanitary environment.
Effective implementation also relies on proper time management, safety procedures, and ongoing quality control measures. By integrating a detailed schedule with clearly defined tasks and ensuring comprehensive final inspections, cleaning teams can optimize their workflow and deliver a high-quality service. This methodical approach not only meets but often surpasses client expectations in maintaining property standards for end-of-tenancy turnover.
Ultimately, whether in a residential or commercial context, adopting this top-to-bottom cleaning workflow enhances efficiency and ensures that properties are returned to an immaculate state, fostering positive landlord-tenant relationships and preserving property value.
References
- End of Tenancy Cleaning - Wrents
- Howzer Property Management End of Tenancy Cleaning
- End of Tenancy Cleaning - First and Main PM
- YM Corp End-of-Tenancy Cleaning
- Dawson Property Management Cleaning Guide
Recommended Further Queries
Last updated February 20, 2025