
Unlock Nature's Potential: Mastering Composting and Vermicomposting
A Comprehensive Guide to Transforming Waste into Garden Gold
Composting and vermicomposting are both methods of recycling organic waste into a nutrient-rich soil amendment. Composting is a natural process that relies on microorganisms to decompose organic materials, while vermicomposting uses worms to accelerate the decomposition process and produce castings, a type of compost that is highly beneficial for plant growth. Both composting and vermicomposting are environmentally friendly ways to reduce waste, improve soil health, and create a sustainable garden.
Key Highlights of Composting and Vermicomposting
- Composting: Harnesses natural decomposition through microorganisms, creating nutrient-rich soil amendments.
- Vermicomposting: Utilizes worms to expedite waste breakdown, producing beneficial worm castings.
- Environmental Impact: Both methods significantly reduce landfill waste and promote sustainable gardening practices.
Understanding Composting
Composting is nature’s way of recycling organic materials into an amendment that can be used to enrich soil and plants. It's a simple yet effective method to transform kitchen and yard waste into valuable resources for your garden. By creating the right conditions, you can harness the power of microorganisms to break down organic matter into a dark, crumbly substance known as compost, often referred to as "black gold" by gardeners.
The Basic Principles of Composting
The core of successful composting lies in understanding the necessary components and conditions that facilitate decomposition. These include:
- Carbon-rich materials (Browns): These provide energy for the microorganisms and include items like dry leaves, twigs, shredded newspaper, and cardboard.
- Nitrogen-rich materials (Greens): These provide protein for the microorganisms and include items like vegetable and fruit scraps, coffee grounds, and grass clippings.
- Moisture: Essential for microbial activity, the compost pile should be damp like a wrung-out sponge.
- Air: Microorganisms need oxygen to break down organic matter efficiently. Regular turning or aeration ensures sufficient airflow.
Setting Up Your Compost Pile
Whether you choose a simple pile, a bin, or a tumbler, setting up your compost system is straightforward. Here's how to get started:
- Choose a location: Select a dry, shady spot with good drainage. If you live in a rainy climate, avoid placing your pile under eaves where it might get too soggy.
- Start with a base layer: Begin with a 4-6 inch layer of bulky "browns" like twigs or wood chips to promote air circulation and drainage.
- Layer greens and browns: Add alternating layers of "greens" and "browns," aiming for a ratio of 2 parts brown to 1 part green.
- Maintain moisture: Keep the pile consistently moist by watering it regularly, especially in dry conditions.
- Turn the pile: Turn the compost pile every 1-2 weeks to aerate it and speed up decomposition.
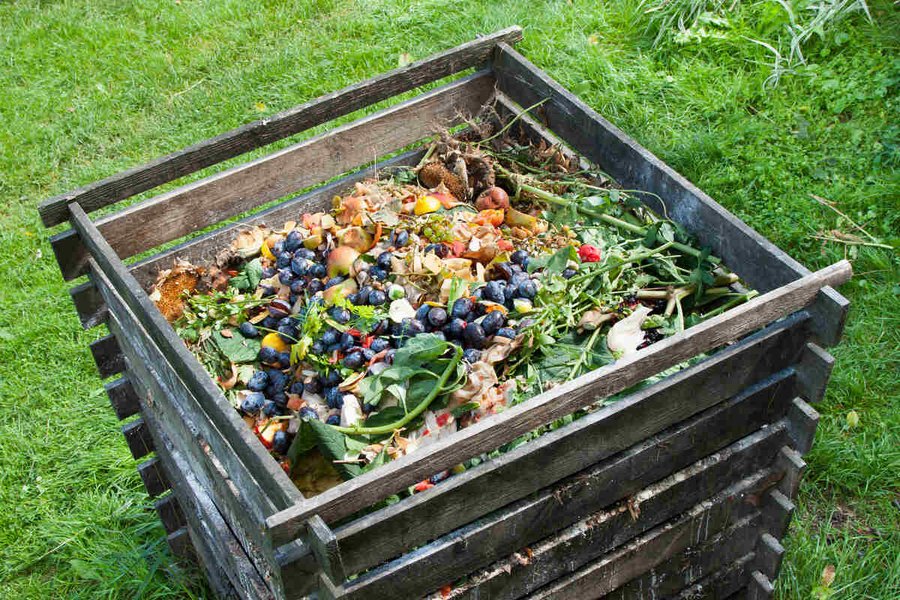 Compost bins are an easy way to start composting.
What to Compost and What to Avoid
Knowing what to include and exclude from your compost pile is crucial for a successful composting process. Here's a quick guide:
Include:
- Fruit and vegetable scraps
- Coffee grounds and filters
- Tea bags (without staples)
- Eggshells
- Grass clippings
- Dry leaves
- Shredded newspaper and cardboard
- Twigs and wood chips
Avoid:
- Meat and dairy products
- Grease and oils
- Diseased plants
- Pet waste
- Treated wood
- Compostable bags and wipes (unless industrially compostable)
Troubleshooting Common Composting Issues
Even with the best intentions, you may encounter some common issues during the composting process. Here's how to address them:
- Smelly compost: This usually indicates too much "green" material or not enough air. Add more "browns" and turn the pile more frequently.
- Dry compost: Compost needs moisture to decompose. Water the pile regularly to keep it damp.
- Slow decomposition: This could be due to a lack of nitrogen, moisture, or air. Add more "greens," water the pile, and turn it regularly.
- Pests: Avoid adding meat, dairy, and greasy foods to prevent attracting pests.
Delving into Vermicomposting
Vermicomposting, or worm composting, is a method that uses worms to decompose organic waste. It's an excellent option for those who lack yard space or want to compost indoors. Worms consume food scraps and other organic materials, breaking them down into nutrient-rich castings, which are highly beneficial for plant growth.
Setting Up Your Vermicomposting Bin
To start vermicomposting, you'll need a worm bin, bedding material, and worms. Here's a step-by-step guide:
- Choose a worm bin: Select a bin made of plastic or wood, ensuring it has ventilation holes and a lid. Avoid bins with antimicrobial properties, as these can harm the beneficial microbes needed for composting.
- Prepare the bedding: Use shredded newspaper, cardboard, or coconut coir as bedding material. Moisten the bedding until it's damp like a wrung-out sponge.
- Add the worms: Introduce red wigglers (Eisenia fetida) or redworms (Lumbricus rubellus) to the bin. These species are most commonly used for vermicomposting due to their efficient decomposition abilities.
- Feed the worms: Start by feeding the worms small amounts of food scraps, such as fruit and vegetable peels, coffee grounds, and tea bags. Bury the food scraps under the bedding to prevent fruit flies.
- Maintain the bin: Keep the bin in a cool, dark location with a temperature between 50 and 80 degrees Fahrenheit. Monitor the moisture level and add water as needed to keep the bedding damp.
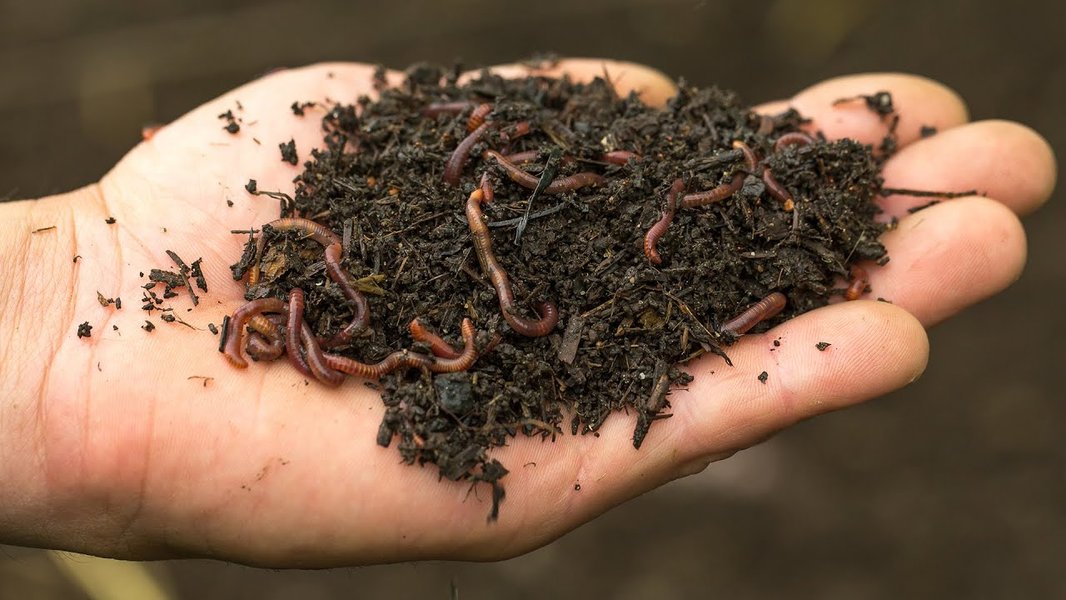 Hands Holding Compost Worms
Selecting the Right Worms for Vermicomposting
The most common worms used for vermicomposting are red wigglers (Eisenia fetida) and redworms (Lumbricus rubellus). Red wigglers are particularly popular due to their ability to tolerate a wide range of temperatures and environmental conditions, making them ideal for beginners. European nightcrawlers (Eisenia hortensis) are another option, but they may require more specific conditions.
Feeding Your Worms: What to Include and Exclude
Providing the right food for your worms is essential for their health and productivity. Here's a guide to what worms can eat and what to avoid:
Include:
- Fruit and vegetable scraps
- Coffee grounds
- Tea bags
- Crushed eggshells
- Shredded newspaper and cardboard
Avoid:
- Meat and dairy products
- Oily or greasy foods
- Citrus fruits (in large quantities)
- Onions and garlic (in large quantities)
Harvesting Vermicompost
After a few months, the vermicompost will be ready to harvest. The finished vermicompost looks like dark, granular rice. Here are a few methods for harvesting:
-
The dump and sort method: Dump the contents of the bin onto a tarp and sort through the material, separating the worms from the castings.
-
The migration method: Move the finished compost to one side of the bin and add fresh bedding and food scraps to the other side. The worms will migrate to the fresh side, leaving the finished compost behind.
-
The screen method: Use a screen or sieve to sift through the compost, separating the worms and larger pieces of organic matter from the finished compost.
Comparing Composting and Vermicomposting
Both composting and vermicomposting are effective methods for recycling organic waste, but they have distinct differences. Here’s a comparison to help you decide which method is best for you:
| Feature | Composting | Vermicomposting |
|---|---|---|
| Space Requirements | Requires outdoor space | Can be done indoors or outdoors |
| Materials | Yard waste, kitchen scraps | Primarily kitchen scraps |
| Time to Compost | Several months | 1-2 months |
| Maintenance | Turning, monitoring moisture | Feeding worms, maintaining moisture |
| End Product | Compost | Worm castings (vermicompost) |
| Pest Concerns | Potential for pests if not managed well | Fewer pest concerns if managed properly |
| Odor | Can be smelly if not balanced | Odor-free if managed well |
Enhancing Your Understanding with Visual Aids
To further illustrate the composting process, consider watching this helpful video:
This video, "Beginner's Guide to Composting," offers a visual walkthrough of setting up a compost bin, layering materials, and maintaining the compost pile. It's an excellent resource for beginners looking to understand the practical steps of composting.
FAQ: Common Questions About Composting and Vermicomposting
What are the benefits of composting and vermicomposting?
Both methods reduce landfill waste, improve soil health, and create nutrient-rich soil amendments for your garden. Composting and vermicomposting also reduce the need for chemical fertilizers, promoting a more sustainable gardening practice.
How do I know if my compost pile is working correctly?
A healthy compost pile should be warm and slightly moist. You should see a gradual breakdown of organic materials, and the pile should have an earthy smell. If the pile is too wet or smelly, it may need more "brown" materials or more frequent turning.
How often should I turn my compost pile?
Turning your compost pile every 1-2 weeks is ideal for aerating the pile and speeding up decomposition. However, even turning it less frequently will still result in compost over time.
What type of bin is best for vermicomposting?
A plastic or wooden bin with ventilation holes and a lid is suitable for vermicomposting. The bin should be dark and opaque to provide a comfortable environment for the worms.
How much food should I feed my worms?
Start by feeding your worms small amounts of food scraps, about a handful per week for a small bin. Monitor how quickly the worms consume the food and adjust the amount accordingly. Avoid overfeeding, as this can lead to foul odors and other problems.
How do I prevent fruit flies in my vermicomposting bin?
Bury food scraps under the bedding to prevent fruit flies from accessing them. You can also place a layer of damp newspaper or cardboard on top of the bedding to create a barrier.
References
Last updated April 14, 2025