
Comprehensive Guide to Controlling Arduino with Python
Unlocking the Power of Python for Arduino Projects
Key Takeaways
- PyFirmata offers an object-oriented approach for seamless Arduino integration without extensive Arduino coding.
- PySerial provides low-level control for customized communication protocols between Python and Arduino.
- Choosing the right method depends on project requirements, desired control complexity, and real-time interaction needs.
Introduction
Controlling an Arduino with Python opens up a realm of possibilities for hobbyists, educators, and professionals alike. Python's extensive libraries and versatility make it an excellent choice for orchestrating complex interactions with Arduino hardware. This guide delves into various methods to achieve this integration, providing detailed explanations, practical code examples, and best practices to ensure a smooth and efficient workflow.
Prerequisites
Hardware Requirements
- An Arduino board (e.g., Arduino Uno, Mega, Nano)
- USB cable to connect Arduino to your computer
- LEDs, resistors, sensors, or other peripherals based on your project needs
Software Requirements
- Arduino IDE installed on your computer
- Python installed (preferably Python 3.6 or higher)
- Relevant Python libraries:
pySerial,pyFirmata,pyduino
Methods to Control Arduino with Python
1. Using PyFirmata
PyFirmata is a Python interface for the Firmata protocol, allowing real-time control and monitoring of Arduino pins without the need to upload custom sketches for each project. This method is highly efficient for projects requiring frequent changes and quick iterations.
Setup Steps
- Install PyFirmata: Open your terminal or command prompt and run:
pip install pyfirmata - Upload StandardFirmata Sketch to Arduino:
- Open the Arduino IDE.
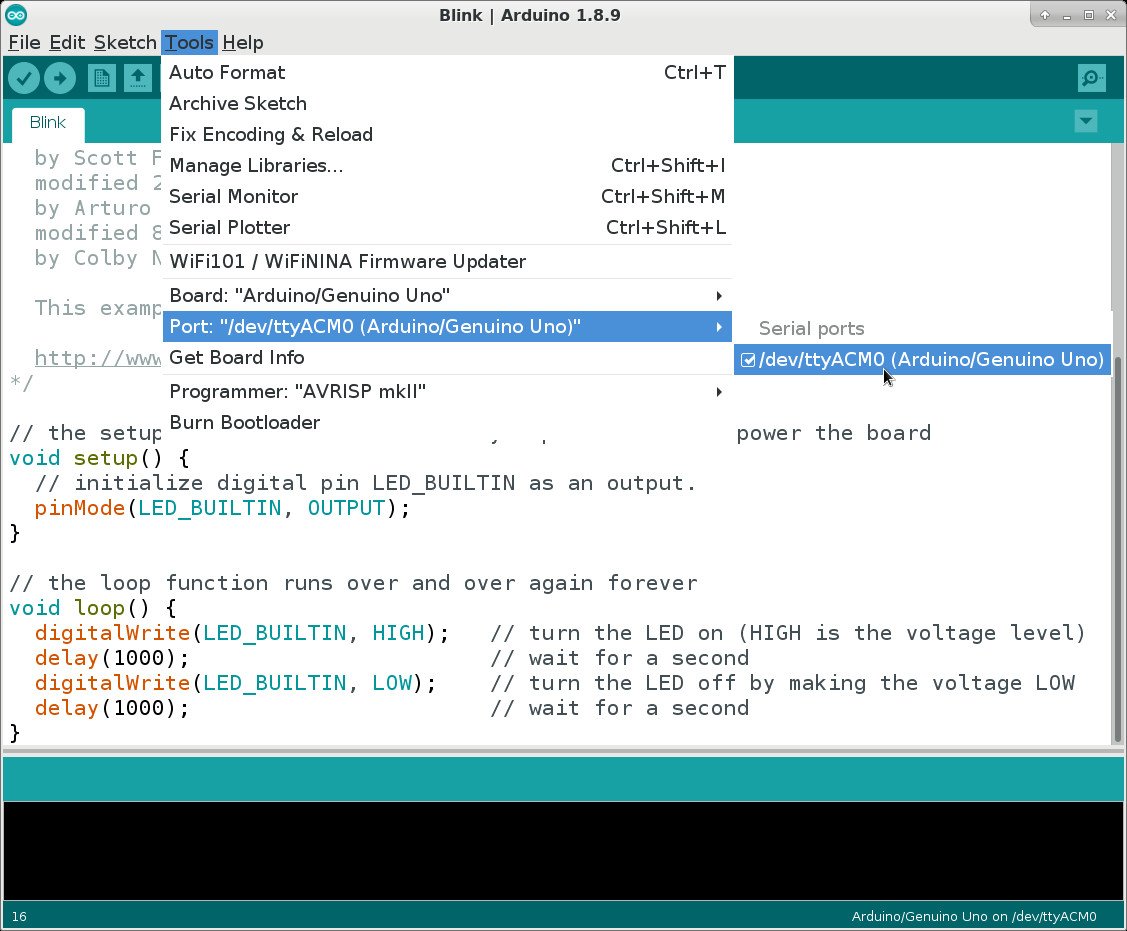
- Navigate to
File > Examples > Firmata > StandardFirmata. - Select your board and port via
Tools > BoardandTools > Port. - Upload the sketch to your Arduino.
- Write Python Script: Below is an example script to blink an LED connected to pin 13.
import pyfirmata
import time

# Replace 'COM3' with your Arduino's serial port
board = pyfirmata.Arduino('COM3')

# Start an iterator thread to prevent buffer overflow
it = pyfirmata.util.Iterator(board)
it.start()

# Define the pin for the LED
led = board.get_pin('d:13:o')

try:
    while True:
        led.write(1)  # Turn LED on
        time.sleep(1)
        led.write(0)  # Turn LED off
        time.sleep(1)
except KeyboardInterrupt:
    board.exit()  # Close connection gracefully
Advantages
- Simple setup with minimal coding.
- Real-time control and monitoring of multiple pins.
- No need to upload new sketches for different projects.
Considerations
- Requires the Firmata sketch to be uploaded to the Arduino.
- Limited to the functionalities provided by the Firmata protocol.
2. Using PySerial
PySerial is a Python library that provides access to the serial port for communication with serial devices like Arduino. This method offers more control and flexibility, allowing the creation of custom communication protocols tailored to specific project needs.
Setup Steps
- Install PySerial: Run the following command in your terminal or command prompt:
pip install pyserial - Write Arduino Sketch: Create a sketch that listens to serial commands and performs actions accordingly. For example, to control an LED:
// Arduino Sketch const int ledPin = 13; void setup() { pinMode(ledPin, OUTPUT); Serial.begin(9600); } void loop() { if (Serial.available() > 0) { char command = Serial.read(); if (command == '1') { digitalWrite(ledPin, HIGH); } else if (command == '0') { digitalWrite(ledPin, LOW); } } }- Open the Arduino IDE.
- Paste the above sketch.
- Select the correct board and port.
- Upload the sketch to the Arduino.
- Write Python Script: Below is an example that sends commands to turn the LED on and off.
import serial
import time

# Replace 'COM3' with your Arduino's serial port
ser = serial.Serial('COM3', 9600, timeout=1)
time.sleep(2)  # Wait for the connection to initialize

try:
    while True:
        ser.write(b'1')  # Send command to turn LED on
        time.sleep(1)
        ser.write(b'0')  # Send command to turn LED off
        time.sleep(1)
except KeyboardInterrupt:
    ser.close()  # Close the serial connection
Advantages
- Full control over the communication protocol.
- Suitable for complex interactions requiring specific command structures.
- Does not rely on predefined libraries or protocols.
Considerations
- Requires manual handling of serial communication and protocol design.
- Potential for increased complexity in code management.
3. Using PyDuino
PyDuino is a Python library that facilitates the creation of web APIs for Arduino, allowing control over Arduino hardware through HTTP requests. This method is ideal for projects that require remote access or integration with web-based applications.
Setup Steps
- Install PyDuino: Execute the following command:
pip install pyduino - Set Up Arduino Hardware: For example, connect an LED to pin 3 with appropriate resistors.
- Create Python API: Below is a simple API example to control an LED.
from pyduino import Arduino from flask import Flask, request app = Flask(__name__) a = Arduino('COM3') # Replace with your serial port @app.route('/led', methods=['POST']) def control_led(): state = request.json.get('state') if state == 'on': a.digital_write(3, 1) # Turn LED on elif state == 'off': a.digital_write(3, 0) # Turn LED off return {'status': 'success'} if __name__ == '__main__': app.run(debug=True)- This script uses Flask to create a web server.
- It defines an endpoint
/ledthat accepts POST requests to control the LED state. - You can send JSON data like
{"state": "on"}or{"state": "off"}to control the LED.
Advantages
- Enables remote control of Arduino via HTTP requests.
- Integrates well with web applications and IoT projects.
- Facilitates the creation of RESTful APIs for Arduino hardware.
Considerations
- Requires knowledge of web frameworks like Flask.
- Introduces additional layers of complexity due to networking components.
4. Using Arduino IoT Cloud with Python Client Library
The Arduino IoT Cloud allows for cloud-based management and control of Arduino devices. By utilizing the Python Client Library, developers can interact with IoT devices programmatically, enabling complex applications and integrations with other cloud services.
Setup Steps
- Set Up Arduino IoT Cloud:
- Create an account on the Arduino IoT Cloud.
- Add and configure your Arduino device within the cloud platform.
- Define cloud variables and configure device properties.
- Install Arduino IoT Client Library: Run:
pip install arduino-iot-client - Write Python Script: Example to update a cloud variable.
from arduino_iot import Client import time # Initialize the client with your credentials client = Client(client_id='YOUR_CLIENT_ID', client_secret='YOUR_CLIENT_SECRET') # Connect to the Arduino IoT Cloud client.connect() # Assume 'ledState' is a boolean cloud variable led_state = True while True: client.update_variable('ledState', led_state) led_state = not led_state time.sleep(1)- Replace
YOUR_CLIENT_IDandYOUR_CLIENT_SECRETwith your actual credentials. - This script toggles the
ledStatevariable every second, turning the LED on and off.
- Replace
Advantages
- Seamless integration with cloud services and IoT applications.
- Facilitates remote monitoring and control of Arduino devices.
- Provides scalability for large-scale IoT deployments.
Considerations
- Requires an Arduino IoT Cloud account and proper device setup.
- Dependent on internet connectivity for cloud interactions.
5. Using MicroPython on Supported Arduino Boards
MicroPython is a lean implementation of Python 3 designed to run on microcontrollers. Some Arduino boards, like the Arduino Nano 33 BLE Sense, support MicroPython, allowing you to write and execute Python code directly on the device.
Setup Steps
- Check Board Compatibility: Ensure your Arduino board supports MicroPython.
- Install MicroPython Firmware:
- Download the appropriate MicroPython firmware for your board.
- Use a tool like
esptoolto flash the firmware onto the Arduino.
- Set Up Development Environment:
- Install a code editor that supports MicroPython, such as Thonny.
- Connect to the board's serial port to upload and run Python scripts.
- Write Python Script on Arduino: Example to blink an LED.
import machine import time led = machine.Pin(13, machine.Pin.OUT) while True: led.value(1) # Turn LED on time.sleep(1) led.value(0) # Turn LED off time.sleep(1)- This script runs directly on the Arduino, eliminating the need for a separate Python script on the computer.
- It provides real-time control and reduces latency.
Advantages
- Direct execution of Python code on the Arduino.
- Eliminates the need for a separate computer to run Python scripts.
- Enables rapid prototyping and iterative development.
Considerations
- Limited to Arduino boards that support MicroPython.
- May have performance constraints compared to native C++ sketches.
Comparative Analysis
| Method | Ease of Setup | Flexibility | Use Cases | Dependencies |
|---|---|---|---|---|
| PyFirmata | High | Medium | Real-time control, Rapid prototyping | Firmata firmware |
| PySerial | Medium | High | Custom protocols, Complex interactions | Custom Arduino sketch |
| PyDuino | Medium | Medium | Web-based control, IoT applications | Web frameworks (e.g., Flask) |
| Arduino IoT Cloud | Medium | High | Cloud integrations, Remote management | Arduino IoT Cloud account |
| MicroPython | Low | High | Direct on-board scripting, Standalone projects | Supported Arduino board, MicroPython firmware |
The table above highlights the various methods' ease of setup, flexibility, typical use cases, and dependencies. Choosing the right method depends largely on the specific requirements of your project, the complexity of interactions, and the environment in which the Arduino will operate.
Best Practices
Ensure Proper Serial Communication
Accurate baud rate settings and correct serial port identification are crucial. Mismatched settings can lead to communication failures or erratic behavior.
Handle Exceptions Gracefully
Implement error handling in your Python scripts to manage unexpected scenarios, such as disconnections or invalid commands, ensuring the Arduino and Python script terminate gracefully.
Optimize Resource Usage
When using libraries like PyFirmata that initiate background threads, monitor system resources to prevent bottlenecks, especially in resource-constrained environments.
Maintain Clear Code Documentation
Document your code, especially the communication protocols and pin configurations, to facilitate easier maintenance and scalability of your projects.
Advanced Techniques
Integrating Sensors and Actuators
Enhance your projects by integrating various sensors (e.g., temperature, humidity, motion) and actuators (e.g., motors, servos) controlled via Python scripts. Below is an example of reading a temperature sensor using PyFirmata.
import pyfirmata
import time

board = pyfirmata.Arduino('COM3')
it = pyfirmata.util.Iterator(board)
it.start()

# Define analog pin for temperature sensor
temp_sensor = board.get_pin('a:0:i')

try:
    while True:
        temp = temp_sensor.read()
        if temp:
            temperature = temp * 100  # Convert to Celsius (example scaling)
            print(f"Temperature: {temperature:.2f}°C")
        time.sleep(1)
except KeyboardInterrupt:
    board.exit()
Creating Interactive Interfaces
Leverage Python's GUI libraries such as Tkinter or PyQt to create user-friendly interfaces for interacting with your Arduino projects. This can include dashboards, control panels, or real-time data visualizations.
import pyfirmata
import time
import tkinter as tk

# Initialize Arduino
board = pyfirmata.Arduino('COM3')
led = board.get_pin('d:13:o')

# Define toggle function
def toggle_led():
    current = led.read()
    led.write(0 if current else 1)

# Set up GUI
root = tk.Tk()
root.title("Arduino LED Control")

toggle_button = tk.Button(root, text="Toggle LED", command=toggle_led)
toggle_button.pack(pady=20)

root.mainloop()
Real-Time Data Logging and Visualization
Utilize Python's data handling libraries like Pandas and visualization tools like Matplotlib or Plotly to log sensor data from Arduino and visualize it in real-time or for post-analysis.
import pyfirmata
import time
import pandas as pd
import matplotlib.pyplot as plt

# Initialize Arduino and sensor
board = pyfirmata.Arduino('COM3')
it = pyfirmata.util.Iterator(board)
it.start()
sensor = board.get_pin('a:0:i')

# Data storage
data = []

# Collect data
try:
    for _ in range(100):
        temp = sensor.read()
        if temp:
            temperature = temp * 100
            data.append(temperature)
            print(f"Temperature: {temperature:.2f}°C")
        time.sleep(1)
except KeyboardInterrupt:
    pass
finally:
    board.exit()

# Create DataFrame
df = pd.DataFrame(data, columns=['Temperature'])

# Plot data
plt.plot(df['Temperature'])
plt.title('Temperature Over Time')
plt.xlabel('Time (s)')
plt.ylabel('Temperature (°C)')
plt.show()
Troubleshooting Tips
Common Issues and Solutions
- Serial Port Not Found: Ensure the correct serial port is selected and that the Arduino is properly connected. Check device manager (Windows) or use
ls /dev/tty*(Linux/macOS) to identify available ports. - Permission Denied Errors: On Unix-based systems, you may need to add your user to the
dialoutgroup or usesudoto grant necessary permissions. - Data Not Received: Verify that the baud rates match between Python and Arduino, and ensure that the Arduino sketch is correctly reading and sending data.
- Library Installation Errors: Ensure that you are using the correct version of Python and that all dependencies are met. Use virtual environments to manage library installations.
Debugging Serial Communication
Implement print statements or logging in both your Arduino sketch and Python script to monitor the flow of data and identify where communication may be failing.
Ensuring Synchronization
When using methods like PySerial, ensure appropriate delays are incorporated to allow the Arduino to process incoming commands, preventing data loss or buffer overflows.
Practical Project Examples
1. Automated Home Lighting System
Utilize PyFirmata to control multiple LEDs representing home lights, allowing them to be toggled via a Python-based interface or automated scripts based on sensor inputs.
Components Needed
- Arduino Uno
- LEDs and resistors
- Python-capable computer
Sample Python Script
import pyfirmata
import time

board = pyfirmata.Arduino('COM3')
it = pyfirmata.util.Iterator(board)
it.start()

# Define multiple LEDs
led_pins = ['d:12:o', 'd:11:o', 'd:10:o']
leds = [board.get_pin(pin) for pin in led_pins]

try:
    while True:
        for led in leds:
            led.write(1)
            time.sleep(0.5)
            led.write(0)
except KeyboardInterrupt:
    board.exit()
2. Environmental Monitoring System
Combine PySerial with temperature and humidity sensors to create a system that logs environmental data and reacts to specific conditions, such as activating cooling systems when temperatures exceed a threshold.
Components Needed
- Arduino Mega
- DHT11/DHT22 sensor
- Cooling fan
- Python-capable computer
Sample Arduino Sketch
#include "DHT.h"

#define DHTPIN 2
#define DHTTYPE DHT11
#define FANPIN 13

DHT dht(DHTPIN, DHTTYPE);

void setup() {
    Serial.begin(9600);
    pinMode(FANPIN, OUTPUT);
    dht.begin();
}

void loop() {
    float temp = dht.readTemperature();
    if (isnan(temp)) {
        Serial.println("Failed to read from DHT sensor!");
        return;
    }

    Serial.println(temp);

    if (temp > 25.0) {
        digitalWrite(FANPIN, HIGH);  // Turn fan on
    } else {
        digitalWrite(FANPIN, LOW);   // Turn fan off
    }

    delay(2000);
}
Sample Python Script
import serial
import time

ser = serial.Serial('COM3', 9600, timeout=1)
time.sleep(2)  # Allow time for Arduino to reset

try:
    while True:
        line = ser.readline().decode('utf-8').rstrip()
        if line:
            temperature = float(line)
            print(f"Current Temperature: {temperature}°C")
            # Further processing can be done here
        time.sleep(1)
except KeyboardInterrupt:
    ser.close()
3. Robotics Control Interface
Implement a Python-based interface to control robotic arms or mobile robots, using PySerial to send movement commands and receive sensor feedback for autonomous navigation.
Components Needed
-
Arduino Nano
-
Servo motors or motor drivers
-
Ultrasonic sensors
-
Python-capable computer
Sample Python Script for Movement Commands
import serial
import time

ser = serial.Serial('COM3', 9600, timeout=1)
time.sleep(2)

def move_forward():
    ser.write(b'F')  # Command to move forward

def move_backward():
    ser.write(b'B')  # Command to move backward

def turn_left():
    ser.write(b'L')  # Command to turn left

def turn_right():
    ser.write(b'R')  # Command to turn right

try:
    move_forward()
    time.sleep(2)
    turn_left()
    time.sleep(1)
    move_forward()
    time.sleep(2)
    turn_right()
    time.sleep(1)
    move_backward()
    time.sleep(2)
except KeyboardInterrupt:
    ser.close()
Security Considerations
Protecting Communication Channels
When deploying Arduino-Python integrations over networks or the internet, ensure that communication channels are secure. Implement authentication and encryption mechanisms to prevent unauthorized access or control.
Validating Inputs and Commands
Always validate and sanitize inputs received from Python scripts to the Arduino to safeguard against potential malicious commands or unintended behavior.
Firmware and Library Updates
Keep Arduino firmware and Python libraries up to date to patch vulnerabilities and leverage the latest features and security enhancements.
Conclusion
Integrating Python with Arduino empowers developers to harness Python's robust ecosystem for hardware control, data processing, and automation. Whether you opt for high-level libraries like PyFirmata for rapid development or PySerial for granular control, Python provides the tools necessary to elevate your Arduino projects. By following best practices, leveraging advanced techniques, and ensuring security, you can create sophisticated and reliable systems that cater to a wide range of applications from simple LED blinking to complex IoT ecosystems.
References
Last updated February 3, 2025