
Unlock Automated Cleanup: Your Guide to Creating a Recycle Bin Emptying Batch File
Streamline your Windows maintenance by crafting a simple script to clear out deleted files effortlessly.
Managing disk space and ensuring a tidy system often involves regularly emptying the Recycle Bin. While Windows provides manual ways to do this, a batch file can automate the process, saving you time and effort. This guide will walk you through creating such a batch file, exploring the most effective methods and important considerations.
Highlights: Key Takeaways
- PowerShell is Preferred: For modern Windows systems (Windows 10 and newer), using PowerShell's
Clear-RecycleBincmdlet within a batch file is the safest and most reliable method. - Administrator Privileges: Emptying the Recycle Bin, especially via script, often requires administrative rights to access and modify system-protected folders.
- Permanent Deletion: Be aware that files removed by these batch scripts are permanently deleted and cannot be easily recovered from the Recycle Bin.
PowerShell Prowess: The Recommended Method
The most robust and recommended approach for creating a batch file to empty the Recycle Bin involves leveraging Windows PowerShell. PowerShell includes a specific cmdlet, Clear-RecycleBin, designed precisely for this task. This method is generally safer and more reliable than directly manipulating Recycle Bin folders.
Why Use PowerShell?
The Clear-RecycleBin cmdlet is part of Microsoft's modern administrative toolkit. It handles the underlying complexities of the Recycle Bin, which can exist on multiple drives and has special system protections. It's built to perform this action cleanly and without user confirmation if specified.
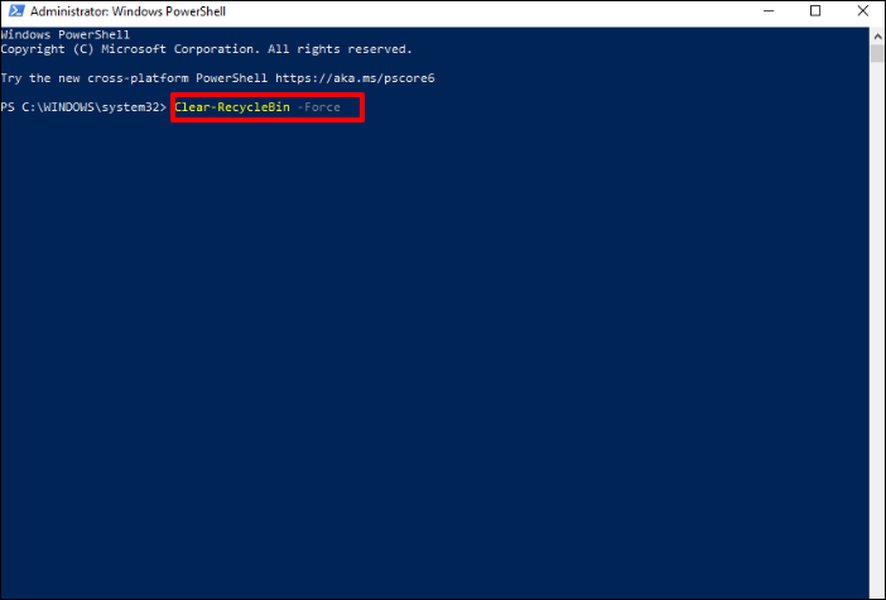
The Clear-RecycleBin -Force command in a PowerShell window, effectively emptying the Recycle Bin without prompts.
The Batch Script Code
Here's the code for your batch file using the PowerShell method:
@echo off
echo Emptying Recycle Bin...
PowerShell.exe -NoProfile -Command "Clear-RecycleBin -Force -ErrorAction SilentlyContinue"
echo Recycle Bin has been emptied.
pause
Code Breakdown:
@echo off: Prevents the commands themselves from being displayed in the command prompt window, leading to a cleaner output.echo Emptying Recycle Bin...: Displays a message to the user indicating the script's action.PowerShell.exe -NoProfile -Command "Clear-RecycleBin -Force -ErrorAction SilentlyContinue": This is the core command.PowerShell.exe: Executes PowerShell.-NoProfile: Prevents PowerShell from loading any user profiles, making the script run faster and more predictably.-Command "...": Tells PowerShell to execute the enclosed command.Clear-RecycleBin: The PowerShell cmdlet that empties the Recycle Bin. By default, it targets all Recycle Bins for the current user.-Force: Suppresses any confirmation prompts, allowing the command to run without user intervention.-ErrorAction SilentlyContinue: If an error occurs (e.g., the Recycle Bin is already empty), the script will continue without displaying an error message.
echo Recycle Bin has been emptied.: Confirms that the process is complete.pause: Keeps the command prompt window open after the script finishes, allowing you to see the output. You can remove this line if you want the window to close automatically.
Creating and Running the Batch File
- Open Notepad or any plain text editor.
- Copy and paste the script code provided above into the text editor.
- Go to "File" > "Save As...".
- In the "Save as type" dropdown, select "All Files (*.*)".
- Name your file with a
.batextension, for example,EmptyRecycleBin.bat. - Save the file to a convenient location, like your Desktop.
- To run the batch file, right-click on it and select "Run as administrator". This is crucial because modifying the Recycle Bin often requires elevated permissions.
Customizing for Specific Drives
If you only want to empty the Recycle Bin for a specific drive (e.g., C: drive), you can modify the PowerShell command:
PowerShell.exe -NoProfile -Command "Clear-RecycleBin -DriveLetter C -Force -ErrorAction SilentlyContinue"Simply replace C with the desired drive letter.
The Traditional rd Command Approach (Less Recommended)
An older method involves using the Command Prompt's rd (remove directory) command to delete the hidden $Recycle.Bin folder, which exists on each drive. While this can work, it's generally considered less safe and less elegant than the PowerShell method, as it directly manipulates system folders.
How It Works
Windows stores deleted files in a hidden system folder named $Recycle.Bin on each drive (e.g., C:\$Recycle.Bin, D:\$Recycle.Bin). The rd command can be used to remove these folders and their contents.
Batch Script for a Single Drive (e.g., C:)
@echo off
echo Attempting to empty Recycle Bin on C: drive...
rd /s /q C:\$Recycle.Bin
echo Recycle Bin on C: drive should be empty.
pause
Enhanced Batch Script for Multiple Drives
To empty the Recycle Bin on multiple drives, you would need to add a line for each drive, preferably with a check to see if the folder exists:
@echo off
echo Attempting to empty Recycle Bin on all available drives...

if exist C:\$Recycle.Bin (
    echo Emptying C: drive Recycle Bin...
    rd /s /q C:\$Recycle.Bin
) else (
    echo No Recycle Bin found or accessible on C: drive.
)

if exist D:\$Recycle.Bin (
    echo Emptying D: drive Recycle Bin...
    rd /s /q D:\$Recycle.Bin
) else (
    echo No Recycle Bin found or accessible on D: drive.
)

:: Add more drives as needed, e.g., E:, F:
:: if exist E:\$Recycle.Bin (
::     echo Emptying E: drive Recycle Bin...
::     rd /s /q E:\$Recycle.Bin
:: ) else (
::     echo No Recycle Bin found or accessible on E: drive.
:: )

echo Recycle Bin emptying process finished for specified drives.
pause
Code Breakdown (rd method):
rd: The command to remove (delete) a directory./s: Removes all directories and files within the specified directory, in addition to the directory itself. Use with caution./q: Quiet mode. Suppresses confirmation prompts when deleting a directory tree with/s.C:\$Recycle.Bin: The path to the hidden Recycle Bin folder on the C: drive. ReplaceC:with other drive letters as needed.if exist <path> (...): Checks if the specified path (the Recycle Bin folder) exists before attempting to delete it. This helps prevent errors.
Important Considerations for the rd Method
- Permissions: This method almost always requires administrative privileges.
- System Folder: Directly deleting
$Recycle.Bincan sometimes have unintended side effects, although Windows typically recreates it. The PowerShell method is generally more graceful. - Hidden & Protected: The
$Recycle.Binfolder is a hidden, system-protected folder. Whilerd /s /qbypasses some protections, it's a forceful approach.
Comparing Methods: Which to Choose?
When deciding which method to use, consider factors like system compatibility, safety, and ease of use. The PowerShell method is generally superior for modern Windows versions. The radar chart below visualizes a comparison between the PowerShell method and the traditional rd command approach based on key attributes.
Scale: 0 (Low/Poor) to 5 (High/Excellent). This chart represents an opinionated analysis for illustrative purposes.
- Safety: PowerShell is higher as it uses a dedicated command less likely to cause unintended system issues.
- Simplicity of Use: The
rdcommand itself is simple, but integrating PowerShell into a batch file is also straightforward. - Modernity & Support: PowerShell is the modern standard and actively supported by Microsoft for system administration tasks.
- Granular Control: PowerShell offers specific parameters like
-DriveLetter. Therdcommand requires listing each path. - Built-in Multi-Drive Handling: PowerShell's
Clear-RecycleBinhandles all drives by default, whereasrdrequires explicit commands for each drive.
Understanding the Batch File Mechanics
A batch file (.bat) is a script file containing a sequence of commands for the Windows command-line interpreter. When you run a batch file to empty the Recycle Bin, it executes these commands to interact with the system. The mindmap below illustrates the key components and flow involved in this process.
(Recommended)"] M1_1["Uses
Clear-RecycleBin cmdlet"]
M1_2["Safer, more robust"]
M1_3["Handles multiple drives automatically"]
M2["rd Command Method(Traditional)"] M2_1["Uses
rd /s /q command"]
M2_2["Directly deletes $Recycle.Bin folder"]
M2_3["Requires specifying each drive"]
ScriptCreation["Creating the Batch File"]
SC1["Open Text Editor (e.g., Notepad)"]
SC2["Write/Paste Commands"]
SC3["Save with .bat Extension"]
Execution
E1["Double-click the .bat file"]
E2["Run from Command Prompt"]
E3["Requires 'Run as administrator' for permissions"]
KeyConsiderations["Important Considerations"]
C1["Permanent Deletion of Files"]
C2["Administrative Privileges Needed"]
C3["Test Before Regular Use"]
C4["Understand Command Parameters"]
This mindmap highlights that whether you choose the PowerShell or rd command method, creating the script involves similar steps, and execution generally requires elevated privileges due to the nature of interacting with the Recycle Bin.
Key Commands and Parameters Explained
Understanding the specific commands and their parameters used in these batch files is essential for customizing them and troubleshooting any issues. The table below provides a quick reference:
| Command/Parameter | Description | Primarily Used In |
|---|---|---|
@echo off |
Suppresses the display of commands as they are executed. | Both PowerShell and rd methods |
echo [message] |
Displays a custom message to the user in the command prompt. | Both PowerShell and rd methods |
PowerShell.exe |
Launches the Windows PowerShell executable. | PowerShell method |
-NoProfile |
(PowerShell) Starts PowerShell without loading user profiles. | PowerShell method |
-Command "..." |
(PowerShell) Executes the specified PowerShell command string. | PowerShell method |
Clear-RecycleBin |
(PowerShell) The cmdlet used to empty the Recycle Bin(s). | PowerShell method |
-Force |
(PowerShell) Suppresses confirmation prompts for Clear-RecycleBin. |
PowerShell method |
-ErrorAction SilentlyContinue |
(PowerShell) Prevents the script from stopping or displaying errors if an issue occurs (e.g., bin already empty). | PowerShell method |
-DriveLetter [letter] |
(PowerShell) Specifies a particular drive's Recycle Bin to empty (e.g., -DriveLetter C). |
PowerShell method (optional) |
rd |
Command Prompt command to remove (delete) a directory. | rd method |
/s |
(rd) Deletes a directory tree (the directory and all its subdirectories and files). | rd method |
/q |
(rd) Quiet mode; suppresses confirmation prompts when used with /s. |
rd method |
C:\$Recycle.Bin |
Example path to the hidden system folder for the Recycle Bin on the C: drive. | rd method |
if exist [path] (...) |
Conditional command; executes subsequent command(s) only if the specified file or folder exists. | rd method (for multiple drives) |
pause |
Suspends processing of the batch file and displays a "Press any key to continue..." message. Useful for keeping the window open to see output. | Both PowerShell and rd methods (optional) |
Automating the Process (Optional)
Once you have your batch file, you might want to automate its execution. Windows offers several ways to do this, such as using the Task Scheduler.
Using Task Scheduler
Task Scheduler allows you to run your batch file automatically at specific times or in response to certain events (e.g., daily, weekly, at user logon).
- Search for "Task Scheduler" in the Windows Start menu and open it.
- In the "Actions" pane on the right, click "Create Basic Task...".
- Give your task a name (e.g., "Empty Recycle Bin Daily") and an optional description. Click "Next".
- Choose a trigger (e.g., "Daily", "Weekly", "When I log on"). Click "Next" and configure the trigger details.
- For the action, select "Start a program". Click "Next".
- In the "Program/script" field, browse to and select your
.batfile. - Click "Next", review the settings, and click "Finish".
- Important: After creating the task, find it in the Task Scheduler Library, right-click it, select "Properties", and on the "General" tab, check "Run with highest privileges" to ensure it has administrative rights.
The following video provides a visual guide on using Task Scheduler, which can be adapted for running your Recycle Bin emptying script, especially if it uses the Clear-RecycleBin command mentioned in the video for automation:
This video demonstrates how to use Task Scheduler to automate tasks, such as emptying the Recycle Bin, often utilizing PowerShell commands like Clear-RecycleBin.
Other Automation Methods
- Startup/Shutdown Scripts: More advanced users can configure scripts to run at system startup or shutdown using the Group Policy Editor (gpedit.msc), typically in corporate environments or on Pro/Enterprise versions of Windows.
Important Precautions
While a batch file to empty the Recycle Bin can be convenient, it's crucial to use it with caution:
- Permanent Deletion: Files emptied from the Recycle Bin using these scripts are permanently deleted. There is no straightforward way to recover them afterwards without specialized data recovery software (and even then, recovery is not guaranteed). Double-check that you don't need any files in the Recycle Bin before running the script.
- Run as Administrator: As mentioned multiple times, these scripts typically require administrative privileges to function correctly, especially when dealing with system folders like
$Recycle.Binor using system-level PowerShell cmdlets. - Test Carefully: Before automating the script or relying on it, test it thoroughly in a safe environment to ensure it behaves as expected and doesn't cause unintended issues.
- Why Automate?: Consider if you genuinely need to automate this. Windows itself has settings to manage Recycle Bin size and can automatically delete older files if configured (via Storage Sense in Windows 10/11). Automating deletion increases the risk of accidentally losing a file you later realize you needed.
- Backup Important Data: Regularly back up your important files to an external drive or cloud storage. This is a general best practice but is especially relevant if you're automating deletion tasks.
Frequently Asked Questions (FAQ)
Recommended Further Exploration
- How can I use Windows Task Scheduler to automate various scripts beyond just emptying the Recycle Bin?
- What are some advanced PowerShell scripting techniques for Windows system maintenance?
- How do Windows file system permissions and User Account Control (UAC) affect script execution?
- What are the best practices for data backup and recovery on Windows to prevent accidental data loss?
References
Last updated May 13, 2025