
Creating Custom-Shaped Cleaning Sponges at Home
A Comprehensive Guide to Crafting Soft, Flexible, and Absorbent Sponges
Key Takeaways
- Material Selection: Choosing the right materials like open-cell polyurethane foam ensures softness and absorbency.
- Mold Preparation: Properly preparing and using silicone molds prevents rigidity and skin formation.
- Safety First: Using protective gear and working in well-ventilated areas is crucial when handling foam compounds.
Introduction
Creating custom-shaped cleaning sponges at home is an ambitious project that can yield personalized and eco-friendly cleaning tools. Commercially available sponges are manufactured using specialized industrial processes, but with the right materials and techniques, you can approximate their desirable properties—softness, flexibility, smoothness, and high water absorbency—at home. This guide provides a step-by-step approach to crafting custom sponges that rival store-bought versions in functionality and durability.
Materials Needed
1. Polyurethane Foam (PU Foam)
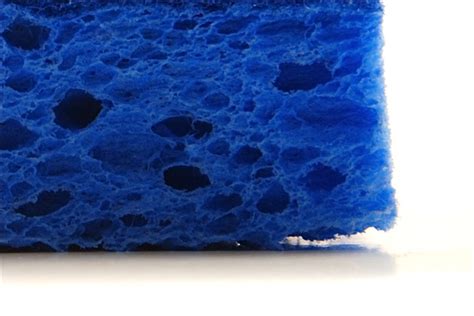
Polyurethane foam is the cornerstone of making soft, flexible, and highly absorbent sponges. It's imperative to use open-cell polyurethane foam for optimal water absorption and flexibility. Open-cell structures allow the sponge to retain moisture while maintaining softness and pliability.
2. Silicone Molds
Silicone molds are essential for shaping the sponges. You can purchase pre-made molds in various shapes or create your own using silicone molding kits. The flexibility of silicone ensures that the cured foam can be easily demolded without compromising the sponge's integrity.
3. Release Agent
A release agent, such as a non-stick spray, is necessary to prevent the polyurethane foam from adhering to the silicone mold. This ensures a smooth release and maintains the sponge's surface texture.
4. Mixing Tools
Accurate mixing of the foam components is crucial. You'll need disposable cups, stir sticks, and a scale to measure the foam components precisely. Ensuring the correct ratio of Part A (isocyanate) and Part B (polyol resin) is vital for proper foam expansion and curing.
5. Protective Gear
Safety cannot be overstated. Protective gloves, goggles, and a mask are necessary to shield yourself from fumes and potential skin contact with the foam compounds during the mixing and curing processes.
Step-by-Step Guide to Making Custom-Shaped Sponges
Step 1: Prepare the Mold
Begin by thoroughly cleaning the silicone mold to remove any residues. Apply a release agent evenly across the mold's surface to facilitate the easy removal of the cured foam. Place the mold on a flat, stable surface to ensure an even curing process.
Step 2: Mix the Polyurethane Foam
Polyurethane foam typically consists of two components: Part A (isocyanate) and Part B (polyol resin). Carefully measure both parts according to the manufacturer's instructions to maintain the correct mixing ratio. Pour both components into a disposable cup and stir gently with a stir stick, avoiding the introduction of excessive air bubbles which can lead to rigidity.
Step 3: Pour the Foam into the Mold
Pour the mixed foam into the prepared silicone mold. Fill the mold slightly above the desired level to account for the foam's expansion during curing. After pouring, gently tap the mold on the table to release any trapped air bubbles, ensuring a smooth and consistent sponge surface.
Step 4: Allow the Foam to Cure
Let the foam cure undisturbed according to the manufacturer's instructions, typically ranging from 15 to 30 minutes. Avoid any movement or disturbance to prevent imperfections in the sponge's texture and to maintain its flexibility.
Step 5: Demold the Sponge
Once the foam has fully cured, carefully remove the sponge from the mold. Inspect the sponge and trim any excess foam using scissors or a utility knife to achieve the desired shape and smooth edges.
Step 6: Test and Use
Rinse the newly formed sponge thoroughly with water to eliminate any residual chemicals or dust. Test its absorbency and flexibility to ensure it meets your cleaning requirements. If necessary, adjust the foam mixture or curing process in subsequent batches to refine the sponge's properties.
Advanced Techniques and Tips
Optimizing Foam Density
The density of the polyurethane foam significantly affects the sponge's softness and absorbency. Opt for low-density polyurethane foam for a softer and more absorbent sponge. High-density foam tends to be more rigid, reducing its effectiveness for cleaning purposes.
Creating Unique Custom Shapes
For bespoke sponge shapes, consider designing your own silicone molds using 3D printing technology or hand-carving a master model. Custom molds allow for the creation of sponges tailored to specific cleaning tasks or aesthetic preferences.
Preventing Skin Formation
To avoid the formation of a dense "skin" on the sponge's surface, stir the foam mixture gently to minimize air entrapment. Additionally, controlling the curing environment by adjusting humidity or preheating the molds can reduce skin formation, ensuring a uniform and smooth sponge texture.
Eco-Friendly Alternatives
Explore bio-based flexible foams made from renewable, plant-based materials as an eco-friendly alternative to traditional polyurethane foams. These bio-based foams maintain similar flexibility and absorbency while being more environmentally sustainable.
Safety Considerations
Working with polyurethane foam requires adherence to safety protocols to prevent exposure to harmful chemicals. Always wear protective gloves, goggles, and a mask to safeguard against fumes and skin contact. Ensure that your workspace is well-ventilated to disperse any potentially hazardous vapors. Proper disposal of unused foam materials is also essential to minimize environmental impact.
Alternative Approaches
Modifying Existing Sponges
If producing entirely new sponges proves challenging, consider purchasing commercial cellulose or synthetic sponges and customizing their shapes. Using sharp scissors or a utility knife, you can trim these sponges to fit specific cleaning tasks or ergonomic preferences.
Using Microfiber Cloths
Microfiber cloths offer an alternative to traditional sponges, providing excellent absorbency and flexibility. They can be cut into various shapes and sizes, making them suitable for diverse cleaning applications. Additionally, microfiber is durable and can be washed and reused multiple times, enhancing sustainability.
Natural Sea Sponges
Natural sea sponges are another viable alternative, known for their superior absorbency and softness. They are biodegradable and eco-friendly, making them an excellent choice for environmentally conscious cleaning solutions. Natural sponges can be purchased in bulk and cut to desired shapes as needed.
Conclusion
Crafting custom-shaped cleaning sponges at home is a feasible project that demands careful selection of materials and adherence to precise techniques. By utilizing open-cell polyurethane foam and silicone molds, you can produce sponges that closely mimic the properties of commercial products. While the process requires attention to detail and safety precautions, the ability to create personalized and eco-friendly cleaning tools makes it a worthwhile endeavor. Alternatively, modifying existing sponges or using microfiber cloths can offer simpler solutions without sacrificing functionality.
References
Last updated January 18, 2025