
Unlocking Dynamic UI Animations in DaVinci Resolve's Fusion Page
Master the art of creating captivating user interface animations directly within DaVinci Resolve's powerful integrated environment.
Key Insights into DaVinci Resolve UI Animation
- Fusion Page is Central: The Fusion page is the primary workspace for advanced UI animations, leveraging a powerful node-based workflow for intricate control.
- Node-Based vs. Layer-Based: Unlike layer-based systems, Fusion's node-based approach provides a non-destructive, highly organized, and flexible method for building complex UI elements and their animations.
- Comprehensive Toolset: DaVinci Resolve offers a rich array of tools, including vector shapes, Text+, Merge, Transform nodes, and various effects like Glow and Gradient, all essential for crafting polished UI animations.
DaVinci Resolve is a comprehensive software suite that unifies video editing, color correction, visual effects (VFX), motion graphics, and audio post-production. For creating user interface (UI) animations, its dedicated Fusion page stands out as the primary and most powerful environment. UI animations are dynamic visual elements such as buttons, text, progress bars, and interactive graphics that enhance video projects, presentations, or digital product showcases. This guide delves into every aspect of creating these animations within DaVinci Resolve, from fundamental concepts to advanced techniques and resources, ensuring a thorough understanding of its capabilities as of May 2025.
The Powerhouse: DaVinci Resolve's Fusion Page
The Fusion page is the heart of DaVinci Resolve's motion graphics and VFX capabilities. It distinguishes itself with a robust node-based workflow, a significant departure from the layer-based systems found in other animation software. This node-based system allows for a clear, organized, and non-destructive flow of effects and operations, making it ideal for building complex UI animations. Each node represents a specific tool or effect, and connecting them creates a visual pipeline for your animation.
Figure 1: Mindmap illustrating the comprehensive process of creating UI animations in DaVinci Resolve.
Why Fusion's Node-Based System Excels for UI
The node-based system provides several advantages for UI animation:
- Non-Destructive Editing: Each operation is a node, meaning you can adjust any part of your animation pipeline without affecting subsequent steps, offering unparalleled flexibility.
- Clear Flow: Visualizing your effects as a connected graph makes complex animations easier to understand and manage.
- Modularity: Individual UI components can be built as separate node trees, then easily merged and manipulated, promoting reusability and efficiency.
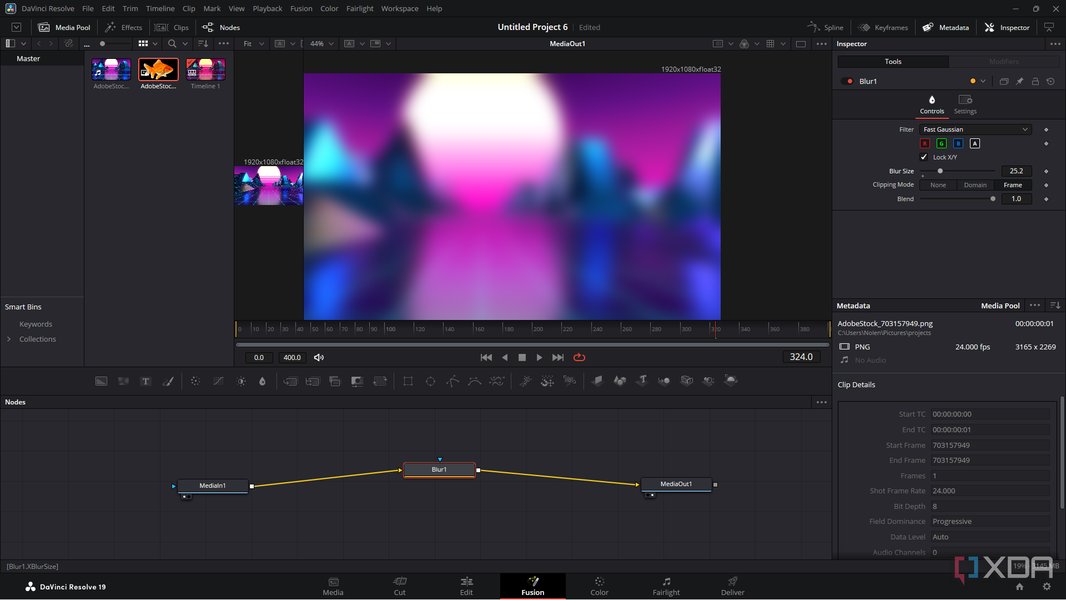
Figure 2: A visual representation of the node-based workflow in DaVinci Resolve's Fusion page, showing interconnected nodes.
Essential Tools and Techniques for UI Animation
Creating compelling UI animations requires a mastery of specific tools and techniques available within DaVinci Resolve. The Fusion page provides the core functionalities, while the Edit page can be used for more basic transitions.
Building Blocks: Vector Shapes and Text
Vector Shapes:
These are fundamental for any UI design. In Fusion, you can create various vector shapes like rectangles, ellipses, and polygons. These can be adjusted for size, corner radius (for rounded buttons), and other properties. Shape nodes are the starting point for buttons, panels, progress bars, and other visual components.Text+ Node:
For labels, button text, or dynamic counters, the Text+ node is indispensable. It offers extensive customization for font, size, color, and allows for advanced text animations, including gradient backgrounds and intricate movements.
Animation Fundamentals: Keyframing and Transforms
Keyframing:
The backbone of animation. By setting keyframes on properties like position, scale, opacity, or color at different points in your timeline, you define the start and end states of an animation. Fusion interpolates the movement between these keyframes.Transform Nodes:
These nodes are used to manipulate the basic properties of your UI elements. You can animate their position (X, Y coordinates), scale, rotation, and opacity to create dynamic movements.Spline Editor and Easing:
To achieve smooth, natural-looking motion, the Spline Editor is crucial. It allows you to refine animation curves, applying "easing" (ease-in, ease-out) to make movements accelerate and decelerate realistically, mimicking real-world physics. This helps avoid robotic, linear animations.
Enhancing Visuals: Effects and Shaders
Merge Nodes:
These are used to combine multiple UI components, layering shapes, text, and effects to build complex designs.Glow and Gradient Nodes:
Essential for modern UI aesthetics. Glow nodes can simulate button highlights or focus states, while gradient nodes allow for sophisticated color transitions, adding depth and visual appeal.Drop Shadow:
Adds realistic depth to UI elements, making them appear to float above the background.Blur:
Can be used for depth of field effects or subtle UI element transitions, making elements appear or disappear smoothly.
Advanced Control: Expressions and Scripting
For more complex and interconnected animations, Fusion supports expressions and scripting. These allow you to link properties of different nodes dynamically or automate repetitive animation tasks. For example, you could use an expression to link a button's highlight color to a simulated hover state, ensuring synchronized behavior.
Step-by-Step Workflow for Creating UI Animations
Here's a structured approach to creating UI animations in DaVinci Resolve, primarily utilizing the Fusion page:
1. Project Setup and Asset Import
Begin by setting up your DaVinci Resolve project. Import any external UI assets, such as icons or background images, into the Media Pool. For UI animations, it's often efficient to create a new Fusion Composition on your Edit page timeline, then switch to the Fusion page to begin your work.
2. Building Your UI Design
In the Fusion page's node editor, start constructing your UI elements:
- Use Shape nodes (Rectangle, Ellipse) for backgrounds, buttons, or panels. Adjust their properties like width, height, and corner radius.
- Add Text+ nodes for labels, numbers, or interactive text. Customize fonts, colors, and sizes.
- Integrate external images (icons, logos) using MediaIn nodes.
- Use Merge nodes to layer and combine these elements into a cohesive UI component.
- Apply visual effects like Glow, Drop Shadow, or Gradient Map nodes to style your UI elements for a polished, modern look.
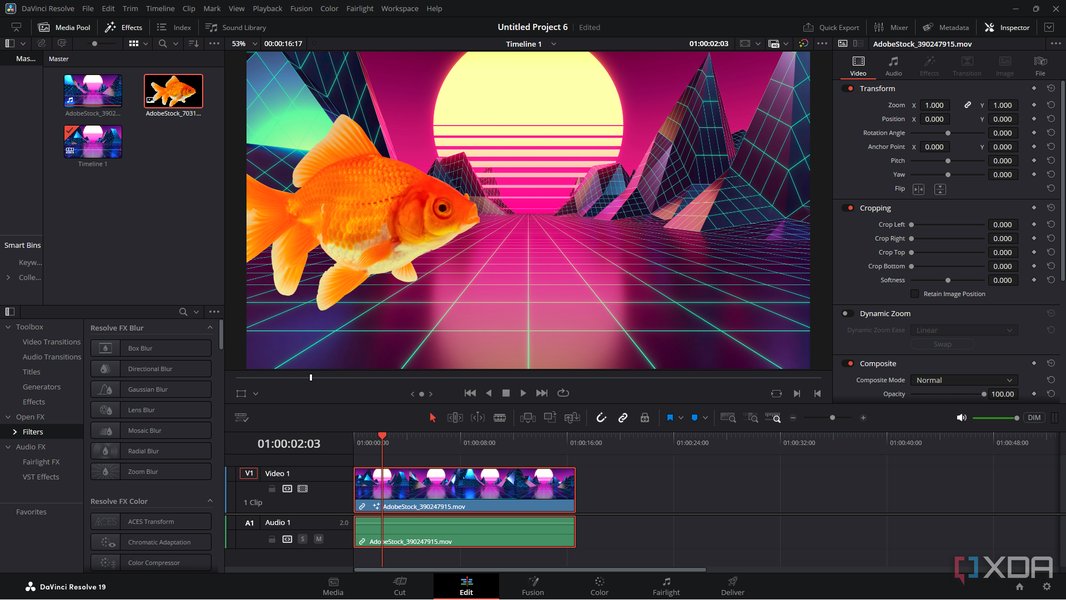
Figure 3: The versatile DaVinci Resolve interface, demonstrating its integrated capabilities.
3. Animating UI Elements
This is where your UI comes to life:
- Select a UI element's node (e.g., a Shape or Text+ node).
- In the Inspector panel, locate the property you want to animate (e.g., Center for position, Size for scale, Alpha for opacity).
- Click the diamond icon next to the property to set a keyframe at your desired starting point on the timeline.
- Move forward in the timeline, adjust the property's value, and set another keyframe. Fusion will automatically create the animation between these points.
- For more complex motion, such as animating along a custom path, use the X and Y position keyframes and observe the visual path created in the viewer.
- Crucially, use the Spline Editor to adjust the easing of your animations. This transforms linear movements into smooth, organic transitions, making your UI feel responsive and natural.
4. Simulating Interactive Elements
To make UI animations truly mimic user interactions, you can animate properties to respond to hypothetical actions:
- Hover States: Animate an element's scale, opacity, or glow to increase when a "mouse cursor" hovers over it.
- Click/Press States: Create a subtle squash-and-stretch effect or a color change when a button is "clicked."
- Progress Bars: Animate the length or fill of a shape node to simulate a loading or progress indicator.
For example, to create a Mac-style dock animation, you would keyframe the movement and scale of icons to pop up smoothly, simulating a mouse-over effect. You could then animate a selected icon to zoom and glow, mimicking a click.
Figure 4: This video tutorial guides you through creating Mac-style Dock UI Animations in DaVinci Resolve's Fusion page. It's highly relevant as it showcases a practical, real-world UI animation example using the software's core features.
5. Refinement and Export
Once your animations are in place, perform final adjustments:
- Add any last-minute effects like subtle blurs or zoom effects to enhance visual appeal.
- Preview your animation frequently to check timing, smoothness, and consistency.
- Once satisfied, switch to the Deliver page to export your composition as a video file or render it for use as an overlay in your main video project.
Comparative Analysis of UI Animation Capabilities
While DaVinci Resolve offers extensive capabilities for UI animation, it's beneficial to understand its strengths and weaknesses compared to other software, particularly in the context of different animation aspects.
Figure 5: Radar chart comparing DaVinci Resolve's UI animation capabilities across various dimensions. This chart illustrates its strengths in areas like node-based control and integration, while acknowledging potential learning curve and specific UI design flexibility.
Tips and Best Practices for Effective UI Animation
To create professional and impactful UI animations in DaVinci Resolve, consider these best practices:
Consistency is Key:
Maintain consistent timing, easing, and visual style across all your UI elements. This ensures a cohesive and polished user experience.Subtlety Over Spectacle:
Most UI animations should be subtle and functional, guiding the user's attention rather than distracting them. Avoid overly dramatic or complex animations unless they serve a specific stylistic purpose.Modularity and Reusability:
Design individual UI components (buttons, toggles, loaders) as separate Fusion compositions or macros. This makes them reusable across projects and streamlines your workflow.Optimize Performance:
For complex animations, use proxies and turn off high-quality rendering during the design phase. This significantly speeds up preview times. Ensure you have robust hardware (CPU, ample RAM, dedicated GPU) for optimal performance.Reference Real-World UIs:
Look at well-designed existing UIs (e.g., macOS, Windows, popular apps) for inspiration on motion, feedback, and visual polish.
Leveraging Templates and Resources
While custom animation provides ultimate control, DaVinci Resolve users can greatly benefit from pre-made templates and a wealth of learning resources.
Pre-made Templates and Plugins
Numerous platforms offer free and paid DaVinci Resolve templates, including motion graphics, titles, and specific UI elements. These can significantly accelerate your workflow:
- Envato Elements and Motion Array: These popular platforms provide extensive libraries of professional templates, including UI animation elements, intros, and transitions, that are fully customizable within Fusion.
- Free Resources: Websites like freevisuals.net offer guides and free templates to help you get started.
- Third-Party Plugins: Tools like MrAlexTech’s MagicAnimate simplify repetitive animation tasks within Fusion, especially useful for common UI movements.
To use a template, download the files, import them into DaVinci Resolve (often directly into Fusion or via the Edit page's effects library), and then modify the parameters like color, timing, and text to suit your project.
Learning Resources and Community Support
To master UI animation in DaVinci Resolve, explore these valuable resources:
| Resource Type | Description | Key Benefit for UI Animation |
|---|---|---|
| Official Blackmagic Design Pages | Detailed information on DaVinci Resolve and the Fusion page, including capabilities and features. | Provides foundational knowledge on Fusion's node-based workflow and core tools. |
| YouTube Tutorials & Courses | Numerous creators offer free tutorials (e.g., "Motion Graphics Crash Course") and paid comprehensive courses on Fusion motion graphics. | Practical, step-by-step guides for specific UI animation techniques and design principles. |
| Reddit Communities (r/davinciresolve) | Active online forums where users share tips, workflows, and solutions to common challenges. | Community-driven insights, troubleshooting, and examples of user-created UI animations. |
| Design & Animation Blogs | Articles and guides focusing on motion graphic design principles and their application in Resolve. | Helps in understanding the 'why' behind effective UI animations, not just the 'how.' |
Table 1: Key resources for learning and mastering UI animations in DaVinci Resolve.
DaVinci Resolve 20: Latest Features and AI Integration (May 2025)
DaVinci Resolve continues to evolve, with version 20 introducing new features that, while not exclusively for UI animation, can indirectly enhance workflows:
- AI Animated Subtitles: While primarily for subtitles, this indicates Blackmagic's trajectory towards automating repetitive animation tasks, which could potentially be extended to UI elements in future updates.
- Smart Timeline Editing: Enhancements to the Edit page's smart tools can streamline the integration of Fusion-created UI animations into larger video projects.
- Improved GPU Acceleration: Ongoing improvements in Fusion's GPU acceleration ensure smoother performance, even with complex UI compositions.
Frequently Asked Questions (FAQ)
Conclusion
DaVinci Resolve, through its deeply integrated and powerful Fusion page, offers a comprehensive and professional environment for creating intricate UI animations. Its node-based workflow provides unparalleled control, enabling designers to craft everything from subtle button feedback to complex animated interfaces. While there might be a learning curve for newcomers to the node system, the investment pays off with a highly flexible and non-destructive approach to motion graphics. By leveraging its robust toolset, combining custom animations with readily available templates, and engaging with the vibrant community, creators can produce high-quality, engaging UI animations fully integrated into their video projects, positioning DaVinci Resolve as a formidable contender in the motion graphics landscape.
Recommended Further Exploration
- How to optimize DaVinci Resolve for complex motion graphics projects?
- Advanced keyframe techniques and spline editor mastery in DaVinci Resolve Fusion?
- Creating custom macros and templates for UI elements in DaVinci Resolve?
- Integrating 3D elements and cameras into UI animations in DaVinci Resolve Fusion?