
Mastering the Art of Fence Post Hole Digging: A Comprehensive Guide
Unearthing the Secrets to a Sturdy and Long-Lasting Fence Foundation
Installing a durable and aesthetically pleasing fence hinges significantly on the proper installation of its posts. The foundation of any robust fence lies in adequately dug and set post holes. This guide will walk you through the essential steps, tools, and considerations to ensure your fence posts stand strong against the test of time and elements.
Key Insights for Optimal Fence Post Installation
- Strategic Planning is Paramount: Before breaking ground, meticulous planning involving property line identification, utility line checks, and precise layout marking is crucial for a straight and compliant fence.
- Depth and Diameter are Non-Negotiable: Ensure holes are dug to at least one-third (ideally half) of the post's total length, extending below the frost line in colder climates, and at least three times the post's width in diameter for proper setting material.
- Selecting the Right Tools Makes All the Difference: From manual post-hole diggers and digging bars to power augers, choosing the appropriate tools for your soil type and project size can significantly reduce effort and improve efficiency.
The Foundational Steps: Planning Your Fence Post Layout
The success of your fence installation begins long before the first shovel hits the dirt. Careful planning ensures not only a straight and attractive fence but also compliance with local regulations and the avoidance of costly mistakes like hitting underground utilities.
Mapping Your Territory: Defining Fence Lines and Post Spacing
The initial step involves accurately surveying your property and determining the precise boundary lines for your fence. This is critical to avoid disputes with neighbors and ensure legal compliance. Once the boundaries are clear, mark the fence line using stakes and string. For component-built fences, rail length often dictates post spacing, commonly 5 to 8 feet apart, though corner posts or areas under higher stress might require closer spacing (4 to 6 feet) for added support. Always verify local building codes, as they may specify minimum depths, materials, and spacing requirements.
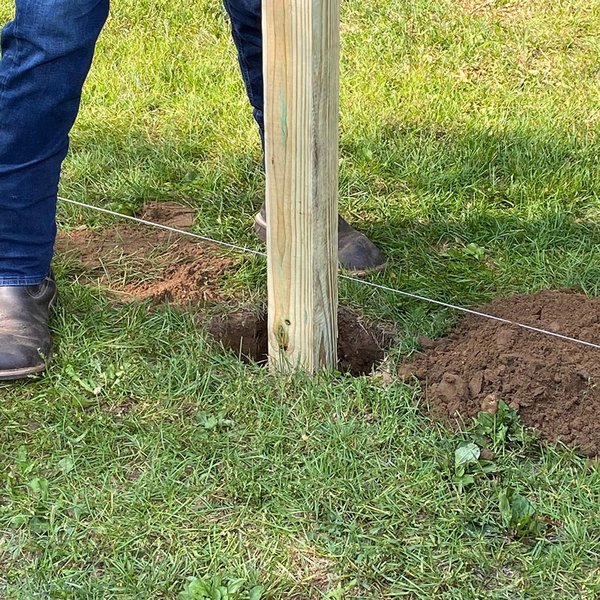
A precisely marked post hole, highlighting the importance of accurate measurements for fence stability.
Understanding Depth and Diameter Requirements
The depth and diameter of your post holes are paramount for the stability and longevity of your fence. A general rule of thumb is to bury at least one-third of the post's total length in the ground, with half being even better for enhanced stability. For example, a 6-foot fence should have posts buried at least 2 feet deep. In regions with cold climates, it is crucial to dig holes below the local frost line to prevent frost heave, which can shift posts over time. Dig each hole approximately 6 inches deeper than your target depth to accommodate a gravel base for drainage. The hole's diameter should be at least three times the width of the post; for a standard 4-inch post, aim for a 12-inch diameter hole. This extra space is essential for adequately filling the hole with concrete or other setting materials.
Essential Tools for Efficient Post Hole Digging
The right tools can transform a strenuous task into a manageable project. Depending on your soil conditions and the number of holes, you can opt for manual or power-assisted tools.
Manual Digging Tools
Post Hole Diggers
These specialized tools, often referred to as clamshell diggers, are ideal for creating narrow, deep holes. They operate by thrusting the blades into the ground, closing them to grab soil, and then lifting the soil out. They are particularly effective in loose to moderately firm soil.

A manual post hole digger, a common and effective tool for basic fence projects.
Digging Bar or Steel Rock Bar
A heavy-duty digging bar is invaluable for breaking up compacted soil, clay, or dislodging rocks. It can be used to loosen the ground before using a post-hole digger, making the digging process much easier, especially in challenging soil conditions. Some digging bars also feature a tamper end, useful for compacting soil or gravel.
Shovels and Spades
While not ideal for deep, narrow holes, a garden spade or round point shovel is useful for initial excavation, cutting through roots, and scooping out loosened dirt, especially at the topsoil level. A sharp shovel can also help establish a pilot hole, guiding other tools to stay centered.
Power-Assisted Digging Tools
Power Augers (Earth Augers)
For projects involving many holes or very hard soil, a power auger (gas or electric) can save significant time and effort. These machines drill holes efficiently. While manual diggers might be sufficient for a couple of holes, an auger becomes a wise investment or rental for larger fencing projects. Extensions for augers can increase their digging depth to reach below frost lines.

A powerful gas auger, ideal for tackling numerous post holes in tough soil.
Support and Measuring Tools
- Post Level: A specialized level that wraps around the post, checking vertical alignment on all sides simultaneously.
- String Lines and Stakes: Essential for maintaining a straight fence line and ensuring consistent post spacing.
- Measuring Tape: For accurate spacing and depth measurements.
- Wheelbarrow: To transport soil, gravel, and concrete around the job site.
- Safety Gear: Gloves, safety glasses, and ear protection are crucial for any fence building project.
The Digging Process: Step-by-Step Excellence
Once you have your plan and tools ready, it’s time to dig. Following a systematic approach ensures straight, deep, and stable post holes.
Marking and Initial Excavation
Begin by clearly marking the center of each post hole along your string line. For 4x4 posts, this will be just under 2 inches from the string. Use a garden spade or shovel to dig out a pilot hole or divot, establishing a guide for your post-hole digger. Spread a tarp or plastic sheet nearby to collect the excavated dirt, keeping your lawn clean.
Efficient Soil Removal and Obstacle Management
If using a manual post-hole digger, plunge the blades into the loosened soil, grab a load, and remove it. For sticky clay soil, dipping the digger in a bucket of water can prevent soil from clinging to the blades. If you encounter rocks, use a digging bar to loosen them, letting them fall into the hole, and then pluck them out with your clamshell digger. For roots, a tile spade can easily slice through smaller ones, while a chainsaw might be necessary for larger, stubborn roots, ensuring proper safety precautions are taken.
Achieving Desired Depth and Diameter
Continuously check the depth of your hole with a measuring tape. Remember to dig about 6 inches deeper than your target post depth to allow for a gravel base. Ensure the hole is wide enough (three times the post width) to accommodate the concrete or setting material adequately. If digging in very dry or sandy soil, consider saturating the hole with water the day before to soften the earth, making it easier to dig.
Setting Your Fence Posts: Methods for Stability
Once the holes are dug, the next critical step is setting the posts securely. Several methods can be employed, each with its advantages.
Concrete Setting: The Gold Standard for Stability
Setting posts in concrete is widely considered the most reliable method for ensuring stability and longevity, especially for load-bearing posts like corner or gate posts, or in areas prone to high winds. After placing about 6 inches of gravel at the bottom for drainage, center the post in the hole. Pour in dry concrete mix, then add water, or mix concrete beforehand. Hold the post perfectly plumb with a post level, and use temporary braces (e.g., 2x4s and stakes) to support it while the concrete cures. Slope the top of the concrete away from the post to direct water away, preventing rot. Allow at least 24 hours for the concrete to set before continuing fence installation.
Gravel or Soil Setting: Alternative Methods
While concrete offers maximum stability, gravel or compacted soil can be viable alternatives, particularly for non-load-bearing posts or in areas with good drainage. For gravel, layer crushed gravel or pea gravel into the hole, tamping it down in 3-inch layers around the post. This provides good drainage and a firm base. For soil, mixing a shovel of Portland cement with the soil at each post and ramming it in 3-inch layers can also provide a sturdy foundation, avoiding the water trap issue that can sometimes occur with concrete directly at the bottom of the hole.
Visualizing Post Installation Strengths
To better understand the comparative strengths of various post-setting methods and tools, consider the following radar chart. This chart visually represents an opinionated analysis of different approaches based on factors like stability, ease of installation, cost-effectiveness, and suitability for various soil types.
This radar chart illustrates a comparative analysis of fence post installation methods and tool effectiveness across key performance indicators. The larger the area covered by a dataset, the stronger its performance in those categories.
Comparative Analysis of Fence Post Installation Elements
Understanding the interplay between tools, methods, and soil conditions is crucial for an effective fence installation. The following table provides a concise comparison of key elements to consider when planning your post hole digging project.
| Aspect | Description | Considerations/Best Use |
|---|---|---|
| Hole Depth | At least 1/3 to 1/2 of post length, below frost line. | Crucial for stability, especially against frost heave in cold climates. |
| Hole Diameter | Minimum 3 times the post width. | Allows sufficient space for concrete or gravel backfill for maximum stability. |
| Soil Type (Clay/Rocky) | Dense, sticky, or rock-filled ground. | Requires robust tools like digging bars or power augers; may need pre-soaking. |
| Soil Type (Sandy/Loose) | Easily crumbles, prone to collapse. | Challenging for manual diggers due to lack of cohesion; may require reinforcement or specific techniques. |
| Concrete Setting | Posts embedded in concrete for maximum stability. | Ideal for high-stress areas (corners, gates) and long-term durability; requires curing time. |
| Gravel/Soil Setting | Posts surrounded by compacted gravel or mixed soil. | Good for drainage, less permanent than concrete, suitable for less critical posts. |
| Post Levels/String Lines | Tools for ensuring vertical and horizontal alignment. | Essential for a straight, professional-looking fence and preventing leaning. |
| Temporary Bracing | Supports to hold posts plumb during concrete curing. | Prevents shifting and ensures posts remain straight until set. |
Watch and Learn: Digging the Perfect Post Hole
Sometimes, seeing the process in action is the best way to grasp the techniques. The video below provides practical demonstrations and additional tips for digging efficient and effective post holes for your fence.
This video, titled "How to Dig a Perfect Post Hole, Fast (+ Pro tips)," offers invaluable visual guidance and expert advice on efficient post hole digging techniques, including useful tips like using a ratchet strap, that can streamline your project.
Frequently Asked Questions (FAQ)
Conclusion: Building a Lasting Foundation
Digging fence post holes might seem like a simple task, but its execution is fundamental to the overall integrity and appearance of your fence. By meticulously planning the layout, choosing the right tools for your specific soil conditions, adhering to proper depth and diameter requirements, and employing the most suitable setting method, you lay a foundation that will withstand the elements for years to come. Whether you opt for the robust stability of concrete or the reliable drainage of gravel, attention to detail at this stage will prevent future headaches and costly repairs, ensuring your fence stands tall, straight, and strong.
Recommended Further Exploration
- Explore best practices for fence post drainage to prevent rot.
- Learn how to choose the right fence post material for your climate.
- Discover how to troubleshoot common fence post issues and repairs.
- Investigate local building codes and permits for fence installation in your area.