
Unveiling the Secrets to a Mosquito-Free Yard: Your DIY 5-Gallon Bucket Trap Guide!
Discover how a simple bucket can transform your outdoor space by effectively targeting mosquito larvae. This guide is current as of May 10, 2025.
Tired of swatting away pesky mosquitoes every time you step outside? A 5-gallon bucket mosquito trap, often dubbed the "Mosquito Bucket of Doom," is an ingenious, low-cost, and environmentally friendly solution to significantly reduce mosquito populations in your vicinity. This method cleverly targets mosquitoes at their larval stage, preventing them from maturing into biting adults. Let's dive into how you can construct and utilize this effective trap.
Quick Wins: Key Insights into Your DIY Mosquito Trap
- Eco-Friendly & Safe: This trap primarily uses organic materials and a natural larvicide (Bti), making it safe for pets, children, beneficial insects like bees, and other wildlife, unlike chemical sprays.
- Targets the Source: By killing mosquito larvae, the trap interrupts the mosquito breeding cycle, leading to a noticeable reduction in adult mosquitoes over time.
- Cost-Effective & Simple: Building this trap requires minimal materials, often readily available, and is very easy to assemble and maintain.
Understanding the "Mosquito Bucket of Doom"
The Science Behind the Simplicity
The 5-gallon bucket mosquito trap operates on a simple yet effective biological principle. Female mosquitoes are naturally attracted to stagnant water containing decomposing organic matter – it signals an ideal nutrient-rich environment to lay their eggs. The trap mimics these conditions to lure them in. Once the eggs hatch into larvae within the treated water, a biological larvicide, *Bacillus thuringiensis israelensis* (Bti), goes to work. Bti is a naturally occurring soil bacterium that produces toxins specifically lethal to mosquito larvae (and the larvae of some flies like black flies and fungus gnats). When the mosquito larvae ingest Bti, it destroys their digestive system, and they die before they can mature into biting adults. This targeted approach ensures that the mosquito population is curbed at its source without harming the broader ecosystem.
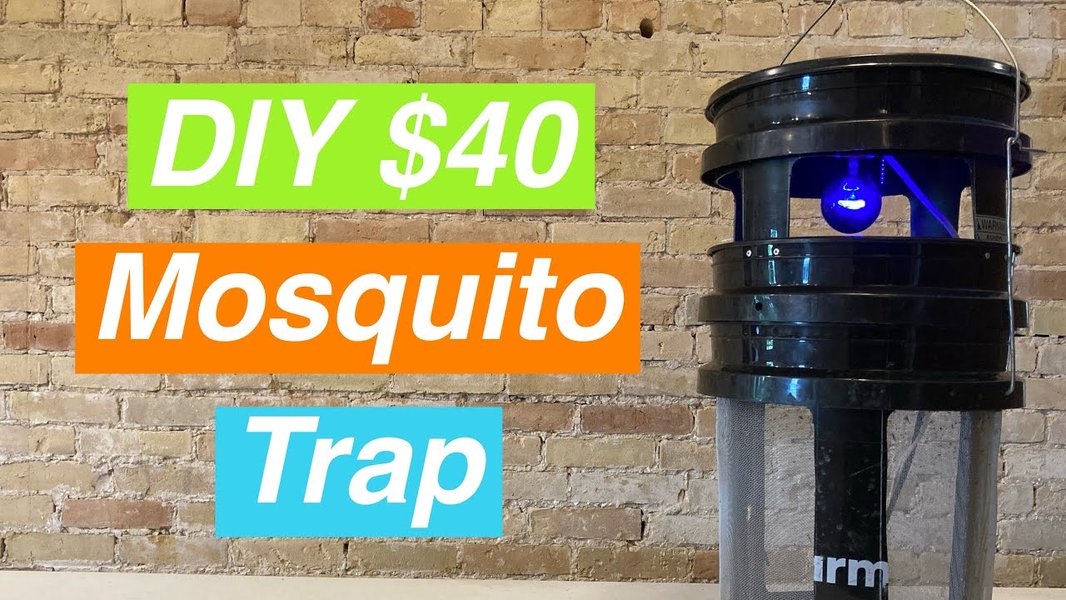
A typical DIY 5-gallon bucket mosquito trap, ready to attract and eliminate larvae.
Gathering Your Supplies: What You'll Need
Before you begin, gather these common items. Most can be found around your home, or at local hardware and garden stores.
- A 5-gallon plastic bucket: Any standard 5-gallon bucket will do. Darker colors might be slightly more attractive to mosquitoes.
- Water: Tap water is perfectly fine. Rainwater can also be used.
- Organic Matter: About 3-4 handfuls of dried grass clippings, hay, straw, or dead leaves. Avoid fresh green material as it decomposes differently.
- Mosquito Dunk or Bti Larvicide: These products contain *Bacillus thuringiensis israelensis* (Bti). A small portion of a dunk (e.g., 1/4 to 1/2) is usually sufficient for one bucket.
- Optional: Drill or Utility Knife: If you want to add drainage holes or modify a lid.
- Optional: Fine Mesh or Chicken Wire: To cover the bucket top, preventing larger animals or excessive debris from falling in while still allowing mosquito access.
- Optional: Stick or Branch: Can be placed inside to provide a surface for larvae or for mosquitoes to land.
Step-by-Step Construction: Building Your Trap
Follow these simple steps to assemble your mosquito-fighting bucket:
Phase 1: Bucket Preparation and Initial Setup
1. Prepare the Bucket
Ensure your 5-gallon bucket is relatively clean. If you're concerned about pets or wildlife, or want to prevent large debris from entering, you can cover the top. Some options include:
- Using a lid with a 1-2 inch hole drilled or cut into it.
- Stretching fine mesh or chicken wire across the top and securing it.
2. Add Organic Matter
Place three to four handfuls of your chosen organic material (hay, straw, grass clippings, or dead leaves) into the bottom of the bucket.
3. Add Water
Fill the bucket about halfway to three-fourths full with water. This provides ample space for mosquitoes to lay eggs and for the organic matter to submerge and decompose.
Phase 2: Activating the Trap
4. Allow Fermentation (The "Brew")
Let the bucket with water and organic matter sit for about 2 to 3 days, or even up to a week. During this time, the organic material will begin to decompose and ferment. This process releases carbon dioxide (CO₂) and other volatile organic compounds that are highly attractive to female mosquitoes searching for a place to lay their eggs. The water will likely become murky and develop a "stew-like" appearance – this is exactly what you want!
5. Introduce the Larvicide
After the fermentation period, add the Mosquito Dunk or Bti product to the water. Typically, 1/4 to 1/2 of a standard Mosquito Dunk is sufficient for a 5-gallon bucket. The Bti will slowly release into the water, targeting any mosquito larvae that hatch from eggs laid in the bucket. Bti is effective for about 30 days.
Phase 3: Placement and Maintenance
6. Strategic Placement
Position your mosquito trap in a shady or semi-shady area of your yard, preferably where you've noticed mosquito activity or near potential breeding spots like dense vegetation. Avoid placing it directly in high-traffic human areas; instead, place it slightly away from patios or decks to draw mosquitoes towards the trap and away from you. Some sources suggest a sunny spot can also work well by warming the water and potentially increasing fermentation speed, but shade helps prevent rapid evaporation.
7. Ongoing Maintenance
Your mosquito bucket trap requires minimal upkeep:
- Water Level: Check the water level periodically, especially during dry weather. If it drops significantly below the halfway mark, top it up with more water. You generally do not need to change the water.
- Bti Replacement: Mosquito Dunks typically remain effective for about 30 days. Add a new piece of a dunk monthly to ensure continuous larval control. Some people take a photo when adding the dunk as a reminder.
- Organic Matter: You can refresh the organic matter every few weeks or as needed if it seems to have fully decomposed, though the existing "stew" often remains attractive for a long time.
Visualizing the Process: Mosquito Trap Mindmap
This mindmap illustrates the core components, process, and outcomes of using a 5-gallon bucket mosquito trap. It provides a clear overview of how this simple device works to control mosquito populations effectively and ecologically.
(Hay, Straw, Leaves, Grass Clippings)"] id1_4["Larvicide (Bti Mosquito Dunk)"] id1_5["Optional: Mesh Cover"] id1_6["Optional: Drainage Holes"] id2["Process Steps"] id2_1["Add Organic Matter & Water to Bucket"] id2_2["Allow Fermentation (2-7 days)"] id2_3["Add Bti Larvicide"] id2_4["Place in Shady/Strategic Location"] id3["Mechanism of Action"] id3_1["Fermenting Organic Matter
Releases CO₂ & Attractants"] id3_2["Female Mosquitoes Attracted
to Lay Eggs"] id3_3["Eggs Hatch into Larvae in Water"] id3_4["Larvae Ingest Bti"] id3_5["Bti Toxins Kill Larvae"] id4["Key Benefits"] id4_1["Eco-Friendly & Non-Toxic"] id4_2["Low Cost & Easy to Make"] id4_3["Targets Larval Stage Effectively"] id4_4["Safe for Pets, Wildlife, & Pollinators"] id4_5["Reduces Local Biting Adult Mosquito Population"] id5["Maintenance Schedule"] id5_1["Monitor & Top Up Water Level"] id5_2["Replace Bti Larvicide Monthly"] id5_3["Refresh Organic Matter Periodically (Optional)"]
This system disrupts the mosquito life cycle by creating an irresistible but lethal nursery for their offspring.
DIY Bucket Trap vs. Other Methods: A Comparative Look
How does the 5-gallon bucket trap stack up against other common mosquito control methods? This chart offers a comparative overview based on several key factors. The DIY Bucket Trap focuses on larval control, which is a proactive approach to reducing mosquito populations. Values are on a scale of 1 (Low/Poor) to 10 (High/Excellent), representing an opinionated analysis for illustrative purposes.
As the chart illustrates, the DIY bucket trap scores highly on eco-friendliness, safety, and low initial cost, while being specifically effective against mosquito larvae. Its maintenance effort is relatively low, mainly involving monthly Bti replacement and occasional water top-ups.
Key Components and Their Roles
Understanding the function of each component can help you optimize your mosquito trap. Here's a breakdown:
| Component | Purpose in the Trap | Important Notes & Tips |
|---|---|---|
| 5-Gallon Bucket | Serves as the main container for the trap, holding the water and organic attractants. | Dark-colored buckets may absorb more heat, potentially speeding up fermentation. Ensure it's placed on a stable surface. |
| Water | Provides the aquatic environment necessary for mosquito eggs to hatch and larvae to develop. | Fill about halfway to three-fourths full. Tap water is fine; rainwater can also be used. |
| Organic Matter (Hay, Straw, Leaves, Grass Clippings) | Decomposes in the water, creating an "infusion" or "stew" that releases CO₂ and volatile organic compounds. | Use dried materials. This fermentation process is what attracts female mosquitoes looking for a place to lay eggs. About 3-4 handfuls are typically sufficient. |
| Fermentation Period (2-7 days) | Allows the organic matter to break down and make the water highly attractive to mosquitoes. | The water will become murky and may have a slight odor, indicating it's ready. Temperature can affect fermentation speed. |
| Bacillus thuringiensis israelensis (Bti) Larvicide (e.g., Mosquito Dunks) | A naturally occurring bacterium that specifically targets and kills mosquito larvae. | Non-toxic to humans, pets, birds, fish, and beneficial insects. Add after the fermentation period. Replace monthly. |
| Optional: Mesh Cover / Drilled Lid | Prevents larger animals (like squirrels or curious pets) and unwanted debris (like excessive leaves) from entering the bucket. | Ensure openings are large enough for mosquitoes to enter (e.g., 1-2 inch holes in a lid, or mesh with appropriate gauge). |
| Optional: Overflow/Drainage Holes | Small holes drilled a few inches below the rim of the bucket. | Prevent the trap from overflowing during heavy rain, which helps keep the Bti solution concentrated and effective. |
Each element plays a crucial role in the trap's success, from attracting the mosquitoes to ensuring the demise of their larvae.
Watch and Learn: Visual Guide to Mosquito Bucket Traps
Sometimes, seeing is believing and learning! This video from Volunteer Gardener provides a clear, concise demonstration of how to create a similar mosquito trap, emphasizing its eco-friendly nature and effectiveness in targeting mosquito larvae. It reinforces the steps and principles discussed, offering a practical visual aid.
The video highlights using common household and garden items to combat mosquitoes without resorting to harmful chemicals, aligning perfectly with the DIY spirit of the 5-gallon bucket trap. It underscores the importance of targeting the larval stage for more effective long-term mosquito control.
Frequently Asked Questions (FAQ)
Is the 5-gallon bucket mosquito trap safe for my pets and children?
Yes, this trap is generally very safe. The primary active ingredient, Bti (Bacillus thuringiensis israelensis), found in Mosquito Dunks, is a naturally occurring bacterium that specifically targets mosquito larvae. It is non-toxic to humans, pets (dogs, cats), birds, fish, and beneficial insects like bees and butterflies. However, it's always a good idea to place the bucket where very curious pets or small children can't easily knock it over or drink from it. Using a mesh cover can add an extra layer of safety.
How many buckets do I need for my yard?
The number of buckets depends on the size of your yard and the severity of your mosquito problem. For an average-sized yard, one to four buckets strategically placed can be effective. If you have a larger property or distinct areas with high mosquito activity (e.g., a wooded section, a damp garden area), you might consider placing a bucket in each of these zones.
Will this trap attract more mosquitoes to my yard?
The trap is designed to attract female mosquitoes that are already in or near your yard and looking for a place to lay eggs. By providing an attractive (but deadly for larvae) breeding site, it intercepts eggs that might otherwise be laid in other standing water sources. Over time, this significantly reduces the local breeding population, leading to fewer adult mosquitoes. It's not creating a new problem but rather managing an existing one more effectively.
What if other animals drink the water from the bucket?
Bti is specific to mosquito, black fly, and fungus gnat larvae. It is not harmful to other animals if they drink the water. However, to prevent wildlife from getting trapped or habitually drinking from it, especially if the water is very stagnant, using a mesh cover (like chicken wire or hardware cloth) over the top of the bucket is a good precaution. This allows mosquitoes in but keeps larger animals out.
When is the best time of year to set up these traps?
It's best to set up your mosquito traps in early spring, or as soon as temperatures consistently stay above 50°F (10°C), which is when mosquitoes typically start becoming active and breeding. Starting early helps to control the first generations of mosquitoes, preventing larger populations from developing as the season progresses.
Recommended Next Steps
Explore these related topics to further enhance your mosquito control efforts and understanding:
- What are the most effective natural mosquito repellents for outdoor spaces?
- How can I identify and eliminate other mosquito breeding sites in my yard?
- Are there specific plants that help repel mosquitoes naturally?
- Understanding the mosquito life cycle for better pest control strategies.
References
This information was synthesized from various reliable sources, including:
Last updated May 10, 2025