
Fluid Properties Lab Manual
A Comprehensive Experimental Guide on Fluid Mechanics
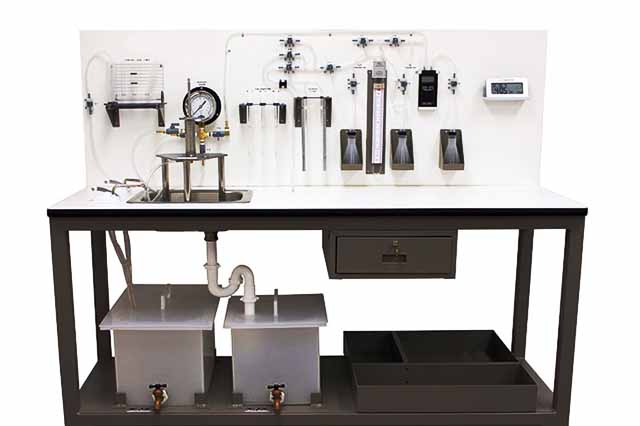
Highlights
- Essential Fluid Characteristics: Understand density, viscosity, surface tension, and capillarity.
- Detailed Experimental Protocols: Step-by-step procedures with clear objectives and safety guidelines.
- Practical Applications: Analyze experimental outcomes with structured discussions and comparative tables.
1. Introduction to Fluid Properties
Fluid mechanics is a foundational branch of science that examines the behavior of fluids – both liquids and gases – under various conditions. The characteristics of fluids define their response to internal and external forces, influencing critical engineering and scientific applications. In this manual, we focus on four primary properties: density, viscosity, surface tension, and capillarity. These properties not only describe the inherent qualities of a fluid but also govern how fluids interact with their environment, design processes, and structures in fields ranging from civil engineering to biochemical analysis.
Density represents the mass of a substance per unit volume and is a key property when designing fluid systems. It provides insights into flotation, mixing, and material compatibility. Viscosity quantifies a fluid’s resistance to flow, which is critical in pipeline transport, lubrication, and even biological processes like blood flow. Surface tension explains the attractive force between fluid particles at the surface and is vital for phenomena such as droplet formation, capillary rise in plants, and many industrial applications. Lastly, capillarity describes the movement of fluid in narrow spaces due to adhesive and cohesive forces, impacting processes like ink flow in pens and water transport in soil.
Throughout this guide, we will explore these fluid properties through carefully designed laboratory experiments. Each experiment is structured to provide clear objectives, detailed procedures, and discussion points that illustrate the relevance of the observed phenomena.
2. Safety Guidelines
Ensuring safety is a paramount aspect of any laboratory work, particularly when handling fluids and chemicals. Below is an exhaustive list of safety guidelines designed to protect all participants during the experiments:
Personal Protective Equipment (PPE)
- Always wear a lab coat, safety goggles, and gloves to protect against chemical splashes and spills.
- Closed-toe footwear is mandatory to prevent accidental exposure to hazardous materials.
Handling and Equipment Precautions
- Familiarize yourself with all equipment and instruments before initiating any experiment.
- Follow the specific handling instructions provided for each fluid—especially corrosive or volatile liquids.
- Keep all workspaces tidy and ensure that all apparatus is properly secured to avoid spills or breakages.
Emergency Procedures
- Report spills, breakages, or accidents immediately to the supervisor or lab coordinator.
- Know the location and proper use of safety equipment such as eyewash stations, fire extinguishers, and first aid kits.
- Do not attempt to fix equipment without proper authorization or adequate training.
Adherence to these safety instructions ensures that experiments are conducted in a secure environment, allowing for an optimal learning and discovery process without compromising personal safety.
3. Experiment 1: Measuring Fluid Density
Objective
The primary goal of this experiment is to determine the density of various liquids by measuring their mass and volume. Understanding fluid density is essential in applications such as buoyancy calculations, material compatibility in mixtures, and quality control in industrial processes.
Materials
- Various liquids (distilled water, oil, ethanol)
- Graduated cylinders or beakers
- Precision balance for accurate mass measurement
- Hydrometer (optional) for specific gravity readings
- Thermometer (to record temperature, as density is temperature-dependent)
- Calculator for computational purposes
Procedure
- Volume Measurement: Pour a measured amount of the chosen fluid into a graduated cylinder. The volume reading should be taken at eye level to minimize parallax errors.
- Mass Determination: Place an empty container on the precision balance and tare it to zero. Then, add the fluid to the same container and record the mass.
-
Calculation of Density: Use the formula:
$$ \text{Density} = \frac{\text{Mass}}{\text{Volume}} $$
Calculate the density using the measured values. - Hydrometer Method (Alternate): If using a hydrometer, gently immerse it in the fluid and record the value indicated. Convert this specific gravity measurement to density if necessary.
- Error Analysis: Evaluate any potential errors in measurement, such as temperature variations or reading inaccuracies, and discuss their impact on the calculated density.
Discussion
Density measurement is a fundamental process in fluid mechanics. Consistent and accurate measurements can be verified by comparing experimental outcomes with known standard values (for example, water has an approximate density of 1 g/cm³ at room temperature). Discuss any discrepancies that might emerge from the two different measuring techniques (direct mass-volume method vs. hydrometer) and analyze the reasons behind such differences.
4. Experiment 2: Observing Viscosity
Objective
The objective of this experiment is to examine the viscosity of selected fluids. Viscosity, defined as the resistance of a fluid to deformation or flow, gives insight into its internal friction. This experiment not only compares viscosities across several liquids but also correlates observational data with theoretical predictions based on known fluid behaviors.
Materials
- Fluids with varying viscosity (water, glycerin, honey)
- Falling Sphere Viscometer or setup with a cylindrical column
- Spherical balls of uniform and differing sizes
- Stopwatch for time measurement
- Ruler or measuring tape to define the distance traveled by the sphere
- Calculator for processing data and computing viscosity coefficients
Procedure
- Preparation: Fill the viscometer with the selected fluid ensuring no air bubbles are present.
- Ball Release: Gently release a spherical ball into the fluid from a predetermined height. Start the stopwatch at the moment of release.
- Time Measurement: Measure the time it takes for the ball to traverse a marked distance within the column. Repeat the trial multiple times for accuracy.
-
Compute Viscosity: Use Stokes' law for a falling sphere in viscous fluid:
$$ \eta = \frac{2}{9} \frac{r^2(\rho_s - \rho_f)g}{v} $$
where:- \( \eta \) is the viscosity
- \( r \) is the radius of the sphere
- \( \rho_s \) is the density of the sphere
- \( \rho_f \) is the density of the fluid
- \( g \) is the acceleration due to gravity
- \( v \) is the terminal velocity (distance/time)
- Repeat With Variations: Experiment with spheres of different radii and use various fluids. Record the terminal velocity and calculate the viscosity for each trial.
- Data Comparison: Compare the viscosity values obtained from the experiments with standard references. Discuss factors such as temperature and fluid composition that could influence viscosity.
Discussion
Viscosity is central to understanding fluid dynamics in many engineering systems. The computed viscosity values offer insights into the fluid's resistance to flow and the energy losses encountered in practical applications like lubrication and fluid transport. A lower viscosity indicates a fluid that flows more easily, whereas a high viscosity fluid such as honey requires more effort to be displaced. By systematically varying parameters like sphere size and fluid type, this experiment underscores the role of internal friction in fluid movement.
5. Experiment 3: Demonstrating Surface Tension
Objective
This experiment is designed to illustrate the phenomenon of surface tension, which is the result of cohesive forces among liquid molecules at an interface. By conducting a simple yet effective test, you will observe how surface tension supports objects that ordinarily should sink and how surfactants can greatly alter this property.
Materials
- Distilled water
- Tensiometer or simple dropper setup
- Paper clip or needle (as a floating object)
- Soap solution or detergent to observe the effect of surfactants
- Glass slides (optional for demonstration of water droplets)
Procedure
- Initial Observation: Place a paper clip gently on the surface of a water-filled shallow tray. Notice that despite its density, the paper clip remains afloat due to the cohesive surface forces.
- Surfactant Effect: Carefully add a drop of soap solution near the paper clip. Observe how the disruption of surface tension causes the paper clip to sink.
- Alternate Setup: Use a tensiometer to quantitatively measure the surface tension of the water before and after the addition of the surfactant.
- Data Recording: Record all observations including the time taken for the disturbance to manifest and any numerical variances in tensiometer readings.
Discussion
Surface tension plays a critical role in various natural phenomena and industrial processes. By studying the effect of surfactants, this experiment highlights real-world applications such as in detergents, emulsions, and medical diagnostics. The experimental results underscore how even small compositions can drastically alter fluid surface properties, providing insights into both molecular interactions and macro-scale outcomes.
6. Experiment 4: Exploring Capillarity
Objective
Capillarity refers to the ability of a fluid to flow in narrow spaces without the assistance of, and often in opposition to, external forces such as gravity. This phenomenon is essential for understanding processes in soil moisture retention, plant physiology, and the design of microfluidic devices.
Materials
- Capillary tubes or narrow glass tubes of various diameters
- Container filled with water (optionally with a contrasting dye)
- Ruler or measuring scale
- Optional: Graph paper for precise measurements
Procedure
- Setup: Fill a container with water. If desired, add a few drops of dye to enhance the visibility of the water column within the tubes.
- Tube Immersion: Insert capillary tubes into the water slowly. Ensure that one end of each tube is immersed in the water.
- Observation and Measurement: Observe how the water rises within the tube due to capillary action. Use a ruler or graph paper to measure the height of the water column inside each tube.
- Vary Tube Diameters: Repeat the experiment with tubes of different diameters to note how capillarity varies with tube size. Generally, water rises higher in thinner tubes.
- Record Observations: Carefully record the height measurements, and graph the relationship between tube diameter and water column height if desired.
Discussion
The capillary rise is directly influenced by the interplay between adhesive forces (between the fluid and the tube wall), cohesive forces (between the fluid molecules), and gravitational pull. This experiment exemplifies how microscopic interactions lead to observable macroscopic outcomes. A discussion on how differences in tube diameter affect theoretical predictions versus the experimental data offers a deeper insight into the capillary phenomenon.
Table: Comparison of Fluid Properties
The table below summarizes the key characteristics measured and discussed through the experiments:
| Property | Measurement Method | Key Observations | Real-World Applications |
|---|---|---|---|
| Density | Mass/Volume, Hydrometer | Variation with temperature and composition | Buoyancy, material separation, mixture design |
| Viscosity | Falling Sphere Viscometer | Time-dependent flow resistance | Lubrication, pipeline design, chemical processing |
| Surface Tension | Dropper Test, Tensiometer | Supports objects on fluid surface; sensitive to surfactants | Detergents, emulsions, droplet formation |
| Capillarity | Observation in Narrow Tubes | Rise height inversely proportional to tube diameter | Soil moisture management, plant water transport, microfluidics |
Conclusion
This manual provides an extensive framework for understanding fluid properties through hands-on experimental investigations. Each experiment is designed to reveal fundamental characteristics such as density, viscosity, surface tension, and capillarity, with specific protocols ensuring consistent and accurate measurements. Comprehensive safety guidelines underpin all procedures, emphasizing protective equipment, proper handling, and emergency protocols to ensure that all lab activities are conducted safely.
Detailed discussions accompanying each experiment elucidate the scientific principles at play. From the quantitative determination of density to the qualitative demonstration of surface tension and capillary action, these laboratory exercises not only reinforce theoretical knowledge but also highlight the practical difficulties and considerations inherent in real-world applications. The included comparison table serves as a valuable tool for synthesizing and contrasting experimental outcomes, thereby cementing the relationship between measurement techniques and fluid mechanics applications.
In summary, this lab manual stands as a comprehensive reference for anyone interested in fluid mechanics. It integrates essential experimental strategies, rigorous safety measures, and clear analysis guidelines, offering an instructive pathway to mastering fundamental fluid properties and their practical implications across various scientific and engineering domains.
References
- CE3502 Lab Manual 2016 Spring - University of Minnesota
- Fluid Mechanics LAB - PCampus
- Lab Manual 2.1 - LEVEL 0 - Measurement of Fluid Properties - Scribd
- Applied Fluid Mechanics Lab Manual - UTA Pressbooks
Recommended Searches

 teachingfluids.wordpress.com
Last updated February 21, 2025