
Unlock Gmail's Secret Weapon: How to Create and Use One-Time Email Addresses
Protect your primary inbox from spam and enhance your online privacy using simple Gmail tricks and tools.
Highlights
- Leverage Gmail's "+" Alias Feature: Instantly create unlimited disposable email variations (e.g., `yourname+temporary@gmail.com`) that deliver to your main inbox, perfect for quick sign-ups.
- Automate Expiration with Google Apps Script: Set up a system where specific email aliases automatically stop forwarding messages after a certain date, offering true temporary functionality.
- Utilize Third-Party Services for Anonymity: Employ external disposable email providers for situations requiring maximum privacy, keeping your Gmail address completely separate.
Why Use One-Time Email Addresses?
In today's digital world, nearly every online service, newsletter, or download requires an email address. While often necessary, sharing your primary email address everywhere can lead to a flood of unwanted spam, marketing emails, and potential privacy risks if data breaches occur. A one-time, temporary, or disposable email address acts as a protective shield for your main inbox.
These addresses are designed for short-term use. You can provide them for website registrations, contest entries, or any situation where you need an email address but don't fully trust the recipient or only need temporary access. This strategy significantly reduces clutter in your primary inbox and minimizes your exposure online. While Gmail doesn't have a single-click "one-time email" button that creates self-destructing addresses, it offers powerful built-in features and integrations that allow you to achieve the same goal effectively.
Method 1: The Gmail "+" Alias Trick
Your Built-In Solution for Disposable Addresses
The simplest and most readily available method involves using Gmail's native aliasing feature, often called the "plus trick." Gmail largely ignores any text added after a plus sign (+) in the username part of your email address, before the "@" symbol. This means you can create countless variations of your email address on the fly.
How It Works
If your primary email address is yourusername@gmail.com, any email sent to addresses like:
yourusername+newsletter@gmail.comyourusername+shopping@gmail.comyourusername+temp123@gmail.comyourusername+projectX@gmail.com
...will all arrive in your main yourusername@gmail.com inbox. The service or website you sign up with sees the full alias (e.g., yourusername+newsletter@gmail.com) as a unique address, but Gmail knows it belongs to you.
Creating and Using Aliases
- Identify the Need: When signing up for a service, newsletter, or temporary account, decide on a relevant keyword to add after the "+". Using the service name or purpose (e.g., `+nytimes`, `+contest`) is a good practice.
- Form the Alias: Simply append `+keyword` to your username. For example, if your email is `jane.doe@gmail.com` and you're signing up for a tech blog, you might use `jane.doe+techblog@gmail.com`.
- Use for Sign-Up: Enter this newly formed alias into the email field on the website or form.
Filtering Alias Emails
The real power of this method comes from filtering. You can automatically manage emails sent to specific aliases:
- Log in to Gmail on your computer.
- Click the gear icon (⚙️) in the top-right corner and select "See all settings."
- Navigate to the "Filters and Blocked Addresses" tab.
- Click "Create a new filter."
- In the "To" field, enter the specific alias you created (e.g.,
jane.doe+techblog@gmail.com). - Click "Create filter."
- Choose actions for emails matching this filter. Common choices include:
- Skip the Inbox (Archive it): Keeps emails out of your main view but searchable.
- Apply the label: Create a new label (e.g., "Disposable" or "Newsletters") to categorize these emails.
- Delete it: Automatically send matching emails to the trash (use with caution).
- Mark as read: Keep them in the inbox but visually less prominent.
- Click "Create filter" again to save your settings.
By setting up filters, you can keep your primary inbox clean and easily identify or dispose of emails associated with a particular alias if it starts receiving spam.
Pros and Cons
- Pros: Extremely easy to use, requires no setup beyond creating filters, integrated directly into Gmail, unlimited aliases.
- Cons: Doesn't truly "expire" – you need to manage emails via filters manually. Some websites might reject email addresses containing a "+", although this is becoming less common.
Method 2: Google Apps Script for Automated Expiration
Adding Time Limits to Your Aliases
For users seeking a more automated "self-destructing" email solution within the Gmail ecosystem, Google Apps Script offers a powerful alternative. This method involves setting up a script that monitors a dedicated Gmail account (or your primary one, though a separate 'burner' account is often recommended for clarity) and processes emails sent to specific aliases based on an embedded expiration date.
Conceptual Overview
The core idea, often detailed in guides like the one from Digital Inspiration, is to create aliases that include a date (e.g., yourburner+MMDDYYYY@gmail.com). The Google Apps Script runs periodically, checks incoming emails, and only forwards emails to your main address if they arrive *before* the date specified in the alias. Emails arriving after the expiration date can be automatically archived or deleted by the script.
Setup Steps (Simplified)
- Create a Dedicated Gmail Account (Optional but Recommended): Set up a new Gmail account (e.g., `myburner.emails@gmail.com`) solely for generating these temporary aliases.
- Access Google Apps Script: Log in to the burner Google account, go to `script.google.com`.
- Obtain and Configure the Script: Find a reliable script designed for this purpose (like the one referenced by Labnol.org). You'll typically need to copy the script code into a new project.
- Modify the Script: Edit the script code to specify your *primary* email address where valid emails should be forwarded. You might also configure other settings like the date format or what happens to expired emails.
- Authorize and Initialize: Run an initialization function within the script editor (e.g., `Initialize`). You will need to grant the script permission to access your Gmail account.
- Set Up Triggers: Configure the script to run automatically (e.g., every 10 minutes or hourly) to check for new emails.
- Create and Use Dated Aliases: When needed, create an alias using the burner account with the expiration date embedded (e.g., `myburner.emails+04302025@gmail.com` for an alias expiring after April 30, 2025). Use this alias for sign-ups.
Pros and Cons
- Pros: Provides true temporary functionality with automated expiration, keeps unwanted emails out of your primary inbox after the expiry date.
- Cons: Requires technical setup and familiarity with Google Apps Script, relies on a script running correctly, potential maintenance if Google updates APIs.
Method 3: Third-Party Disposable Email Services
External Tools for Maximum Anonymity
If you prefer not to use your Gmail account at all, even with aliases, or require a higher degree of anonymity, numerous third-party disposable email address (DEA) services are available. These services provide temporary, often randomly generated, email addresses that self-destruct after a set period (minutes, hours, or days).
How They Work
- Choose a Service: Popular options include Temp Mail (temp-mail.org), EmailOnDeck, 10MinuteMail, Guerrilla Mail, AdGuard Temp Mail, and 1TimeEmail. Many are free and require no registration.
- Generate an Address: Visit the service's website. It will typically provide you with a ready-to-use temporary email address instantly.
- Use the Address: Copy the temporary address and use it for online sign-ups, verifications, or downloads.
- Check the Temporary Inbox: Keep the service's website open in a browser tab. Incoming emails will appear directly on their web interface. You can read messages, click verification links, etc., within the temporary inbox.
- Expiration: The address and its associated emails will usually be automatically deleted after the service's specified time limit (e.g., 10 minutes, 1 hour, 24 hours).
While these services don't directly integrate with Gmail in the same way aliases do, you could manually forward a crucial verification email from the temporary service's inbox to your Gmail if needed for record-keeping, though this partially defeats the purpose of anonymity.
Pros and Cons
- Pros: Offers strong privacy/anonymity as your real email is never shared, truly disposable with automatic deletion, very simple to use (just visit the site).
- Cons: Limited lifespan (might expire before you receive an important email), less control over the address, reliability can vary between services, generally no option to send emails, no integration with your main Gmail workflow.
Comparing the Methods: A Quick Overview
Which Approach Suits You Best?
Choosing the right method depends on your needs for convenience, privacy, and control. The Gmail "+" alias is great for everyday use and organization, the Apps Script method offers automation for true temporary needs tied to your Google account, and third-party services provide maximum anonymity for one-off uses. The chart below compares these methods across key factors.
Note: Ratings (1-10, higher is better/more) are approximate estimations for comparison purposes.
Visualizing the Options
A Mindmap of Disposable Email Strategies with Gmail
To better understand the different paths you can take, here's a mindmap outlining the core methods and their key characteristics for creating and managing one-time or temporary email addresses in conjunction with Gmail.
See It In Action: Setting Up Filters
Visual Guide to Managing Alias Emails
Setting up filters is crucial for managing emails sent to your Gmail "+" aliases effectively. This helps keep your main inbox clean and organizes communications from different sources. Below are visual examples related to setting up disposable or temporary email functionalities.
Step 1: Choosing a method - either a third-party provider or using Gmail's features.

Step 2: Generating or creating the disposable address (either via a service or using the '+' trick).
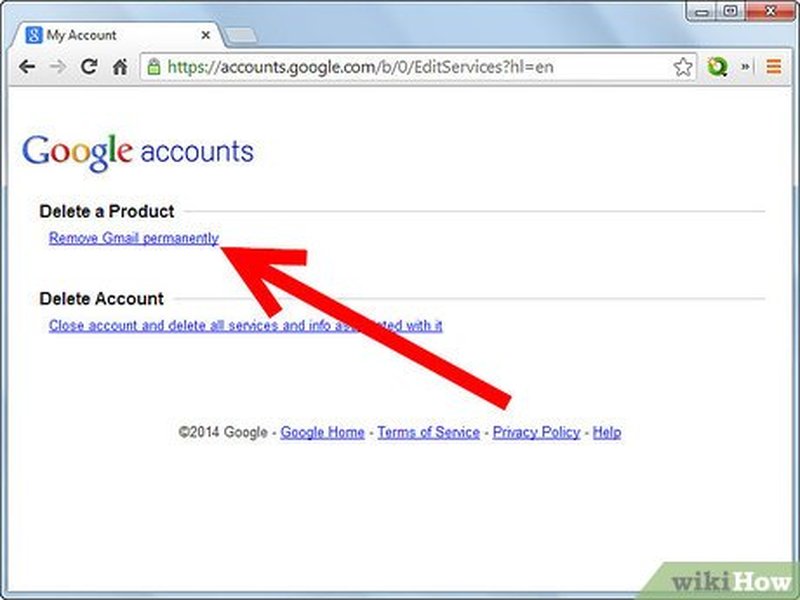
Step 5 (Relevant for '+' trick): Setting up filters in Gmail to manage emails sent to your aliases automatically.
These images illustrate the general process, whether using an external service or managing aliases within Gmail. The key step for the "+" trick is configuring filters (as shown conceptually in the last image) to sort, label, or delete emails sent to your temporary aliases, keeping your primary inbox focused.
Best Practices for Using Disposable Emails
Maximizing Effectiveness and Security
To get the most out of using one-time or temporary email addresses with Gmail, follow these best practices:
| Best Practice | Description | Why it Matters |
|---|---|---|
| Use Unique Aliases | Create a distinct Gmail "+" alias for each website or service you sign up for (e.g., user+serviceA@gmail.com, user+serviceB@gmail.com). |
Makes it easy to identify the source of spam if an alias starts receiving unwanted emails. You can create a filter to delete all future mail from that specific alias. |
| Set Up Filters Immediately | As soon as you use a new "+" alias, create a corresponding filter in Gmail to label, archive, or delete incoming emails to that address. | Prevents clutter in your main inbox and keeps temporary communications organized from the start. |
| Periodically Review Filters/Labels | Occasionally check the emails captured by your filters or assigned to specific labels (e.g., "Disposable"). | Allows you to clean out old, unnecessary emails or adjust filters if needed. |
| Avoid for Critical Accounts | Don't use temporary or easily disposable addresses (especially third-party ones) for important accounts like banking, primary social media, or government services. | You need reliable, long-term access to emails for these services, including password resets and security notifications. Losing access to a temporary address could lock you out. |
| Check Website Compatibility | Be aware that a small number of websites may not accept email addresses containing the "+" symbol. | If a "+" alias is rejected, you might need to use a third-party service or, reluctantly, your primary address (or a secondary, non-burner Gmail account). |
| Use Descriptive Keywords | When creating "+" aliases, use keywords that clearly indicate the purpose or source (e.g., `+amazon`, `+techcrunch_newsletter`). | Helps you remember why you created the alias and makes managing filters easier. |
Understanding Gmail Aliases: Video Explanation
Visual Guide to Disposable Email Addresses in Gmail
This video provides a clear explanation of how Gmail's disposable email address feature (using the "+" trick) works and discusses its practical uses for managing your inbox and enhancing privacy. It covers the core concept of creating aliases and how they function within your main Gmail account.
Watching this can help solidify your understanding of the "+" alias method, demonstrating how simple yet effective it can be for creating temporary email variations without needing external tools or complex setups. It highlights the convenience of having all emails arrive in one place while still being able to differentiate their origin using aliases.
Frequently Asked Questions (FAQ)
Quick Answers to Common Queries
Do Gmail "+" aliases expire automatically?
Can websites block emails with a "+" sign?
Is using the "+" alias method secure?
How many "+" aliases can I create?
Can I send emails *from* a "+" alias?
References
Sources Used for This Information
- How to Create a Disposable Email Address with Gmail - Digital Inspiration
-
How to create a temporary/disposable email using gmail? - Gmail Help
- How to Create a Disposable Email Address with Gmail - GeeksforGeeks
- How to use Disposable Email Address with Gmail to cut down Spam - TechPP
- How to Set Up a Disposable Email Address - wikiHow
- Temp Mail - Disposable Temporary Email - Temp-Mail.org
- Free Temporary Email - EmailOnDeck
Recommended Reading
Explore Further Topics
Last updated April 11, 2025