
Comprehensive Guide to Installing MySQL on Ubuntu
Introduction
MySQL is one of the most popular open-source relational database management systems (RDBMS) used for a wide range of applications, from small-scale projects to large, enterprise-level systems. Installing MySQL on Ubuntu, a widely-used Linux distribution, is a straightforward process that can be accomplished using Ubuntu's package manager, apt. This guide provides a step-by-step approach to installing, securing, and verifying MySQL on your Ubuntu system, ensuring a robust and secure database environment.
Prerequisites
Before proceeding with the installation, ensure that you have the following prerequisites in place:
- Ubuntu System: This guide is tailored for Ubuntu systems. Ensure you are running a supported version of Ubuntu.
- Root or Sudo Access: Administrative privileges are required to install packages and configure system settings.
- Stable Internet Connection: Required to download MySQL packages and dependencies.
Step 1: Update the Package Repository
Before installing any new packages, it's essential to update the local package index to ensure you have access to the latest versions available in the repositories. This helps prevent potential conflicts and ensures compatibility.
Execute the Update Command
Open the terminal and run the following command:
sudo apt updateThis command fetches the updated package lists from the repositories and ensures that you have the latest information about available packages and their dependencies.
Step 2: Install MySQL Server
With the package repository updated, you can proceed to install the MySQL server package using the apt package manager.
Install the MySQL Server Package
Run the following command in the terminal:
sudo apt install mysql-serverThis command downloads and installs the MySQL server along with its dependencies. During the installation process, you may be prompted to confirm the installation and configure certain settings.
Step 3: Secure MySQL Installation
Securing your MySQL installation is crucial to protect your databases from unauthorized access and potential threats. MySQL provides a security script that simplifies this process.
Run the Security Script
Execute the following command:
sudo mysql_secure_installationThis interactive script performs several security-related tasks, including:
- Set a Root Password: Configures a strong password for the MySQL root user, enhancing security.
- Remove Anonymous Users: Eliminates default anonymous accounts that can be exploited.
- Disallow Root Login Remotely: Restricts root user access to the local machine, preventing remote attacks.
- Remove Test Database: Deletes the default test database, reducing potential vulnerabilities.
- Reload Privilege Tables: Applies the changes by reloading the privilege tables.
Follow the on-screen prompts to apply these security measures. It's recommended to answer "yes" to all prompts to ensure a secure MySQL environment.
Step 4: Verify MySQL Installation
After installation and securing, it's important to verify that MySQL is correctly installed and running.
Check MySQL Version
Run the following command to check the installed MySQL version:
mysql --versionYou should see output similar to:
mysql Ver 8.0.XX for Linux on x86_64 (MySQL Community Server - GPL)Check MySQL Service Status
To ensure that the MySQL service is active and running, use the systemd service manager:
sudo systemctl status mysqlThe output should indicate that the service is active (running). If it's not running, you can start it with:
sudo systemctl start mysqlStep 5: Manage the MySQL Service
Managing the MySQL service involves starting, stopping, and enabling it to run at system boot.
Start the MySQL Service
If MySQL is not running, start it using:
sudo systemctl start mysqlEnable MySQL to Start on Boot
To ensure that MySQL starts automatically when the system boots, enable the service with:
sudo systemctl enable mysqlStop the MySQL Service
If you need to stop the MySQL service for any reason, use:
sudo systemctl stop mysqlOptional Steps
Depending on your requirements, you may want to perform additional configurations or installations.
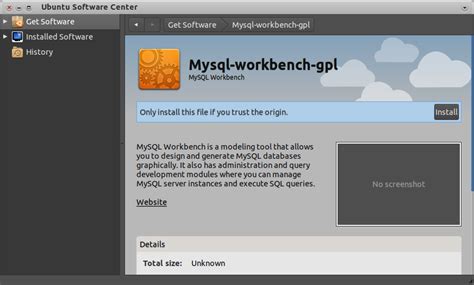
Install MySQL Workbench
MySQL Workbench is a graphical tool for managing MySQL databases. To install it, execute:
sudo apt install mysql-workbenchAfter installation, you can launch MySQL Workbench from the applications menu or by running mysql-workbench in the terminal.
Configure Remote Access (Not Recommended by Default)
If your use case requires remote access to the MySQL server, you can configure it by editing the MySQL configuration file:
sudo nano /etc/mysql/mysql.conf.d/mysqld.cnfLocate the line:
bind-address = 127.0.0.1Change it to:
bind-address = 0.0.0.0Save and exit the editor, then restart the MySQL service:
sudo systemctl restart mysqlNote: Enabling remote access can expose your database to potential security risks. Ensure you have proper firewall rules and security measures in place before doing so.
Troubleshooting
Encountering issues during installation or operation is not uncommon. Here are some common problems and their solutions:
MySQL Service Fails to Start
If the MySQL service fails to start, check the status and logs for more information:
sudo systemctl status mysqlsudo less /var/log/mysql/error.logLook for error messages that can indicate the cause, such as configuration errors or missing dependencies.
Cannot Connect to MySQL Server
If you're unable to connect to the MySQL server, ensure that the service is running and listening on the correct port (default is 3306). You can check active listening ports with:
sudo netstat -tulnp | grep mysqlAlso, verify that your firewall settings allow traffic on the MySQL port.
Forgot MySQL Root Password
If you've forgotten the root password, you can reset it by following these steps:
- Stop the MySQL service:
- Start MySQL in safe mode:
- Log in to MySQL without a password:
- Switch to the MySQL database:
- Update the root password:
- Flush privileges and exit:
- Stop the safe mode process and restart the MySQL service:
sudo systemctl stop mysqlsudo mysqld_safe --skip-grant-tables &mysql -u rootUSE mysql;ALTER USER 'root'@'localhost' IDENTIFIED BY 'YourNewPassword';FLUSH PRIVILEGES;
EXIT;sudo systemctl stop mysql
sudo systemctl start mysqlAfter these steps, you should be able to log in with the new root password.
Additional Resources
For more detailed instructions, advanced configurations, and troubleshooting, refer to the following official and reputable resources:
- MySQL Official Installation Guide for Linux
- Ubuntu Official MySQL Documentation
- DigitalOcean MySQL Installation Tutorial
- MySQL Tutorial: Securing Your Installation
Best Practices
To maintain a secure and efficient MySQL environment, consider the following best practices:
- Regular Backups: Implement a routine backup strategy to prevent data loss.
- Update Regularly: Keep MySQL and your Ubuntu system updated to benefit from security patches and improvements.
- Use Strong Passwords: Ensure all MySQL user accounts have strong, unique passwords.
- Limit User Privileges: Grant users only the permissions they need to perform their tasks.
- Monitor Logs: Regularly review MySQL logs to identify and address potential issues promptly.
- Enable Firewall: Use a firewall to restrict access to the MySQL port, allowing connections only from trusted sources.
Conclusion
Installing MySQL on Ubuntu is a manageable task that sets the foundation for robust database management and application development. By following this comprehensive guide, you ensure that your MySQL installation is not only functional but also secure and optimized for your specific needs. Remember to adhere to best practices and regularly consult official documentation to keep your database environment up-to-date and secure.
Last updated January 3, 2025