
Seamlessly Integrating Your Nest Learning Thermostat (4th Gen)
A Comprehensive Guide to Installation and Smart Home Integration
Key Highlights for Your Nest Thermostat Installation
- App-Guided Setup: The primary and most efficient way to install and configure your Nest Learning Thermostat (4th gen) is through the Google Home app, which provides step-by-step instructions, including compatibility checks and wiring guidance.
- C-Wire Not Always Required: The 4th generation Nest Learning Thermostat features "Power Sharing," often eliminating the need for a common (C) wire in most homes, simplifying the installation process.
- Enhanced Features and Compatibility: This generation boasts a redesigned aesthetic, a larger display, advanced AI for energy savings, and broadened compatibility with HVAC systems, including ventilation, humidifiers, and dehumidifiers, alongside Matter certification for wider smart home integration.
Installing the Google Nest Learning Thermostat (4th generation) is a straightforward process designed for user-friendly setup, typically taking around 40 minutes or less. This guide will walk you through each crucial step, from initial preparation to final configuration, ensuring your new smart thermostat is up and running efficiently. The 4th Gen Nest Learning Thermostat offers significant improvements over its predecessors, including enhanced design, advanced AI features for energy optimization, and expanded compatibility with various HVAC systems.
Understanding Your Nest Learning Thermostat (4th Gen)
What's New and Why It Matters
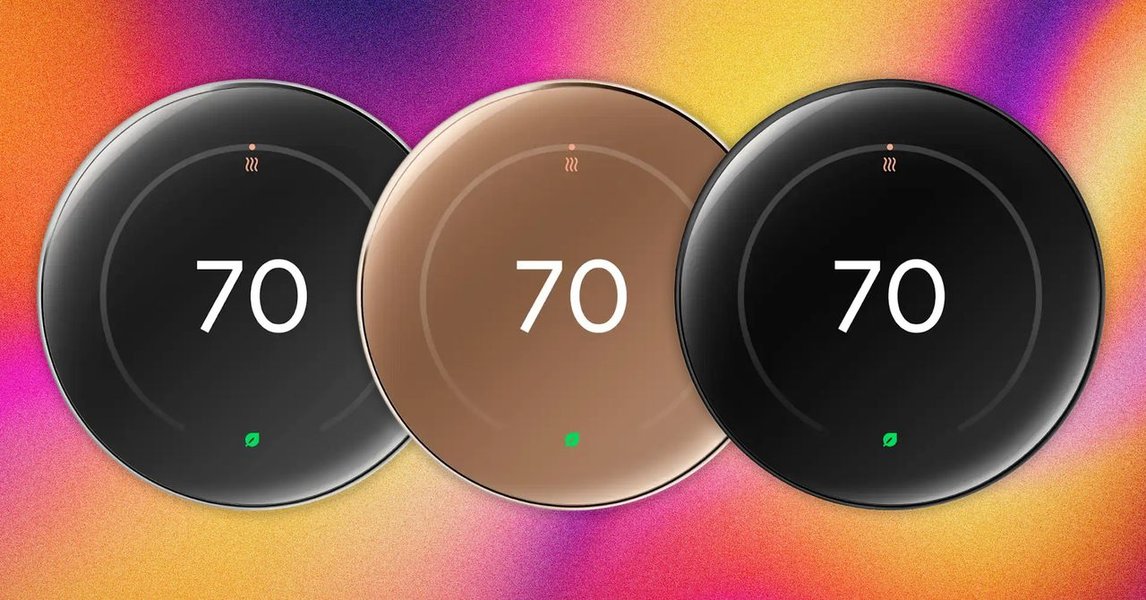
The Nest Learning Thermostat (4th Gen) represents a substantial evolution in smart home climate control. It features a sleek, updated design reminiscent of a modern smartwatch, with a 60% larger crystal LCD display for improved visibility. Beyond aesthetics, this generation is engineered for greater efficiency and broader system compatibility. Key advancements include:
- Advanced AI for Energy Savings: New features like natural heating and cooling, Adaptive Eco, and smart ventilation utilize various data points to optimize energy consumption, potentially saving an average of 13% on heating and 15% on cooling bills.
- Bundled Temperature Sensor: It comes with a Nest Temperature Sensor (2nd gen) right in the box, allowing you to manage hot and cold spots more effectively by prioritizing heating or cooling in specific rooms.
- Matter Certification: Being Matter-certified, this thermostat offers enhanced interoperability, allowing control not only through the Google Home app but also through other Matter-compatible smart home applications.
- Power Sharing Feature: This innovative feature typically eliminates the need for a C-wire in most installations, drawing sufficient power from your existing thermostat wiring. While rare, a C-wire or Nest Power Connector might be necessary for certain HVAC systems to ensure consistent power supply.
This commitment to user-friendly installation and advanced functionality makes the 4th Gen Nest Learning Thermostat a compelling upgrade for many households.
Pre-Installation Checklist and Compatibility
Ensuring a Smooth Setup
Before you begin the physical installation, it's vital to perform a few preparatory steps to ensure compatibility and a hassle-free experience. The Google Home app is your central hub for this process.
Downloading the Google Home App
The first step is to download the Google Home app from either Google Play (for Android) or the Apple App Store (for iOS). All setup and configuration for the Nest Learning Thermostat (4th gen) are exclusively managed through this app. You'll need to sign in with an existing Google account or create a new one.
The sleek design of the Nest Learning Thermostat (4th Gen) complements modern interiors.
Compatibility Check
The Google Home app will guide you through a compatibility check to ensure your existing HVAC system works with the Nest Learning Thermostat (4th gen). This thermostat is designed to work with most 24V systems, including gas, electric, oil, forced air, variable speed, heat pump, and radiant systems. If you have an older or less common system, it's crucial to confirm compatibility through the app or by checking Google's official compatibility checker online.
For systems with stranded wiring, common in older installations, you might need to use wire nuts or Wago connectors to ensure a secure connection to the Nest base. In some cases, such as dual-fuel systems (e.g., heat pump and propane), the app will help you correctly configure the wiring, especially for terminals like * (star) which might have previously been jumpered to W2/AUX on older thermostats.
Step-by-Step Installation Process
From Old to New
Once you've confirmed compatibility and gathered your tools, you can proceed with the physical installation. The process involves turning off power, removing your old thermostat, wiring the Nest base, and attaching the display.
1. Power Down Your System
Before touching any wires, always switch off the power to your heating and cooling system at the circuit breaker. This is a critical safety step to prevent electrical shocks and damage to your system or the new thermostat.
2. Remove Your Old Thermostat and Document Wiring
Carefully remove the cover of your old thermostat. Take a clear picture of the existing wiring connections. This photo will be invaluable for correctly connecting the wires to your new Nest thermostat. Wrap the wires around a pen or pencil to prevent them from falling back into the wall. Make sure to note any special terminals, such as S1 and S2, which are typically for outdoor temperature sensors and are not compatible with Nest thermostats. Similarly, if you have jumper wires between E and AUX terminals, the Nest app will guide you on how to handle these connections, as the 4th Gen handles emergency heat more intelligently.
Watch this official guide for a visual walkthrough of the Nest Learning Thermostat (4th Gen) installation.
This video provides a detailed visual guide to installing and setting up the Nest Learning Thermostat (4th gen), showing you the exact steps and nuances involved. It covers everything from unboxing to the final setup through the Google Home app, which is extremely helpful for visual learners.
3. Install the Nest Base
The Nest Learning Thermostat (4th gen) requires replacing the old mounting plate with its new base. Pull the wires through the center of the Nest base and then attach the base to the wall using the provided screws. It's recommended to use a screwdriver rather than a power drill to avoid overtightening and damaging the base.
The 4th Gen's backplate is redesigned to offer compatibility with new systems, including those for ventilation, humidifiers, and dehumidifiers, making it a more versatile option for comprehensive home climate control.
4. Connect the Wires
Refer to the picture you took of your old thermostat's wiring. Connect the wires to the corresponding terminals on the Nest base. The Google Home app will provide specific, personalized wiring instructions based on your system configuration. The Power Sharing feature means that in most cases, you won't need a C-wire, simplifying the wiring process significantly. If you are replacing an older Nest model (e.g., 3rd gen), while the physical mounting plate needs to be swapped, the wiring process is often similar, making the transition relatively quick.
5. Attach the Display and Restore Power
Once the wiring is secure, attach the Nest display to the base. The 4th Gen Nest Learning Thermostat is designed to automatically turn on once it's attached to the base and power is restored. Go back to your circuit breaker and turn the power back on to your HVAC system.
Initial Setup and Configuration via Google Home App
Bringing Your Smart Thermostat to Life
With the thermostat physically installed and powered on, the final stage involves setting it up and configuring its smart features through the Google Home app.
Adding Your Thermostat to the Google Home App
Open the Google Home app and follow the prompts to add a new device. You will select "Thermostat" and then "Nest Learning Thermostat (4th gen)." The app will guide you through connecting the thermostat to your Wi-Fi network and integrating it with your Google account. You might need to physically touch the thermostat to complete the pairing process.
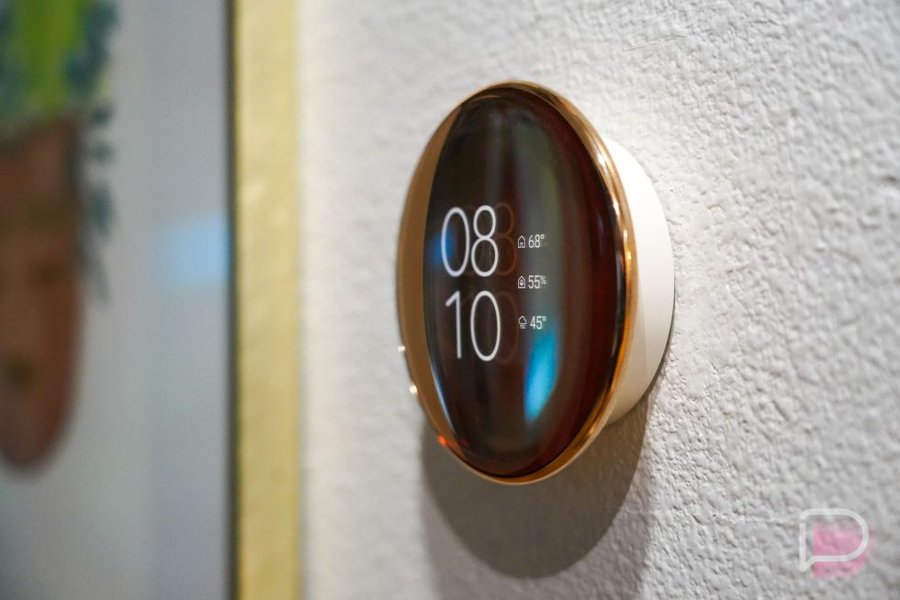
The Nest Learning Thermostat (4th Gen) in its sleek form, ready for smart control.
System Configuration and Learning
The app will then prompt you to configure your HVAC system type (e.g., heat pump with emergency heat, dual-fuel, etc.). This is where the app’s guidance is crucial, especially for complex systems. After initial setup, the Nest Learning Thermostat will begin its "learning" process, adapting to your preferences, schedule, and home's unique heating and cooling patterns to optimize energy usage automatically.
Feature Comparison: Nest Learning Thermostat (4th Gen)
A Look at Key Enhancements
To better understand the value of upgrading or choosing the 4th Gen model, here's a comparison of its key features and capabilities:
| Feature | Nest Learning Thermostat (4th Gen) | Previous Generations (e.g., 3rd Gen) |
|---|---|---|
| Design & Display | Sleeker profile, 60% larger crystal LCD display, almost appears to "float" on the wall. | Classic round design, smaller display. |
| C-Wire Requirement | "Power Sharing" often eliminates C-wire (needed in <1% of cases). | Designed to work without C-wire, but more instances may require it. |
| Included Accessories | Comes with a Nest Temperature Sensor (2nd gen). | Temperature sensor sold separately. |
| Smart Home Integration | Matter-certified, controllable via Google Home app and other Matter-compatible apps. | Primarily Nest app, Google Home app integration (limited for older models). |
| Energy Saving Features | Natural heating and cooling, Adaptive Eco, smart ventilation, more advanced AI learning. | Learning schedules, Home/Away Assist, basic Eco modes. |
| HVAC System Compatibility | Works with most 24V systems including humidifiers, dehumidifiers, and ventilation. | Compatible with most 24V systems, but less comprehensive support for auxiliary systems. |
| Installation Process | Highly app-guided, typically 40 mins or less, new backplate for broader compatibility. | App-guided, but less streamlined for complex systems. |
Performance & Efficiency Analysis
Optimizing Your Home's Climate
The Nest Learning Thermostat (4th Gen) excels in its ability to optimize your home's energy consumption while maintaining comfort. Its advanced algorithms learn your preferences over time, adjusting temperatures proactively to save energy without sacrificing comfort. This learning capability, combined with features like Home/Away Assist (detecting when you're in or out to adjust temperatures), contributes to its proven energy savings.
This radar chart illustrates the perceived strengths of the Nest Learning Thermostat (4th Gen) compared to its older counterparts across several key aspects. The 4th Gen consistently scores higher in areas like ease of installation, energy efficiency (due to more advanced AI), comprehensive smart home integration (Matter certification), and its modern design. While older generations are still competent, the 4th Gen demonstrates Google's commitment to continuous improvement in smart climate control, offering a more refined and feature-rich experience.
Troubleshooting Common Installation Issues
Addressing Potential Hurdles
While the installation process is generally smooth, some common issues can arise:
- Thermostat Not Powering On: If the display doesn't light up after installation and power restoration, first check the circuit breaker again. Then, remove the display and check if the level at the top of the base illuminates, which indicates power is reaching the base. Ensure all wires are securely connected.
- Power Errors: If you experience power errors, it could indicate insufficient power from your HVAC system. In rare cases (less than 1%), a C-wire or a Nest Power Connector might be necessary, even with the Power Sharing feature. You can use Google's compatibility checker to assess if this is needed for your specific setup.
- Stranded Wires: If your home has stranded wiring, which can be difficult to insert into the Nest terminals, consider using wire nuts or Wago connectors to convert them to solid ends for a more secure connection.
- Incompatible Sensors (S1/S2): The Nest Learning Thermostat (4th Gen) does not support external temperature sensors connected via S1 and S2 terminals. These wires should be capped off and not connected to the Nest.
Frequently Asked Questions
Conclusion
The Nest Learning Thermostat (4th Gen) offers a significant upgrade in terms of design, features, and overall user experience. Its intuitive app-guided installation, coupled with innovations like Power Sharing and Matter certification, makes it an accessible and powerful tool for smart home climate control. By following the steps outlined in this guide and leveraging the Google Home app, you can successfully install and configure your new thermostat, unlocking its potential for energy savings and enhanced home comfort.
Recommended Further Exploration
- Explore how the Nest Learning Thermostat (4th Gen) uses advanced AI to optimize energy consumption and reduce utility bills.
- Delve into a detailed comparison of the Nest Learning Thermostat (4th Gen) against competing smart thermostats to understand its unique advantages.
- Learn more about diagnosing and resolving specific power or wiring issues that might arise during or after your Nest 4th Gen installation.
- Discover how to maximize the Matter certification of your Nest 4th Gen thermostat by integrating it with other smart devices in your home.
References
Last updated May 21, 2025