
Unlock Numerical Power: Integrating Octave with Jupyter on Your Linux Mint System
A step-by-step guide to installing GNU Octave and its Jupyter kernel, enabling interactive scientific computing on Linux Mint.
GNU Octave is a powerful open-source high-level language, primarily intended for numerical computations, offering a syntax largely compatible with MATLAB. When combined with Jupyter Notebook or JupyterLab, it provides an interactive environment perfect for developing, documenting, and executing Octave code, complete with rich media outputs. This guide will walk you through the process of installing Octave and its kernel for Jupyter on your Linux Mint distribution.
Highlights: Key Steps to Success
- Install GNU Octave: Ensure Octave is present on your system, preferably a recent version via PPA or standard repositories.
- Set up Jupyter: Install Jupyter Notebook or JupyterLab using Python's package manager, pip.
- Integrate the Octave Kernel: Install and register the
octave_kernelto make Octave available within Jupyter environments.
Preparing Your Linux Mint System: Prerequisites
Before diving into the installation of Octave and its Jupyter kernel, it's crucial to ensure your system is up-to-date and has the necessary build tools and Python components. This helps prevent potential conflicts and ensures a smoother installation process.
Update System Packages
First, open your terminal and refresh your system's package list and upgrade existing software:
sudo apt update
sudo apt upgrade -y
This ensures all base packages are current.
Install Essential Dependencies
Next, install common dependencies that might be required for Octave, Jupyter, and the kernel compilation or operation. These include compilers, Python's package installer (pip), and version control tools.
sudo apt install build-essential g++ gfortran gcc python3-pip python3-venv git -ypython3-pip is particularly important as it will be used to install Jupyter and the Octave kernel.
Step 1: Installing GNU Octave
GNU Octave can be installed from the standard Linux Mint repositories. However, to get a more recent version, using the official Octave PPA (Personal Package Archive) is recommended.
Option A: Install Octave via PPA (Recommended for Newer Versions)
Adding the PPA ensures you get a stable, recent release of Octave.
sudo add-apt-repository ppa:octave/stable
sudo apt update
sudo apt install octave
Option B: Install Octave from Default Repositories
If you prefer not to add a PPA or if the PPA doesn't support your Linux Mint version, you can install Octave directly from the default repositories. This might provide an older version.
sudo apt update
sudo apt install octave
Verify Octave Installation
Once the installation is complete, verify it by checking the Octave version:
octave --versionYou should see output similar to "GNU Octave, version X.X.X", confirming its successful installation.
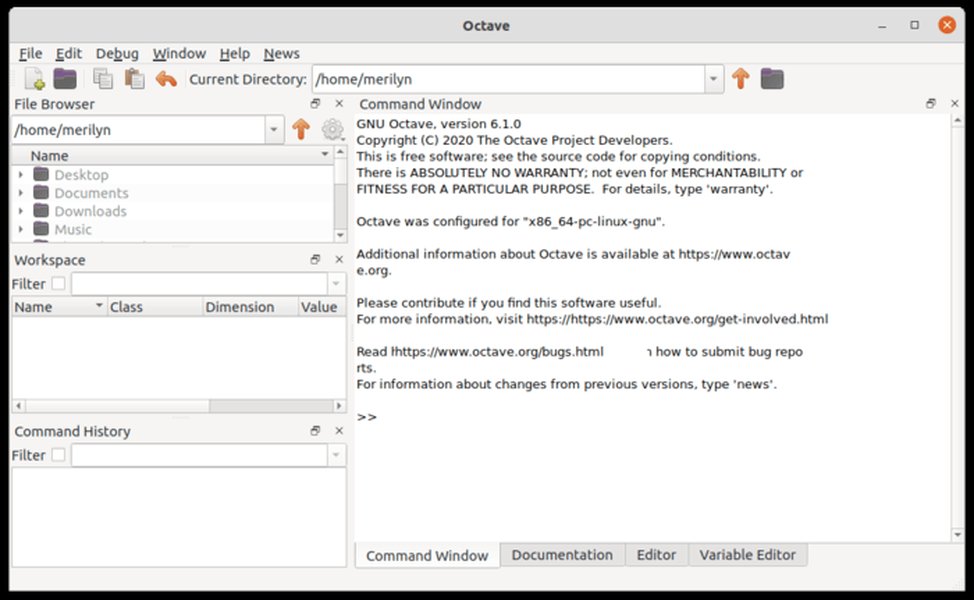
The GNU Octave GUI provides an alternative to the command line.
Step 2: Installing Jupyter Notebook / JupyterLab
Jupyter Notebook and JupyterLab are web-based interactive computing platforms. If you don't have them installed, you can use pip3, the Python package installer.
pip3 install notebook jupyterlabUsing sudo with pip3 (i.e., sudo pip3 install ...) installs packages system-wide. For user-specific installations, you can omit sudo and add ~/.local/bin to your PATH if it's not already there.
Verify Jupyter Installation
You can verify the installation by checking the version or attempting to launch it:
jupyter notebook --version
jupyter lab --version
Or simply run:
jupyter notebookThis should open the Jupyter Notebook interface in your default web browser.
Step 3: Installing and Configuring the Octave Kernel for Jupyter
To use Octave within Jupyter, you need to install the octave_kernel. This package allows Jupyter to communicate with Octave. It's also recommended to install oct2py, which facilitates communication between Python and Octave.
Install the Kernel
Use pip3 to install the necessary packages:
pip3 install octave_kernel oct2pyRegister the Kernel with Jupyter
After installation, you need to make the kernel visible to Jupyter. This is usually done automatically, but it's good practice to explicitly register it for the current user:
python3 -m octave_kernel install --userThis command installs a kernel spec file that Jupyter uses to find and launch the Octave kernel.
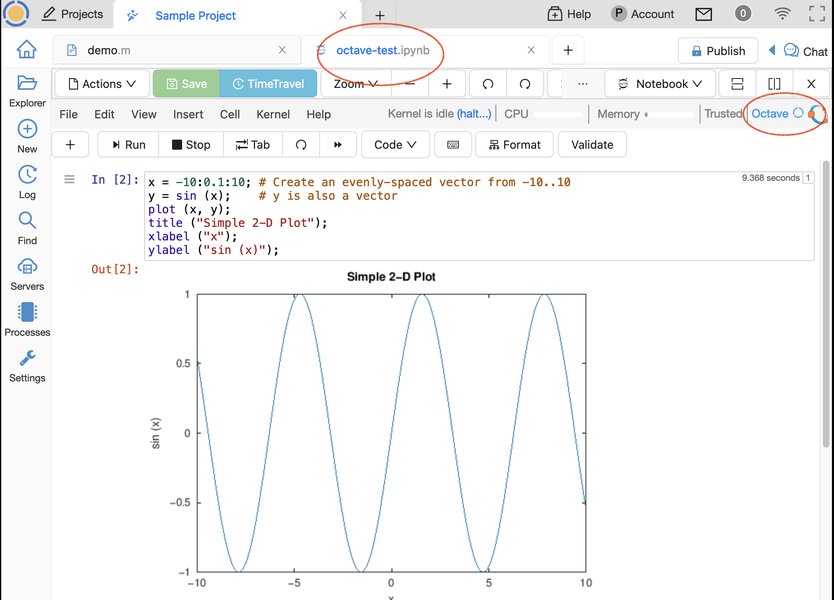
An example of Octave code executed within a Jupyter Notebook environment.
Visualizing Installation Component Factors
The installation process involves several components, each with varying levels of importance for functionality, potential for encountering issues, and time investment. The radar chart below provides a visual representation of these factors for the key stages of setting up Octave with Jupyter on Linux Mint. These are qualitative assessments based on common user experiences.
This chart helps to understand that while kernel installation and configuration might be quicker, they have a higher potential for issues if not done correctly. System preparation, though less time-consuming, is fundamental for a smooth overall process.
Overview of the Installation Process: A Mindmap
To provide a clear visual summary of the entire setup, the mindmap below outlines the main stages and sub-steps involved in getting Octave and its Jupyter kernel running on Linux Mint.
on Linux Mint"] id1["1. Prerequisites"] id1a["Update System Packages:
sudo apt update && sudo apt upgrade -y"]
id1b["Install Essential Dependencies:sudo apt install build-essential g++ ... -y"]
id2["2. Install GNU Octave"]
id2a["Option A: Use PPA (Recommended):sudo add-apt-repository ppa:octave/stablesudo apt updatesudo apt install octave"]
id2b["Option B: Use Default Repositories:sudo apt install octave"]
id2c["Verify Installation:octave --version"]
id3["3. Install Jupyter (Notebook/Lab)"]
id3a["Install using pip:pip3 install notebook jupyterlab"]
id3b["Verify Installation:jupyter notebook --version"]
id4["4. Install Octave Kernel for Jupyter"]
id4a["Install Kernel and oct2py:pip3 install octave_kernel oct2py"]
id4b["Register Kernel with Jupyter:python3 -m octave_kernel install --user"]
id5["5. Launch and Use"]
id5a["Start Jupyter:jupyter notebook or jupyter lab"]
id5b["Create New Notebook:Select 'Octave' from kernel options"] id6["6. Common Troubleshooting"] id6a["Kernel Not Detected in Jupyter"] id6b["Octave Executable Path Issues (
octave-cli vs octave)"]
id6c["Environment Variable: OCTAVE_EXECUTABLE"]
id6d["Octave Package Management within Notebooks"]
This mindmap provides a quick reference to the sequential steps and key commands, helping to navigate the installation journey.
Step 4: Launching Jupyter and Using the Octave Kernel
With all components installed and configured, you can now launch Jupyter and start using Octave.
- Open your terminal and run:
Or, if you prefer JupyterLab:jupyter notebookjupyter lab - This will open the Jupyter interface in your web browser.
- From the Jupyter dashboard, click on "New" (in Jupyter Notebook) or the Launcher (in JupyterLab). You should see "Octave" or "Octave Kernel" listed as an option for creating a new notebook. Select it.
You can now write and execute Octave code directly in the cells of your Jupyter notebook!

The Jupyter Notebook interface showing the option to create a new notebook with the Octave kernel.
Video Guide: Octave in Jupyter
For a visual demonstration of how Octave can be used within Jupyter Notebooks, the following video provides a helpful overview. While not specific to Linux Mint installation, it showcases the end result: an interactive Octave environment in Jupyter.
This video demonstrates using Octave within a Jupyter Notebook environment.
The video illustrates creating new Octave notebooks, executing basic commands, and seeing how Jupyter renders Octave outputs. This can be a great way to confirm your setup is working as expected and to get started with using Octave in this powerful interactive environment.
Troubleshooting Common Issues
Sometimes, you might encounter issues during or after the installation. Here are some common problems and their solutions:
Octave Kernel Not Detected in Jupyter
If "Octave" doesn't appear in the list of available kernels in Jupyter:
- Ensure you've run `python3 -m octave_kernel install --user`.
- Restart the Jupyter Notebook server. Sometimes a full system restart might also help.
- Check if the kernel spec is installed correctly: `jupyter kernelspec list`. You should see `octave` listed.
Octave Executable Path Issues (`octave-cli` vs `octave`)
The Octave kernel typically expects to find `octave-cli` (Octave Command Line Interface). Some older installations or configurations might have the `octave` command pointing to the GUI version, which can cause problems for the kernel.
- The kernel often needs `octave-cli`. You can check which executable is being used by the kernel or if a symlink is needed. The path to `octave-cli` is usually `/usr/bin/octave-cli`.
- If you suspect a symlink issue in `/usr/local/bin`, you might need to correct it. For instance, if an incorrect `octave` link exists:
Adjust `/usr/bin/octave-cli` if your `octave-cli` is located elsewhere (e.g., `/usr/local/bin/octave-cli`). Use `which octave-cli` to find its location.sudo unlink /usr/local/bin/octave sudo ln -s /usr/bin/octave-cli /usr/local/bin/octave
Setting the `OCTAVE_EXECUTABLE` Environment Variable
If the kernel cannot find the Octave executable, you can explicitly tell it where to look by setting the `OCTAVE_EXECUTABLE` environment variable before launching Jupyter:
export OCTAVE_EXECUTABLE=$(which octave-cli)
jupyter notebook
To make this permanent, add the `export` line to your shell's configuration file (e.g., `~/.bashrc` or `~/.zshrc`) and then source it or restart your terminal.
Installing Octave Packages within Jupyter
If you need to use specific Octave packages (e.g., from Octave Forge), you can install them directly within an Octave notebook cell using Octave's package management commands:
pkg install -forge package_nameFor example, to install the 'control' package:
pkg install -forge control
pkg load control
VS Code Jupyter Extension Issues
Users of Visual Studio Code's Jupyter extension have sometimes reported issues with detecting locally installed Octave kernels. If this occurs, one workaround is to run a Jupyter server manually in your terminal (`jupyter notebook` or `jupyter lab`) and then connect to this existing local server from VS Code.
Quick Command Reference Table
Here's a summary table of the key commands used throughout this guide for quick reference:
| Command | Purpose |
|---|---|
sudo apt update && sudo apt upgrade -y |
Update system package lists and upgrade installed packages. |
sudo apt install build-essential ... -y |
Install essential build tools and Python pip. |
sudo add-apt-repository ppa:octave/stable |
Add the official Octave PPA for newer versions. |
sudo apt install octave |
Install GNU Octave. |
octave --version |
Verify Octave installation and check version. |
pip3 install notebook jupyterlab |
Install Jupyter Notebook and JupyterLab. |
pip3 install octave_kernel oct2py |
Install the Octave kernel for Jupyter and `oct2py`. |
python3 -m octave_kernel install --user |
Register the Octave kernel with Jupyter for the current user. |
jupyter notebook or jupyter lab |
Launch Jupyter Notebook or JupyterLab. |
export OCTAVE_EXECUTABLE=$(which octave-cli) |
Set environment variable for Octave executable (if needed). |
Frequently Asked Questions (FAQ)
Recommended Further Exploration
To deepen your understanding and explore related topics, consider these queries:
- What are some advanced Octave programming techniques for data analysis?
- How can I create interactive plots using Octave within a Jupyter Notebook?
- What are the key differences and similarities when comparing Octave and Python for scientific computing?
- What are some best practices for managing Octave projects and software environments?
References
This guide was synthesized from information found in the following resources:
 abdallahshamy.wordpress.com
Last updated May 10, 2025