
Comprehensive Guide to Setting Up a Mirrored Hard Disk in Windows 11
Ensure data redundancy by mirroring your C: drive to D: drive with ease
Key Takeaways
- Data Redundancy: Mirroring ensures that all your important files on C: are automatically duplicated on D:, providing a safety net against drive failures.
- System Requirements: Proper preparation, including having two compatible drives and backing up existing data, is crucial for a successful mirroring setup.
- Configuration Steps: Utilizing Windows 11's built-in tools like Disk Management or Storage Spaces simplifies the mirroring process without the need for additional software.
Introduction to Disk Mirroring in Windows 11
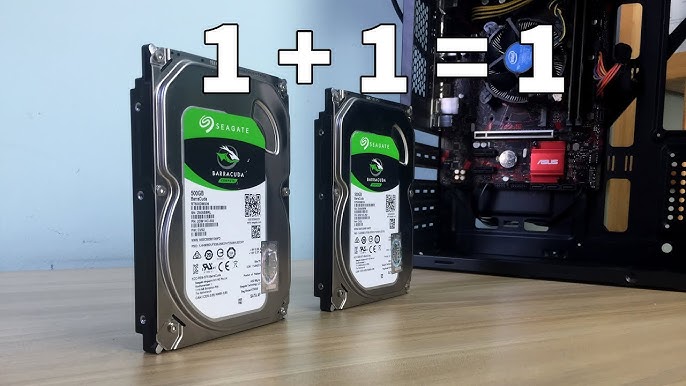
Disk mirroring in Windows 11 is a process that creates an exact copy of a disk (such as the system drive C:) onto another disk (like D:). This setup, commonly known as RAID 1, offers real-time duplication of data, ensuring that if one drive fails, the mirrored drive retains all your files without loss. This guide will walk you through the detailed steps to set up disk mirroring using both Disk Management and Storage Spaces, addressing pre-requisites, step-by-step instructions, verification methods, and additional considerations to optimize your mirrored setup.
Pre-Requisites for Setting Up Disk Mirroring
Ensure Compatibility and Data Safety
Before initiating the mirroring process, it's essential to prepare your system to prevent data loss and ensure compatibility. Follow these pre-requisites meticulously:
- Compatible Drives: Ensure that both the primary (C:) and secondary (D:) drives are of the same size or that the secondary drive is equal to or larger than the primary. This ensures that all data can be adequately mirrored without space constraints.
- Backup Important Data: Disk mirroring operations often involve formatting the secondary drive, which will erase all existing data. Backup any important files on both C: and D: drives to an external storage medium or cloud service.
- System Requirements: Disk mirroring is supported in Windows 11 Pro, Enterprise, and higher editions. Windows 11 Home does not support built-in mirroring features.
- Administrative Privileges: Ensure you have administrative rights on the system, as configuring disk settings requires elevated permissions.
- Drive Health: Verify that both drives are in good health. Use Windows’ built-in tools or third-party software to check for any existing issues that might complicate the mirroring process.
Method 1: Using Disk Management
Step-by-Step Guide to Creating a Mirrored Volume
Disk Management is a built-in Windows utility that allows users to manage disk drives and partitions. Here's how to set up a mirrored volume using Disk Management:
Step 1: Open Disk Management
Option 1: Press Win + X and select Disk Management from the menu.
Option 2: Press Win + R, type diskmgmt.msc, and press Enter.
Step 2: Prepare the Secondary Drive (D:)
- Ensure that the D: drive is unallocated. If it contains data or partitions, right-click on the D: volume and select Delete Volume. Confirm the action to make the space unallocated.
- Right-click on the D: drive and select Delete Volume if necessary. This step is crucial as mirroring requires an empty target drive.
Step 3: Convert Both Drives to Dynamic Disks
- In Disk Management, right-click on the C: drive and select Convert to Dynamic Disk.
- Repeat the process for the D: drive by right-clicking and selecting Convert to Dynamic Disk.
- Follow the on-screen prompts to complete the conversion. This process allows Windows to create volumes that can be mirrored.
Step 4: Create the Mirrored Volume
- Right-click on the C: drive partition and select Add Mirror.
- In the dialog box that appears, choose the D: drive as the mirror location.
- Click Add Mirror to confirm. Windows will initiate the mirroring process, which may take some time based on the size and speed of the drives.
Step 5: Assign Drive Letter and Format
- Once the mirrored volume is created, Windows will handle the formatting automatically. Ensure that the file system (e.g., NTFS) matches between both drives.
- The D: drive may receive a new drive letter if necessary, but it should mirror the C: drive seamlessly.
Step 6: Synchronize Data
- Windows will begin synchronizing data from the C: drive to the D: drive. Monitor the synchronization progress in Disk Management.
- Wait until the status changes from "Resynching" to "Healthy (Mirror)" indicating successful completion.
Step 7: Verification
- Create or edit a test file on the C: drive.
- Check the D: drive to ensure that the test file appears automatically, confirming that mirroring is functioning correctly.
Method 2: Using Storage Spaces
Creating a Mirrored Storage Space for Enhanced Redundancy
Storage Spaces is a Windows feature that allows users to group multiple drives into a single storage pool with redundancy options. Here's how to set up a mirrored storage space:
Step 1: Backup Your Data
Before configuring Storage Spaces, ensure all important data on both the C: and D: drives is backed up. The process may involve formatting the D: drive, leading to potential data loss.
Step 2: Open Storage Spaces
- Press
Windows + S, type Storage Spaces, and select Manage Storage Spaces from the search results.
Step 3: Create a New Storage Pool
- In the Storage Spaces window, click on Create a new pool and storage space.
- Select the C: and D: drives to include in the pool and click Create pool.
Step 4: Configure the Storage Space
- Provide a name for the storage space, such as "Mirrored Drive."
- Assign a drive letter (e.g., E:) to the new storage space.
- Select the Two-way mirror as the resiliency type to ensure data duplication across both drives.
- Set the size of the storage space, ensuring it fits within the combined capacity of the drives.
- Click Create storage space to finalize the configuration.
Step 5: Move Files to the Mirrored Storage Space
- Transfer your files from the C: drive to the newly created storage space (e.g., E:). This ensures that any new changes are mirrored across both drives.
Step 6: Verify the Mirroring
- Create or edit a file within the storage space and verify that the changes are automatically reflected on both the C: and D: drives.
- Ensure that the status in Storage Spaces indicates a healthy mirror.
Comparison: Disk Management vs. Storage Spaces
Choosing between Disk Management and Storage Spaces depends on your specific needs and system configuration. Below is a comparison to help you decide:
| Feature | Disk Management | Storage Spaces |
|---|---|---|
| Ease of Use | Straightforward for basic mirroring tasks. | More user-friendly with additional redundancy options. |
| Flexibility | Limited to simple RAID configurations. | Supports complex configurations like multi-way mirroring and parity. |
| Management | Managed through Disk Management utility. | Managed through the Storage Spaces interface with better monitoring tools. |
| Performance | May offer better performance for simple mirroring. | Performance can vary based on the complexity of the storage pool. |
| Compatibility | Available in all Windows 11 editions that support dynamic disks. | Best suited for Windows 11 Pro and higher editions. |
Additional Considerations for Effective Mirroring
System Performance Impact
While disk mirroring enhances data redundancy, it can slightly reduce system performance as every write operation is duplicated across both drives. It's recommended to use high-performance drives to mitigate any noticeable impact.
Fault Tolerance and Recovery
Mirroring provides fault tolerance by ensuring data remains accessible even if one drive fails. Windows will notify you of any drive failures, allowing you to replace the faulty drive promptly without data loss.
Data Security Beyond Mirroring
While mirroring protects against hardware failures, it doesn't safeguard against accidental deletions, malware, or ransomware attacks. Implementing regular backups to external devices or cloud storage services is essential for comprehensive data security.
Monitoring and Maintenance
Regularly monitor the status of your mirrored drives using Disk Management or Storage Spaces. Ensure that both drives are functioning correctly and that synchronization processes are completing without errors.
Expanding Storage Capacity
If you plan to expand your storage capacity in the future, Storage Spaces offers more flexibility. You can add more drives to the storage pool and adjust redundancy settings without significant reconfiguration.
Troubleshooting Common Issues
Synchronization Failures
If the mirrored drives fail to synchronize:
- Ensure both drives are properly connected and recognized by the system.
- Check for drive errors using Windows' built-in error-checking tools.
- Verify that both drives are set as dynamic disks.
- Restart the computer to reset the mirroring process.
Performance Degradation
Experiencing slower system performance after setting up mirroring:
- Ensure that both drives are functioning optimally without errors.
- Consider using SSDs for faster read/write operations.
- Limit the number of simultaneous operations to reduce the strain on the drives.
Drive Failure Notifications
If Windows notifies you of a drive failure:
-
Immediately replace the faulty drive with a new one of equal or greater capacity.
-
Re-establish the mirroring setup using Disk Management or Storage Spaces.
-
Restore data from the healthy mirrored drive if necessary.
Best Practices for Disk Mirroring
Regular Backups
Mirroring is a form of redundancy, not a substitute for backups. Regularly back up your data to external drives or cloud storage to protect against data corruption, accidental deletions, or ransomware attacks.
Use High-Quality Drives
Invest in reliable, high-performance drives to ensure the longevity and efficiency of your mirrored setup. Enterprise-grade SSDs or HDDs can offer better performance and durability.
Keep Firmware Updated
Regularly update the firmware of your drives and ensure that your system's BIOS/UEFI is up to date. This can prevent compatibility issues and improve performance.
Monitor System Alerts
Pay attention to system notifications related to drive health. Promptly address any warnings about potential failures to maintain data integrity.
Optimize Power Settings
Ensure that your system's power settings are optimized to prevent drives from entering low-power states that might disrupt the mirroring process.
Recap and Conclusion
Setting up a mirrored hard disk in Windows 11 is an effective way to safeguard your data against drive failures. By following the detailed steps outlined in this guide, you can establish a reliable RAID 1 configuration using either Disk Management or Storage Spaces. Remember to prepare adequately by ensuring compatibility, backing up existing data, and maintaining regular monitoring and maintenance of your mirrored drives. While mirroring enhances data redundancy, complementing it with regular backups will provide comprehensive protection for your valuable files.
References
Last updated January 23, 2025