
Comprehensive Guide to Setting Up an NVIDIA GPU for AI Processing
Maximize your AI performance with a properly configured NVIDIA GPU.
Key Takeaways
- Ensure Hardware Compatibility: Verify that your NVIDIA GPU supports CUDA and meets the power and cooling requirements for AI workloads.
- Install Essential Software: Properly install NVIDIA drivers, CUDA Toolkit, and cuDNN to enable GPU acceleration.
- Set Up and Optimize Deep Learning Frameworks: Install frameworks like TensorFlow or PyTorch with GPU support and optimize their configurations for best performance.
1. Verify Hardware Compatibility
Ensure Your System Meets the Requirements
Before setting up your NVIDIA GPU for AI processing, it's crucial to confirm that your hardware is compatible and capable of handling AI workloads efficiently. Follow these steps:
a. Check GPU Compatibility
Ensure that your NVIDIA GPU supports CUDA, NVIDIA’s parallel computing platform essential for AI applications. Popular GPUs for AI include the GeForce RTX 4090, RTX 5090, and others listed on the NVIDIA CUDA GPUs list.
b. Verify System Requirements
- Power Supply: Confirm that your power supply unit (PSU) can handle the power requirements of your NVIDIA GPU. High-end GPUs may require PSUs with 750W or higher capacity.
- Cooling Solutions: Adequate cooling is essential to maintain GPU performance and longevity. Ensure your system has sufficient airflow and consider additional cooling solutions if necessary.
- PCIe Slots: Verify that your motherboard has the appropriate PCIe slots to accommodate your GPU. Most modern GPUs require at least a PCIe 3.0 x16 slot.
c. Physical Space
Ensure that your computer case has enough physical space to fit the GPU, particularly if you are upgrading an existing system. Measure the available space and compare it with the GPU's dimensions provided by the manufacturer.
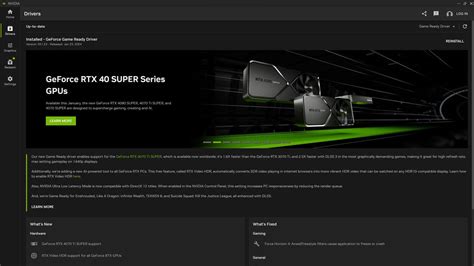
2. Install NVIDIA GPU Drivers
Acquire and Install the Latest Drivers
a. Identify Your GPU Model
Identify the specific model of your NVIDIA GPU to download the correct driver. Visit the NVIDIA Driver Download page to select your GPU model and operating system.
b. Download and Install the Driver
- Download: Select and download the latest driver compatible with your GPU and operating system.
- Installation: Run the downloaded installer and follow the on-screen instructions. It's recommended to perform a clean installation to remove any previous driver versions.
- Reboot: Restart your computer to finalize the driver installation process.
c. Verify Driver Installation
After installation, verify that the driver is correctly installed by running the nvidia-smi command in the command line or terminal. This command displays detailed information about your GPU, including driver version and GPU usage, confirming that the driver is functioning properly.
nvidia-smi3. Install the CUDA Toolkit
Set Up NVIDIA's Parallel Computing Platform
a. Download the CUDA Toolkit
Visit the NVIDIA CUDA Toolkit page and download the version compatible with your GPU and operating system. It’s advisable to choose the latest stable release unless a specific version is required for compatibility with certain AI frameworks.
b. Install CUDA Toolkit
- Run the Installer: Execute the downloaded CUDA Toolkit installer.
- Select Components: During installation, you can choose to install additional components such as samples, drivers, and tools. If you have already installed the NVIDIA drivers separately, you may opt to exclude them to avoid conflicts.
- Follow Installation Prompts: Proceed with the installation by following the on-screen instructions. Accept the license agreements and specify the installation paths if necessary.
c. Set Environment Variables
After installation, set the CUDA paths to your system’s environment variables to ensure that CUDA tools are accessible from the command line.
- On Windows: Add
C:\Program Files\NVIDIA GPU Computing Toolkit\CUDA\vXX.X\binto yourPATHenvironment variable, wherevXX.Xcorresponds to the installed CUDA version. - On Linux: Add the following lines to your
.bashrcor.zshrcfile:
Replaceexport PATH=/usr/local/cuda-XX.X/bin:$PATH export LD_LIBRARY_PATH=/usr/local/cuda-XX.X/lib64:$LD_LIBRARY_PATHXX.Xwith your CUDA version.
4. Install cuDNN (CUDA Deep Neural Network Library)
Enhance Deep Learning Capabilities
a. Download cuDNN
Visit the NVIDIA cuDNN page to download the version of cuDNN that matches your installed CUDA Toolkit version. You may need to create a free NVIDIA Developer account to access the download links.
b. Install cuDNN
- Extract the Archive: Unzip the downloaded cuDNN archive.
- Copy cuDNN Files:
- On Windows: Copy the cuDNN files to
C:\Program Files\NVIDIA GPU Computing Toolkit\CUDA\vXX.X, ensuring they are placed in the appropriate subdirectories such asbin,lib, andinclude. - On Linux: Copy the cuDNN files to
/usr/local/cuda-XX.X, maintaining the directory structure forbin,lib, andinclude.
- On Windows: Copy the cuDNN files to
- Set Permissions (Linux Only): Ensure that the copied files have the correct permissions. You can set the necessary permissions using:
sudo chmod a+r /usr/local/cuda-XX.X/lib64/libcudnn* - Verify Installation: After copying, verify that cuDNN is correctly installed by checking the presence of cuDNN header files in the
includedirectory and the library files in thelibdirectory.
5. Set Up a Deep Learning Framework
Install AI Frameworks for GPU Acceleration
Select and install a deep learning framework that leverages CUDA and cuDNN for GPU acceleration. Popular choices include TensorFlow, PyTorch, and Keras.
a. TensorFlow Installation
To install TensorFlow with GPU support, execute the following command:
pip install tensorflowEnsure that the TensorFlow version matches your CUDA and cuDNN versions for compatibility. Refer to the TensorFlow GPU support guide for detailed version compatibility information.
b. PyTorch Installation
To install PyTorch with CUDA support, use the following command, replacing cu118 with the appropriate CUDA version:
pip install torch torchvision torchaudio --index-url https://download.pytorch.org/whl/cu118Refer to the PyTorch compatibility table to ensure you are installing the correctly matched versions.
c. Keras Installation
Keras is often used as a high-level API for TensorFlow. You can install it using:
pip install kerasAfter installation, verify the framework is correctly utilizing the GPU by running simple test scripts.
6. Configure Virtual Environments (Optional)
Isolate Dependencies for Projects
Using virtual environments can help manage dependencies and prevent conflicts between different projects. Tools like conda or virtualenv are recommended for creating isolated Python environments.
a. Using Conda
To create and activate a new Conda environment:
conda create -n ai-gpu python=3.8
conda activate ai-gpu
Within the activated environment, install the necessary AI frameworks and dependencies:
pip install tensorflow
pip install torch torchvision torchaudio --index-url https://download.pytorch.org/whl/cu118
b. Using Virtualenv
To create and activate a new virtual environment using virtualenv:
python -m venv ai-gpu-env
source ai-gpu-env/bin/activate  <!-- On Windows: ai-gpu-env\Scripts\activate -->
Within the activated environment, install the necessary AI frameworks and dependencies:
pip install tensorflow
pip install torch torchvision torchaudio --index-url https://download.pytorch.org/whl/cu118
7. Optimize GPU Settings
Enhance Performance for AI Workloads
a. NVIDIA Control Panel Configuration
Adjust the GPU settings to prioritize performance over visual quality. Open the NVIDIA Control Panel and navigate to Manage 3D Settings to make the following adjustments:
- Power Management Mode: Set to
Prefer maximum performance. - Texture Filtering - Quality: Set to
High performance.
b. Monitor GPU Usage
Use the nvidia-smi tool to monitor GPU memory usage, temperature, and utilization in real-time. This helps in identifying performance bottlenecks and ensuring that the GPU is being used efficiently during AI tasks.
nvidia-smic. Optimize Memory Usage
For large AI models, optimizing GPU memory usage can improve performance. Techniques include:
- Mixed Precision Training: Utilize half-precision (FP16) computations to reduce memory consumption and increase processing speed without significantly impacting model accuracy.
- Model Quantization: Convert model weights from floating-point to lower precision (e.g., INT8) to decrease memory usage and speed up inference.
d. Manage Multiple GPUs
If your system is equipped with multiple NVIDIA GPUs, you can distribute AI workloads across them to enhance performance. Most deep learning frameworks provide utilities to manage multi-GPU setups:
- TensorFlow: Use
tf.distribute.MirroredStrategyfor synchronous training across multiple GPUs. - PyTorch: Utilize
torch.nn.DataParallelortorch.nn.parallel.DistributedDataParallelfor parallel training.
8. Test Your Setup
Validate GPU Acceleration
After completing the installation and configuration steps, it's essential to test your setup to ensure that your NVIDIA GPU is properly configured for AI processing.
a. TensorFlow Test
Create a simple TensorFlow script to check GPU availability:
import tensorflow as tf
print("Num GPUs Available: ", len(tf.config.list_physical_devices('GPU')))
Run the script. If the output indicates available GPUs, TensorFlow successfully detects and utilizes the GPU.
b. PyTorch Test
Create a simple PyTorch script to verify CUDA availability:
import torch
print("CUDA Available: ", torch.cuda.is_available())
print("GPU Device Name: ", torch.cuda.get_device_name(0))
Execute the script. A true value for CUDA availability and the correct GPU device name confirm that PyTorch can leverage the GPU.
c. Keras Test
Create a simple Keras script to verify GPU usage:
from tensorflow import keras
print("Num GPUs Available: ", len(tf.config.list_physical_devices('GPU')))
Run the script to ensure that Keras recognizes the GPU.
d. Comprehensive Verification Table
The following table summarizes the test commands and expected outputs for verifying GPU setup across different frameworks:
| Framework | Test Command | Expected Output |
|---|---|---|
| TensorFlow | print("Num GPUs Available: ", len(tf.config.list_physical_devices('GPU'))) |
Num GPUs Available: 1 |
| PyTorch | print(torch.cuda.is_available()) |
True GeForce RTX 4090 |
| Keras | print("Num GPUs Available: ", len(tf.config.list_physical_devices('GPU'))) |
Num GPUs Available: 1 |
9. Troubleshooting Common Issues
Resolve Potential Setup Problems
a. GPU Not Recognized by Frameworks
If your AI framework does not recognize the GPU, consider the following solutions:
- Check Driver Installation: Ensure that the NVIDIA drivers are correctly installed and updated to the latest version.
- Verify CUDA and cuDNN Versions: Confirm that the installed CUDA Toolkit and cuDNN versions are compatible with your AI framework.
- Environment Variables: Ensure that the CUDA paths are correctly set in your system’s environment variables.
- Reinstall Frameworks: Sometimes, reinstalling the AI frameworks within your virtual environment can resolve recognition issues.
b. Installation Errors
During the installation of CUDA Toolkit or cuDNN, you might encounter errors. Here are common solutions:
- Run as Administrator: On Windows, run the installer as an administrator to avoid permission issues.
- Check Compatibility: Ensure that you are installing versions of CUDA and cuDNN that are compatible with each other and with your AI frameworks.
- Disable Antivirus: Temporarily disable antivirus software that might interfere with the installation process.
- Consult Logs: Review installation logs for specific error messages and seek solutions based on those errors.
c. Performance Issues
If you experience suboptimal performance, consider the following:
- Update Drivers and Software: Ensure all drivers and software components are up to date.
- Optimize Model and Data: Adjust batch sizes, use data loaders efficiently, and optimize model architectures.
- Monitor Resource Usage: Use tools like
nvidia-smiand framework-specific profilers to identify bottlenecks.
d. CUDA Not Found
If you receive errors indicating that CUDA is not found, verify that:
- The CUDA Toolkit is correctly installed and the
PATHenvironment variable includes the CUDAbindirectory. - On Linux, the
LD_LIBRARY_PATHincludes the CUDAlib64directory. - Restart your terminal or system after setting environment variables.
10. Additional Tools and Resources
Enhance Your AI Development Workflow
a. NVIDIA AI Workbench
Explore the NVIDIA AI Workbench for streamlined AI development. It offers integrated tools for managing projects, training models, and monitoring GPU performance.
b. GPU Profilers
Utilize profiling tools to analyze and optimize your AI models:
- TensorBoard: Built-in TensorFlow tool for visualizing model performance and GPU utilization.
- PyTorch Profiler: Tool for profiling PyTorch models to identify bottlenecks.
- NVIDIA Nsight: Suite of performance analysis and debugging tools for NVIDIA GPUs.
c. Regular Updates
Keep your GPU drivers, CUDA Toolkit, cuDNN, and AI frameworks up to date to benefit from the latest performance improvements, bug fixes, and features.
d. Community and Support
Leverage the vast community resources and official documentation for troubleshooting and optimization tips:
- NVIDIA CUDA Python Documentation
- Setting Up Windows for Machine Learning/Deep Learning
- Running AI Models with NVIDIA GPU on GitHub
- NVIDIA AI Enterprise Software Platform
Conclusion
Empower Your AI Projects with a Properly Configured NVIDIA GPU
Setting up an NVIDIA GPU for AI processing involves a series of meticulous steps, from verifying hardware compatibility to installing essential software and configuring deep learning frameworks. By following this comprehensive guide, you can ensure that your GPU is optimally configured to handle demanding AI workloads, thereby enhancing your machine learning and deep learning projects' performance and efficiency.
Remember to regularly update your drivers and software components, monitor GPU performance, and leverage available tools and community resources to maintain and improve your AI development environment. Proper setup and optimization not only accelerate your AI computations but also contribute to the stability and scalability of your AI solutions.
References
Last updated January 20, 2025