
Unlock the Secret to Flawless Eyes: Your Ultimate Eyeshadow Application Guide
Transform your gaze with expert techniques for stunning, perfectly blended eyeshadow every time.
Achieving a "perfect" eyeshadow look might seem daunting, but with the right knowledge, tools, and a bit of practice, anyone can master the art. This comprehensive guide will walk you through every step, from prepping your eyelids to the final blending flourish, ensuring your eye makeup enhances your natural beauty and stays put all day.
Key Highlights for Picture-Perfect Eyeshadow
- Preparation is Paramount: Never underestimate the power of a good eyeshadow primer to create a smooth canvas, intensify color, and prevent creasing.
- Blending is Your Best Friend: The secret to a professional, seamless eyeshadow look lies in meticulous blending; no harsh lines allowed!
- Tools and Techniques Matter: Using the right brushes for each step and tailoring application to your eye shape can elevate your eyeshadow game significantly.
Preparing Your Canvas: The Foundation of Flawless Eyeshadow
Before a single speck of color touches your lids, proper preparation is crucial. This initial step ensures your eyeshadow applies smoothly, appears vibrant, and lasts throughout the day without creasing or fading.
Prime Time: The Importance of an Eyeshadow Primer
An eyeshadow primer is a non-negotiable first step for perfect application. It creates a smooth, even surface by filling in any fine lines and neutralizing discoloration on the eyelids.
Choosing Your Primer
Select a primer based on your skin type. Matte primers work well for oily lids, helping to control excess oil and prevent shadow from sliding. Silicone-based or hydrating primers are beneficial for dry skin, preventing the eyeshadow from looking cakey or emphasizing texture.
Application
Apply a thin layer of primer all over your eyelid, from the lash line up to the brow bone. You can use a clean finger or a small synthetic brush for this. Allow it to set for a minute before proceeding.
Setting the Stage: Creating a Smooth Base
Once the primer has set, apply a light, matte eyeshadow shade that matches your skin tone, or a translucent setting powder, over the primer. This step helps to further smooth the lid and provides an ideal surface for blending subsequent colors. Use a fluffy brush for an even application.
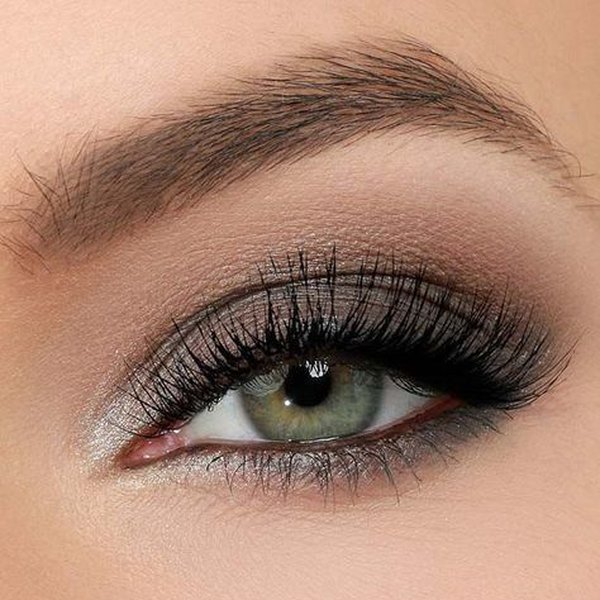
Key areas of the eye for eyeshadow placement, including lid, crease, brow bone, and outer V.
Choosing Your Arsenal: Essential Tools and Colors
Having the right tools and a thoughtful selection of eyeshadow colors are fundamental to achieving a polished look. Good quality brushes, in particular, can make a significant difference in application and blending.
Must-Have Brushes
- Flat Shader Brush: Ideal for packing color onto the eyelid with intensity.
- Fluffy Blending Brush: Essential for diffusing harsh lines and seamlessly blending different shades together. Often, having a couple of clean blending brushes on hand is beneficial.
- Crease Brush: Smaller and often tapered or dome-shaped, this brush allows for precise application of color into the crease.
- Pencil or Smudger Brush: Useful for applying eyeshadow along the lower lash line or for adding precise definition to the outer corner.
- Angled Brush: Can be used for applying liner or for more defined eyeshadow application along the lash line.
Selecting Your Eyeshadow Shades
A common approach for a versatile look involves using at least three shades:
- Base Shade: A light, often matte, neutral color close to your skin tone or slightly lighter. This is applied all over the lid as the initial canvas.
- Transition Shade: A matte eyeshadow, typically 2-3 shades darker than your skin tone. This shade is used in the crease to create depth and help blend the lid color with the highlight color.
- Accent/Darker Shade: A deeper color used to add definition and intensity, usually applied to the outer corner of the eye, the outer V, or along the lash line. This can be matte or shimmery.
- Highlight Shade (Optional): A very light, often shimmery, shade used to illuminate the inner corner of the eye and under the brow bone.
Eyeshadow Colors to Make Your Eyes Pop
While personal preference is key, certain shades can particularly enhance your natural eye color. The table below offers some suggestions:
| Eye Color | Complementary Eyeshadow Shades |
|---|---|
| Blue Eyes | Warm oranges, coppers, bronzes, peaches, warm browns, gold. |
| Green Eyes | Purples (lavender, violet, plum), burgundy, rose gold, warm browns, reds, deep greens. |
| Brown Eyes | Highly versatile; virtually any color works well. Jewel tones like sapphire, emerald, and amethyst are striking. Also, teals, blues, golds, and bronzes. |
| Hazel Eyes | Golds, browns, greens, and purples can bring out different flecks in hazel eyes. |
This table provides general guidelines; feel free to experiment to find what you love!
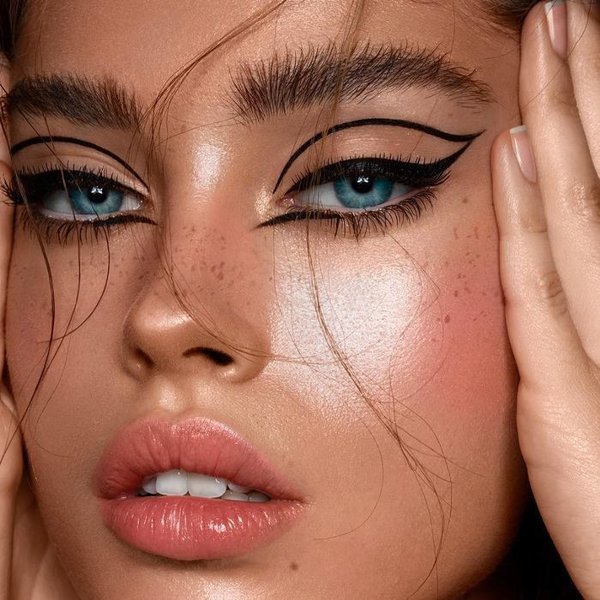
Careful application and blending are key to a polished eyeshadow look.
The Art of Application: Step-by-Step to Stunning Eyes
With your lids prepped and tools ready, it's time to apply the eyeshadow. Follow these steps for a beautifully defined look.
Step 1: Apply the Base Shade
Using a flat shader brush or your fingertip, sweep your chosen light base shade across the entire eyelid, from the inner corner to the outer corner and up towards the brow bone. This creates an even canvas and helps the other colors pop.
Step 2: Define the Crease with a Transition Shade
Take your matte transition shade (2-3 shades darker than your skin tone) on a fluffy blending brush. Apply this into your crease – the natural fold above your eyelid. Use gentle back-and-forth, windshield-wiper motions. Start at the outer corner and blend inwards, then slightly upwards towards the brow bone, ensuring a soft gradient. This adds depth and dimension.
Tip for Hooded Eyes
If you have hooded eyes (where the mobile lid is less visible when your eyes are open), apply the crease color slightly *above* your natural crease. This way, the color will be visible when your eyes are open, creating the illusion of more lid space.
Step 3: Add Depth with an Accent or Darker Shade
Using a smaller, denser brush or a crease brush, apply your darkest shade to the outer corner of your eye in a "V" shape or a "C" shape. You can also deepen the outer part of the crease with this color. Start with a small amount of product and build up the intensity gradually. Tap off any excess powder from your brush before application to prevent fallout.
Step 4: Define the Lash Line
For added definition and to make your lashes appear thicker, apply a dark eyeshadow (like your accent shade, or a black/brown) along your upper lash line using a small angled brush or a pencil brush. You can also lightly smudge a bit of your transition or accent shade along the lower lash line for a balanced look.
Mastering the Blend: The Secret to a Professional Finish
Blending is arguably the most crucial step for achieving a perfect, seamless eyeshadow look. It eliminates harsh lines and ensures a smooth transition between colors, preventing a patchy or amateur appearance.
Key Blending Techniques
- Light Hand: Always use a light touch. It's easier to add more product than to take it away.
- Clean Brushes: Use a clean blending brush, or clean your brush between blending different color interfaces. This prevents colors from becoming muddy.
- Circular and Windshield-Wiper Motions: Use small circular motions to diffuse color and gentle back-and-forth (windshield-wiper) motions to blend along the crease and edges.
- Blend One Shade at a Time: If layering multiple colors, blend each shade before applying the next. Start with lighter shades and work towards darker ones.
- Build Color Gradually: Apply eyeshadow in thin layers, blending each layer. This gives you more control over the intensity.
- Soften Edges: Ensure all edges are soft and diffused. If an area looks too harsh, use a clean fluffy brush with a tiny bit of your base shade or translucent powder to soften it. The warmth of your fingertips can also help meld colors seamlessly.
Blending takes practice, so don't be discouraged if it doesn't look perfect on your first try. The more you practice, the better your technique will become.
This video tutorial, "HOW TO APPLY EYESHADOW FOR BEGINNERS : MUST SEE!" by TheMakeupChair, offers excellent visual guidance on fundamental eyeshadow application techniques, perfect for those starting out.
Eyeshadow Styles: A Comparative Look
Different occasions and preferences call for different eyeshadow styles. The radar chart below compares a few common styles based on factors like intensity, blending complexity, and typical number of shades used. This is a general guide to help you understand how techniques might vary.
As the chart illustrates, a "Natural Everyday Look" generally requires less intensity and fewer shades, while a "Cut Crease Look" demands high precision, more complex blending, and stronger definition.
Visualizing the Process: Eyeshadow Application Mindmap
To help you conceptualize the entire eyeshadow application journey, here's a mindmap outlining the key stages and considerations discussed. This visual summary can serve as a quick reference as you practice and perfect your technique.
This mindmap provides a bird's-eye view of the entire process, from initial prep to the final perfecting touches, reinforcing the structured approach to flawless eyeshadow.
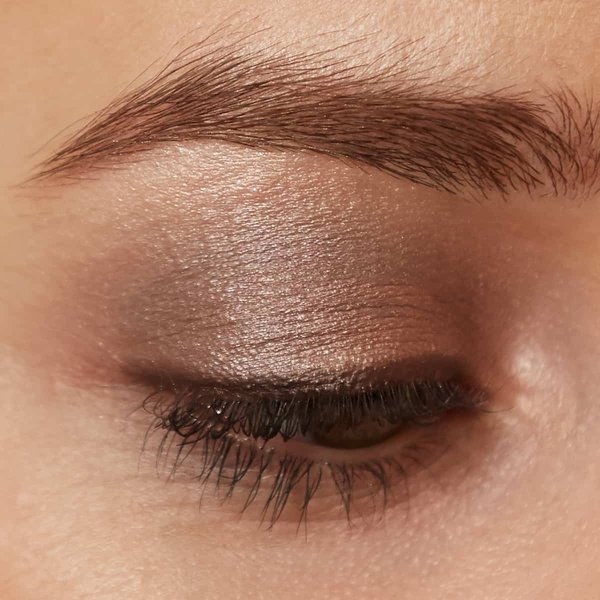
A beautifully executed natural eyeshadow look, showcasing seamless blending and subtle definition.
Finishing Touches and Pro Tips
Once your main eyeshadow colors are applied and blended, a few final touches can elevate your look from good to perfect.
Highlighting
Apply a light, shimmery eyeshadow or a dedicated highlighter to the inner corners of your eyes. This instantly brightens your eyes and makes them appear more open and awake. A touch of the same highlighter just beneath the arch of your eyebrows can also lift the brow area.
Mascara
No eye makeup look is complete without mascara. Apply one or two coats of your favorite black or brown mascara to your upper lashes, wiggling the wand at the base of the lashes to build volume before sweeping through to the tips. You can also apply a light coat to your lower lashes if desired.
Clean Up
If there's any eyeshadow fallout under your eyes, gently sweep it away with a large, clean powder brush. For a super sharp edge, especially with winged liner or darker eyeshadow looks, you can dip a cotton swab in makeup remover or use a small concealer brush with a tiny bit of concealer to clean up and define the outer edge of your eyeshadow.
Additional Pro Tips for Perfection
- Consider Your Eye Shape: Always adapt your eyeshadow placement to your specific eye shape (e.g., almond, round, hooded, monolid, deep-set). There are many tutorials available online that cater to specific eye shapes.
- Prevent Fallout: Tap off excess eyeshadow from your brush before applying it to your lids. You can also do your eye makeup *before* your face makeup to easily clean up any fallout.
- Invest in Quality: Good quality eyeshadows and brushes generally offer better pigmentation, blendability, and longevity, making the application process smoother and the results more professional.
- Practice Makes Perfect: Don't be afraid to experiment with different colors, techniques, and styles. The more you practice, the more confident and skilled you will become.
Frequently Asked Questions (FAQ)
What is the most important step for achieving perfect eyeshadow?
How many eyeshadow shades do I really need to start with?
How can I make my eyeshadow last longer and prevent creasing?
What's the best way to apply shimmery or glitter eyeshadows?
Conclusion
Achieving perfect eyeshadow is a skill that combines technique, the right tools, and practice. By starting with a well-prepped eyelid, choosing your colors thoughtfully, applying shades strategically to enhance your eye shape, and dedicating time to meticulous blending, you can create stunning eye makeup looks for any occasion. Remember that makeup is a form of self-expression, so enjoy the process of learning and experimenting to find what makes you feel most confident and beautiful.
Recommended For You
- What are the best eyeshadow techniques specifically for hooded eyes?
- How do I choose eyeshadow colors that best complement my skin tone and eye color?
- What is the most effective way to clean my makeup brushes to ensure best application?
- Can you show me an easy smokey eye tutorial suitable for beginners?