
How to Program a Genie Garage Door Remote Using the Learn Button
A Comprehensive Step-by-Step Quick Guide
Key Takeaways
- Locate the Learn Button Properly: Identifying the exact location of the Learn button on your Genie garage door opener is crucial for successful programming.
- Follow the Programming Sequence Precisely: Adhering to the correct sequence of steps ensures that your remote communicates effectively with the opener.
- Test and Troubleshoot Effectively: Verifying the functionality of the remote after programming and knowing how to address common issues can save time and frustration.
Introduction
Programming your Genie garage door remote using the Learn button is an essential skill for homeowners seeking convenience and security. Whether you've acquired a new remote or simply need to reprogram an existing one, understanding the process ensures that you maintain seamless access to your garage. This comprehensive guide walks you through each step meticulously, offering tips and troubleshooting advice to guarantee a successful programming experience.
Step-by-Step Programming Instructions
Step 1: Locate the Learn/Program Button
The initiation of the programming process begins with identifying the Learn or Program button on your Genie garage door opener. Typically, this button is situated on the motor unit, which is mounted on the ceiling of your garage. Depending on the model, the button may be:
- Behind the light cover.
- Adjacent to the antenna wire.
- Underneath the unit's facade.
The Learn button is usually small and square or round, often colored purple, yellow, red, or another distinct color to differentiate it from other buttons. Consult your garage door opener's user manual if you're having difficulty locating it.
Step 2: Prepare for Programming
Before you begin programming, ensure you have everything prepared:
- Remote Control: Have the Genie remote you intend to program at hand.
- Battery Check: Verify that the remote's batteries are fresh and inserted correctly to prevent any power issues during programming.
- Proximity: Stand within 3-5 feet of the garage door opener to maintain a strong signal during the programming process.
- Clear Access: Ensure that there's clear access to both the opener and the remote without obstructions that might interfere with the signal.
Step 3: Initiate Programming Mode
With everything prepared, it's time to enter the programming mode:
- Press and release the Learn or Program button on the garage door opener. Depending on the model, you might need to press and hold it for a couple of seconds.
- Upon pressing, the LED indicator near the button should illuminate or start blinking, signaling that the opener is now in programming mode.
- Note that some models might require holding the button for 2 seconds to activate this mode.
Once the opener is in programming mode, you typically have a 30-second window to complete the next step. It's essential to act promptly to ensure the remote pairs correctly with the opener.
Step 4: Program the Remote
With the opener ready to pair, follow these steps to program your remote:
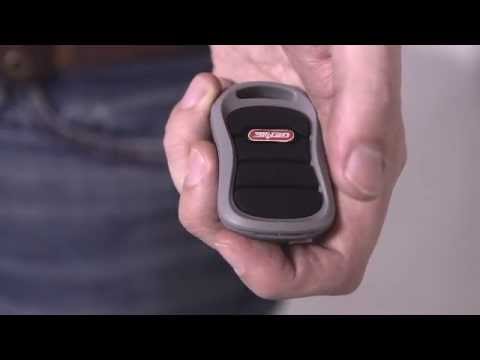
- Within the 30-second window, press and hold the button on your Genie remote that you wish to program. If your remote has multiple buttons, you can choose the one that best suits your preference.
- Hold the remote button until you observe a response from the garage door opener. This response might include:
- Flashing of the opener's LED lights.
- A clicking sound indicating successful communication.
- Once the response is noted, release the remote button. This indicates that the remote has been successfully programmed.
Step 5: Test the Remote
After programming, it's crucial to verify that the remote operates the garage door correctly:
- Press the programmed button on the remote.
- Observe whether the garage door responds by opening or closing as intended.
- If the door moves, the programming was successful.
- If there's no response, consider repeating the programming steps or refer to the troubleshooting section below.
Step 6: Repeat for Additional Remotes
If you have multiple Genie remotes to program, repeat the programming steps for each one individually:
- Press and release the Learn button on the opener to enter programming mode.
- Within 30 seconds, press and hold the desired button on the next remote until confirmation is received.
- Test each remote after programming to ensure successful pairing.
Troubleshooting Tips
Even with careful adherence to the programming steps, you might encounter issues. Here are common problems and their solutions:
| Issue | Possible Cause | Solution |
|---|---|---|
| No Response from Remote | Dead batteries or remote out of range. | Replace the batteries and ensure you're within the recommended range during programming. |
| Opener Not Entering Programming Mode | Faulty Learn button or improper button press. | Ensure you're pressing the correct button. If the problem persists, consult the user manual or contact Genie support. |
| Remote Works Intermittently | Interference from other electronic devices or obstructions. | Reprogram the remote and minimize interference by relocating electronic devices away from the opener. |
| Programming Fails | Remote compatibility issues or incomplete programming sequence. | Verify that the remote is compatible with your Genie model and carefully follow the programming steps again. |
Additional Tips for Successful Programming
Enhance your programming experience with these additional recommendations:
- Ensure Remote Compatibility: Not all Genie remotes are compatible with every opener model. Verify compatibility before attempting to program.
- Maintain Line of Sight: While many garage door openers use radio frequency, ensuring a clear line of sight can improve signal strength and reduce interference.
- Avoid Signal Interference: Devices like wireless routers, cordless phones, and other electronic gadgets can interfere with the remote's signal. Position these devices away from the garage door opener.
- Regular Maintenance: Periodically check and replace remote batteries to ensure consistent performance.
- Secure Programming Environment: Ensure that during programming, the garage door is in a safe position to prevent accidental opening or closing.
FAQs
Can I program a Genie remote without the Learn button?
No, the Learn button is essential for initiating the programming mode. If your opener lacks a Learn button, refer to the user manual or contact Genie support for alternative programming methods.
How many remotes can I program to one Genie opener?
Most Genie garage door openers allow multiple remotes to be programmed simultaneously. Typically, you can program up to five remotes, but this can vary based on the model. Refer to your specific opener's manual for exact details.
What should I do if my remote still doesn't work after programming?
If the remote fails to operate the garage door after programming:
-
Replace the remote's batteries.
-
Ensure you're within the effective range during programming.
-
Remove any potential sources of interference.
-
Reset the opener's memory by pressing and holding the Learn button for 6-10 seconds, then attempt to reprogram the remote.
-
If problems persist, consult Genie customer support.
Is it necessary to clear the opener's memory before programming a new remote?
Clearing the opener's memory is only necessary if you intend to remove all previously programmed remotes. If you're adding a new remote without removing existing ones, clearing the memory is not required.
Conclusion
Programming your Genie garage door remote using the Learn button is a straightforward process that enhances the functionality and security of your garage access. By meticulously following the outlined steps, ensuring the right setup, and employing effective troubleshooting strategies, you can effortlessly manage your garage door operations. Regular maintenance and understanding common issues can further streamline your experience, providing peace of mind and convenience for years to come.
References
Last updated January 25, 2025