
Unlock Excel Customization: Setting Sensitivity Labels and Hiding Footers with Python
A comprehensive guide to programmatically creating tailored .xlsx files with specific compliance and formatting features.
Yes, it is indeed possible to create an empty Excel .xlsx file, assign a "Non-Confidential" sensitivity label, and ensure the footer is hidden using Python. This process involves leveraging specific Python libraries designed for Excel manipulation. While creating an empty file is straightforward, setting sensitivity labels and modifying page setup elements like footers requires a nuanced approach, particularly regarding organization-specific configurations for sensitivity labels. This guide will walk you through the necessary steps, tools, and considerations. Our knowledge cutoff is Thursday, 2025-05-15.
Key Insights at a Glance
- Sensitivity Labels via Custom Properties: Python can set sensitivity labels by writing specific metadata (like
LabelIdandLabelName) as custom document properties in the Excel file. Libraries such asXlsxWriterare well-suited for this. - Organization-Specific Label Data is Crucial: The exact values for sensitivity label properties are unique to each organization's Microsoft Information Protection (MIP) setup. You must obtain these from an existing, correctly labeled file within your organization.
- "Hiding" Footers by Clearing Content: Programmatically, "hiding" a footer typically means setting its content to an empty string. This effectively removes any visible footer text in print layouts or page views.
Core Task: Python for Customized Excel Files
Automating the creation of Excel files with specific attributes like sensitivity labels and hidden footers can significantly streamline workflows, especially in enterprise environments where compliance and consistent document formatting are paramount.
Creating the Basic Excel File
The first step is to generate an empty Excel workbook with a blank worksheet. Python libraries like XlsxWriter and openpyxl excel at this. XlsxWriter is particularly strong for creating new files with extensive formatting and feature control, though it doesn't read or modify existing files.
Using XlsxWriter to Create an Empty Workbook
# Ensure you have XlsxWriter installed: pip install XlsxWriter
import xlsxwriter

# Create a new Excel workbook
workbook = xlsxwriter.Workbook('empty_excel_file.xlsx')

# Add a worksheet (it will be blank by default)
worksheet = workbook.add_worksheet()

# At this point, 'empty_excel_file.xlsx' contains one blank sheet.
# We will add more configurations before closing.
This snippet initializes a new workbook and adds a single, empty sheet to it.
Applying a "Non-Confidential" Sensitivity Label
Setting a sensitivity label programmatically involves interacting with the file's metadata, specifically its custom document properties.
Understanding Sensitivity Labels
Sensitivity labels, part of Microsoft Purview Information Protection (formerly MIP), classify documents (like Excel files) based on their content's sensitivity. These labels can trigger protection policies, such as encryption or access restrictions, and visually mark the document.
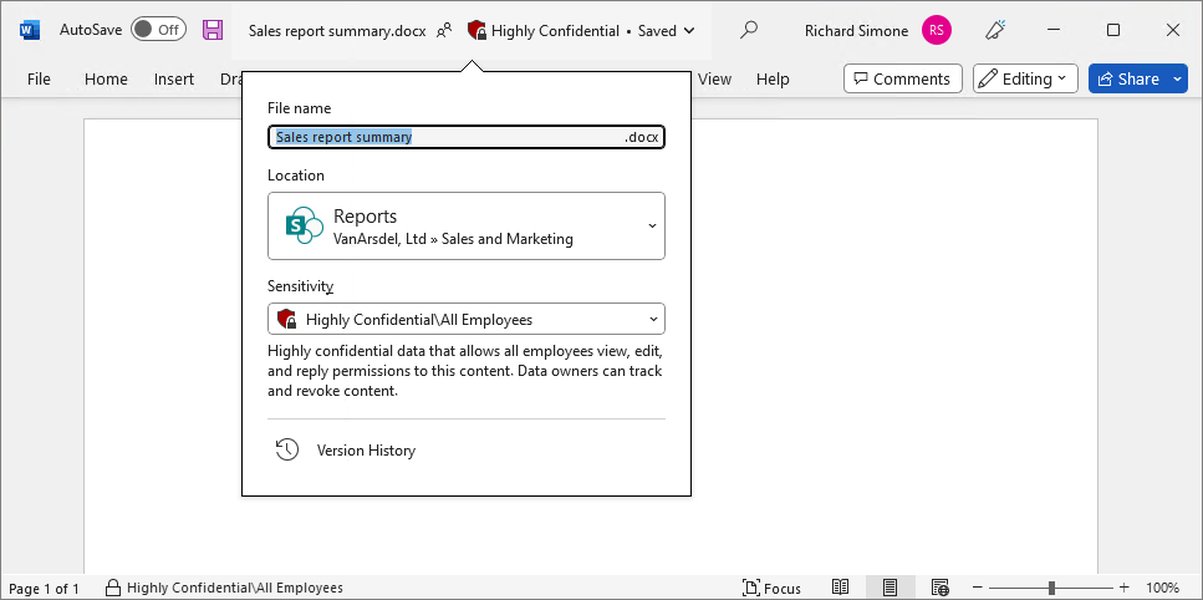
An example showing how sensitivity labels appear in Microsoft Office applications.
How Python Can Help
Python libraries like XlsxWriter allow you to define custom document properties. Sensitivity labels are stored within these properties. You'll need to set properties that Office applications recognize to apply the label.
Obtaining Label Metadata: The Critical Step
To set a label like "Non-Confidential," you must know the specific LabelId (a GUID) and potentially other metadata (LabelName, SiteId, etc.) as defined by your organization's Microsoft 365 configuration. The most reliable way to get this information is to:
- Manually apply the desired "Non-Confidential" label to an Excel file using Microsoft Excel within your organization.
- Save this sample file.
- Inspect its custom properties. An .xlsx file is a ZIP archive; you can rename it to .zip, extract its contents, and look for custom property XML files (typically in
docProps/custom.xml). Alternatively, some tools or scripts can extract this information.
Do not guess these values. They must precisely match your organization's configuration.
Setting Custom Properties for the Label (Conceptual)
Once you have the correct metadata, you can use XlsxWriter's set_custom_property() method. Common properties associated with sensitivity labels include:
SensitivityLabelId(or a similar key derived fromMSIP_Label_<GUID>_Id)SensitivityLabelName(or similar for the label's display name)- Other properties like
IsEnabled,SetDate,Method,SiteIdmight also be relevant, often prefixed withMSIP_Label_<LabelID>_. For basic application, the ID and Name are often the primary ones set directly using simpler custom property keys that Excel interprets.
# This is a continuation of the previous XlsxWriter code.
# --- Conceptual example for setting sensitivity label properties ---
# IMPORTANT: Replace these with your actual, organization-specific values!
org_specific_label_id = "xxxxxxxx-xxxx-xxxx-xxxx-xxxxxxxxxxxx"  # Placeholder GUID
org_specific_label_name = "Non-Confidential"                     # Placeholder Name

# The exact property names might vary slightly or require a specific format.
# Check a sample file from your organization.
# XlsxWriter documentation and community examples often show setting these:
workbook.set_custom_property('SensitivityLabelId', org_specific_label_id)
workbook.set_custom_property('SensitivityLabelName', org_specific_label_name)
# Potentially other properties:
# workbook.set_custom_property('MSIP_Label_GUID_Enabled', 'True')
# workbook.set_custom_property('MSIP_Label_GUID_SiteId', 'your-tenant-guid')
Effectively "Hiding" the Footer
In Excel, footers are part of the page setup options and appear when printing or in Page Layout view. "Hiding" a footer programmatically typically means clearing its content so that nothing appears.
Understanding Excel Footers
Excel allows for left, center, and right sections for both headers and footers. By default, some versions of Excel might insert filename or sheet name in these areas. To ensure no footer is visible, all these sections should be cleared.
Clearing Footer Content with XlsxWriter
The XlsxWriter library provides methods to control page setup, including headers and footers. You can set the footer content to an empty string.
# This is a continuation of the XlsxWriter code.
# --- Setting an empty footer to "hide" it ---
# This clears the default footer (center section).
worksheet.set_footer('')

# To be thorough, you can clear all parts of the footer:
# worksheet.set_footer('&L&C&R') # Clears Left, Center, and Right by setting them to empty
# Simpler: setting just set_footer('') usually suffices for a blank footer.
# If you need to ensure specific sections are blank:
# worksheet.set_footer('&L&C&R', {'left': '', 'center': '', 'right': ''})
By setting the footer to an empty string, no text will appear in the footer area of the worksheet when printed or viewed in Page Layout mode.
Bringing It All Together: Full Python Script
Here is a complete Python script using XlsxWriter that demonstrates creating an empty Excel file, attempting to set a "Non-Confidential" sensitivity label (using placeholder metadata that you must replace), and hiding the footer.
import xlsxwriter

def create_custom_excel(filename="custom_excel_file.xlsx"):
    # Step 1: Create a new workbook and add a blank worksheet
    workbook = xlsxwriter.Workbook(filename)
    worksheet = workbook.add_worksheet()  # This creates a blank worksheet

    # Step 2: Set the sensitivity label (CRITICAL: Use your organization's actual metadata)
    # These are PLACEHOLDERS. You MUST obtain the correct values for your environment.
    # Inspect an existing Excel file labeled "Non-Confidential" within your organization.
    label_id_placeholder = "d5688d38-24b0-47bd-b6ed-0cb1b7409201"  # EXAMPLE GUID - REPLACE
    label_name_placeholder = "Non-Confidential"                     # EXAMPLE NAME - REPLACE

    # Common custom properties used for sensitivity labels:
    # The exact names and set of properties can vary. Consult a sample file.
    # The XlsxWriter documentation example for sensitivity labels uses properties like these:
    try:
        workbook.set_custom_property('MSIP_Label_' + label_id_placeholder + '_Enabled', 'True')
        workbook.set_custom_property('MSIP_Label_' + label_id_placeholder + '_SetDate', '2025-05-15T00:00:00Z') # Example date
        workbook.set_custom_property('MSIP_Label_' + label_id_placeholder + '_Method', 'Privileged') # Or 'Manual'
        workbook.set_custom_property('MSIP_Label_' + label_id_placeholder + '_Name', label_name_placeholder)
        workbook.set_custom_property('MSIP_Label_' + label_id_placeholder + '_SiteId', 'your-azure-ad-tenant-guid-here') # Placeholder
        workbook.set_custom_property('MSIP_Label_' + label_id_placeholder + '_ActionId', '00000000-0000-0000-0000-000000000000') # Placeholder
        workbook.set_custom_property('MSIP_Label_' + label_id_placeholder + '_ContentBits', '0') # Placeholder
        # Simpler properties that might also work depending on Office version and configuration:
        # workbook.set_custom_property('SensitivityLabelId', label_id_placeholder)
        # workbook.set_custom_property('SensitivityLabelName', label_name_placeholder)
        print(f"Attempted to set sensitivity label properties for '{label_name_placeholder}'.")
    except Exception as e:
        print(f"Error setting sensitivity label properties: {e}")


    # Step 3: Hide the footer by setting it to an empty string
    # This clears content from the center, left, and right footer sections.
    worksheet.set_footer('')
    print("Footer content cleared.")

    # Step 4: Save the workbook
    try:
        workbook.close()
        print(f"Excel file '{filename}' created successfully.")
    except Exception as e:
        print(f"Error closing/saving workbook: {e}")

if __name__ == "__main__":
    create_custom_excel("empty_non_confidential_no_footer.xlsx")
    print("\nReminder: Verify the sensitivity label in Excel. The label metadata used in this script are placeholders and MUST be replaced with your organization-specific values.")
Explanation of the Script:
- It initializes an empty workbook and worksheet.
- It then attempts to set custom document properties intended to apply a sensitivity label. Crucially, the
label_id_placeholder,label_name_placeholder, and otherMSIP_Label_...property values and names are illustrative and must be replaced with the actual data from your organization's environment. The script uses a more detailed set ofMSIP_Label_properties which are closer to what's stored internally. - The
worksheet.set_footer('')command clears any default or existing footer content. - Finally,
workbook.close()saves the file. Always test the output file in Microsoft Excel to confirm the label is applied as expected and the footer is indeed hidden.
Visualizing Python's Excel Capabilities
Different Python libraries offer varying degrees of control over Excel file generation and manipulation. The radar chart below provides a comparative overview of common libraries concerning features relevant to your query. The scores (from 2 to 10, where 10 is best) represent a general assessment of their strengths in each area.
This chart highlights that XlsxWriter is strong for creating new, richly formatted files and supports custom properties and page setup well. OpenPyXL is more versatile for both reading and writing. Libraries like PyWin32 or xlwings (which use COM automation on Windows) offer deeper control by interacting directly with the Excel application, including potentially more robust MIP interaction, but sacrifice cross-platform compatibility and ease of standalone deployment.
Mapping the Workflow: From Script to Customized Excel
The process of creating your customized Excel file can be visualized as a series of steps orchestrated by your Python script. The mindmap below outlines this workflow.
Create .xlsx with 'Non-Confidential' Label & Hidden Footer"] id1_1["Step 1: Initialize Excel File"] id1_1_1["Python Library Selection (e.g., XlsxWriter)"] id1_1_2["Action: Create Workbook & Add Worksheet"] id1_1_2_1["Result: Empty .xlsx structure"] id1_2["Step 2: Apply Sensitivity Label"] id1_2_1["Mechanism: Set Custom Document Properties"] id1_2_1_1["Required Info: Org-Specific LabelID & Name"] id1_2_1_2["Source: Inspect pre-labeled sample file"] id1_2_2["Action:
workbook.set_custom_property(...)"]
id1_3["Step 3: Configure Footer"]
id1_3_1["Mechanism: Modify Page Setup"]
id1_3_2["Action: worksheet.set_footer('')"]
id1_3_2_1["Effect: Clear footer content (effectively 'hides' it)"]
id1_4["Step 4: Finalize and Save"]
id1_4_1["Action: workbook.close()"]
id1_4_2["Result: Customized .xlsx file ready for use"]
id2["Key Considerations"]
id2_1["Accuracy of Label Metadata"]
id2_2["Library Capabilities (XlsxWriter, OpenPyXL, etc.)"]
id2_3["Testing & Verification in Excel Application"]
This mindmap illustrates that the core of the task lies in selecting the right tools (Python libraries) and, critically, providing accurate, organization-specific data for features like sensitivity labels.
Understanding Sensitivity Labels in Microsoft 365
To better grasp what sensitivity labels are and how they function within the Microsoft ecosystem, the following video provides a helpful overview. While the video doesn't cover Python programming, it explains the user-facing aspects and purpose of these labels, which is crucial context for programmatic manipulation.
Video explaining the use of Sensitivity Labels in Microsoft 365.
Understanding how these labels work from a user and administrative perspective helps in appreciating the role of the metadata you'll be setting with Python.
A Closer Look at Sensitivity Label Metadata
When a sensitivity label is applied to an Office document, several custom properties are typically written into the file. These properties inform Office applications about the label. While the exact set can vary based on the label's configuration and your organization's setup, the table below lists common properties you might encounter or need to set. Note that the <LabelID> in property names refers to the specific GUID of the label.
| Property Name Pattern | Description | Example Value (Illustrative) |
|---|---|---|
MSIP_Label_<LabelID>_Enabled |
Indicates if the label is active on the document. | True |
MSIP_Label_<LabelID>_SetDate |
UTC timestamp indicating when the label was applied. | 2025-05-15T12:30:00Z |
MSIP_Label_<LabelID>_Method |
How the label was applied (e.g., Manual, Automatic, Privileged). | Manual |
MSIP_Label_<LabelID>_Name |
The display name of the sensitivity label. | Non-Confidential |
MSIP_Label_<LabelID>_SiteId |
The Azure Active Directory tenant ID (GUID) where the label is defined. | xxxxxxxx-xxxx-xxxx-xxxx-xxxxxxxxxxxx |
MSIP_Label_<LabelID>_ActionId |
An identifier for any protection actions (e.g., encryption) associated with the label. Often all zeros if no specific action beyond tagging. | 00000000-0000-0000-0000-000000000000 |
MSIP_Label_<LabelID>_ContentBits |
Internal flags related to protection type or label characteristics. | 0 |
| (Simpler aliases used by some tools) | Description | Example |
SensitivityLabelId |
Often used as a direct custom property key for the label's GUID. | your-label-id-guid |
SensitivityLabelName |
Often used as a direct custom property key for the label's name. | Non-Confidential |
When using libraries like XlsxWriter, you might set a subset of these, or simpler aliases (like SensitivityLabelId), depending on what your Office version and configuration recognize. Always refer to a correctly labeled sample file from your environment to determine the exact properties and values needed.
Important Considerations and Best Practices
Organizational Specificity of Labels
It cannot be overstated: sensitivity label metadata (LabelId, SiteId, etc.) is unique to each Microsoft 365 tenant (organization). Using generic or example values will likely result in the label not being recognized or applied correctly. Diligent extraction of this data from a sample file is key.
Limitations and Alternatives
- Encrypted Labels: If a sensitivity label also applies encryption, setting it via custom properties alone might not be sufficient or might not work correctly. Full encryption handling typically requires deeper integration, possibly via the Microsoft Information Protection (MIP) SDK, which is more complex to use with Python (often involving C# interop or PowerShell).
- COM Automation: For Windows environments, libraries like
pywin32orxlwingscan automate the Excel application itself. This allows for more direct manipulation of Excel features, including applying labels as a user would, but it requires Excel to be installed and is not cross-platform. - Third-Party Libraries: Some commercial Python libraries for Excel manipulation (e.g., Aspose.Cells, Spire.XLS) may offer more built-in support for advanced features, including sensitivity labels, but they come with licensing costs.
Testing and Verification
After generating an Excel file programmatically, always open it in Microsoft Excel to:
- Verify that the sensitivity label is correctly displayed and recognized.
- Check if any associated protections (if applicable) are active.
- Confirm that the footer is indeed hidden in Page Layout view and print previews.
Frequently Asked Questions (FAQ)
LabelId for "Non-Confidential"?
openpyxl for this?
Recommended Further Exploration
- How can I extract sensitivity label metadata from an existing Excel file using Python?
- What are the differences between XlsxWriter and OpenPyXL for advanced Excel formatting?
- Can Python interact with the Microsoft Information Protection SDK to apply labels with encryption?
- How to automate setting headers and other page setup options in Excel using Python?
References
Last updated May 15, 2025