
Unlock the Airwaves: Build Your Own PlutoSDR Ham Radio Scanner with Python!
Dive into the world of Software Defined Radio and craft a custom scanner to explore amateur radio frequencies using your PlutoSDR and the power of Python.
Highlights: Your Quick Guide to Python SDR Scanning
- PlutoSDR Power: Understand how the Analog Devices PlutoSDR, with its wide frequency range (70 MHz - 6 GHz), is an ideal and affordable platform for creating a versatile ham radio scanner.
- Python Simplicity: Leverage Python libraries like
pyadi-iiofor direct PlutoSDR control,numpyfor signal processing, andsounddevicefor audio output, making complex SDR tasks manageable. - Hands-On Project: Get a step-by-step guide, including Python code snippets, to initialize your PlutoSDR, scan frequency bands, detect active signals, and even demodulate Narrowband FM (NBFM) for listening to ham communications.
Understanding the Essentials: PlutoSDR and Ham Radio Scanning
Embarking on the journey of creating a ham radio scanner with a PlutoSDR and Python opens up a fascinating world of radio communication. Let's break down the core components.
What is a Software Defined Radio (SDR)?
A Software Defined Radio (SDR) is a radio communication system where components traditionally implemented in hardware (like mixers, filters, amplifiers, modulators/demodulators, detectors, etc.) are instead implemented using software on a personal computer or embedded system. This software-centric approach provides immense flexibility, allowing a single piece of hardware to be reconfigured for various radio tasks, frequencies, and modes simply by changing the software.
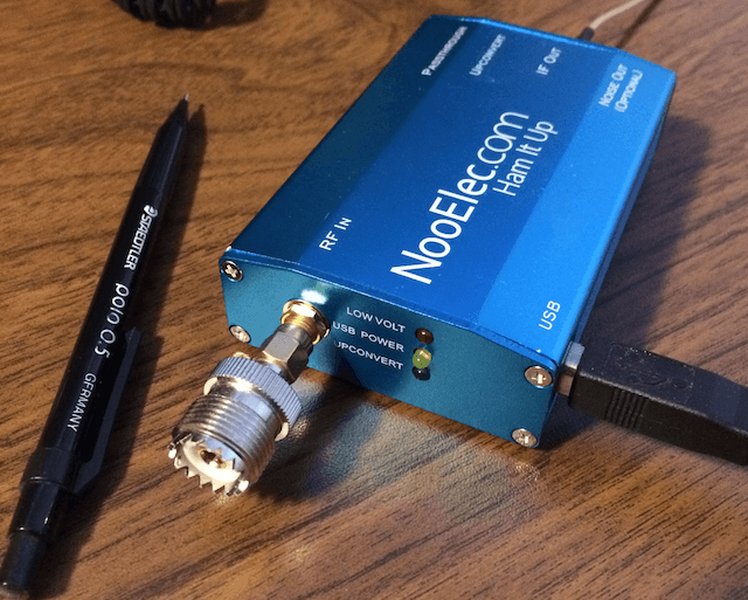
An example of a popular SDR dongle used by hobbyists.
Why the PlutoSDR is a Great Choice
The Analog Devices PlutoSDR (often called "Pluto") is a highly capable and relatively affordable SDR transceiver. Key features that make it suitable for a ham radio scanner project include:
- Wide Frequency Range: Typically covering from 70 MHz to 6 GHz, which encompasses many popular ham radio bands (VHF, UHF, and even some microwave frequencies).
- Full Duplex Capability: It can transmit and receive simultaneously, though for a scanner, we'll primarily focus on its reception capabilities.
- Programmability: The PlutoSDR is designed to be easily controlled by software, with excellent support for Python through libraries like
pyadi-iio. - USB Powered and Portable: Its small form factor and USB power make it convenient for various setups.
The Goal: A Python-Powered Ham Scanner
Our objective is to create a Python program that instructs the PlutoSDR to:
- Tune to specific ham radio frequency bands.
- Scan across these frequencies in defined steps.
- Detect the presence of active signals (i.e., transmissions).
- Optionally, demodulate these signals (e.g., Narrowband FM for voice) and play the audio.
Setting Up Your Development Environment
Before you can start coding, you'll need to prepare your hardware and software environment.
Hardware Requirements
- Analog Devices PlutoSDR: Connected to your computer via USB.
- Suitable Antenna: The antenna is crucial for good reception. For VHF/UHF ham bands, a telescopic antenna, a discone, or a band-specific vertical antenna will work. Ensure it's connected to the PlutoSDR's RX port.
- Computer: A PC running Windows, macOS, or Linux with Python installed.
Software and Python Libraries
You'll need Python (version 3.8+ is recommended) and several key libraries. You can install these libraries using pip:
pip install numpy scipy matplotlib sounddevice pyadi-iiopyadi-iio: The official Analog Devices Python interface for IIO (Industrial I/O) devices, including the PlutoSDR. This is the primary library for controlling the hardware.numpy: Essential for numerical operations, especially for handling the arrays of sample data from the SDR.scipy: Provides many scientific and technical computing functions, useful for signal processing tasks like filtering and demodulation.matplotlib: (Optional) Useful for visualizing spectrum data, though not strictly required for a basic scanner.sounddevice: For playing back demodulated audio. (PyAudiois an alternative).
Ensure your PlutoSDR drivers are correctly installed. On many systems, connecting the PlutoSDR via USB will allow it to be recognized automatically. If you encounter issues, consult the Analog Devices documentation for driver setup specific to your operating system.
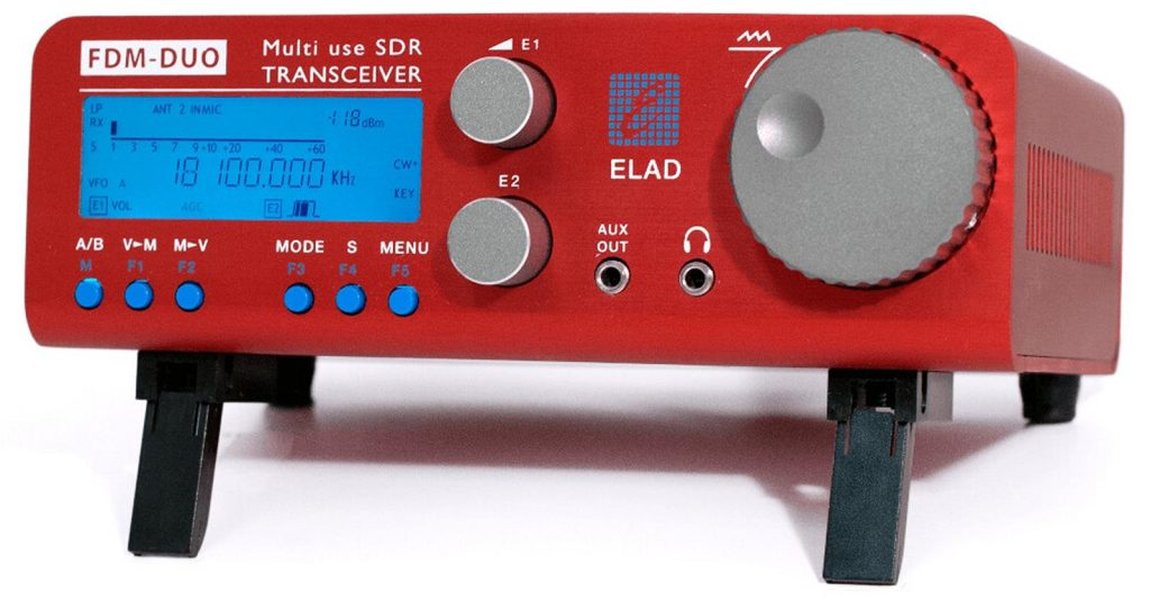
An example of advanced SDR equipment, illustrating the diversity in SDR hardware.
Core Concepts of Building Your Scanner
Understanding these fundamental concepts will help you grasp how the Python scanner interacts with the PlutoSDR and processes radio signals.
Interfacing with PlutoSDR
The pyadi-iio library allows your Python script to communicate with the PlutoSDR. This includes initializing the device, setting parameters like the center frequency (rx_lo), sample rate (sample_rate), and receiver gain, and fetching received samples (rx()).
Frequency Scanning Logic
Scanning involves systematically tuning the PlutoSDR across a range of frequencies. Your program will define a start frequency, stop frequency, and a step size. It will then loop through this range, tuning the SDR to each step and listening for a short period (dwell time).
Signal Detection Techniques
Once samples are received at a particular frequency, you need to determine if a signal is present. A common method is to calculate the Power Spectral Density (PSD) or simply the average power of the received samples. If this power exceeds a predefined threshold (squelch level), a signal is considered detected.
Demodulation Basics (e.g., NBFM)
For voice communications on ham radio bands (like the 2-meter band), Narrowband FM (NBFM) is common. Demodulation is the process of extracting the original audio information from the radio signal. For FM, this typically involves detecting changes in the frequency of the signal. A simple FM demodulator can be implemented by calculating the phase difference between successive complex samples.
Audio Output
After demodulation, the resulting audio samples need to be played through your computer's speakers. Libraries like sounddevice or PyAudio handle this by sending the audio data to the system's audio output device.
Building the Python Ham Scanner: Step-by-Step
Let's construct a basic Python program to act as a ham radio scanner using the PlutoSDR. This example will focus on scanning a portion of the 2-meter ham band (e.g., 144-146 MHz) for NBFM signals.
Step 1: Initializing the PlutoSDR
First, we import necessary libraries and initialize the PlutoSDR object. You might need to specify the PlutoSDR's IP address if it's connected via network, or use its USB URI. For direct USB, adi.Pluto() often works, but if you know the URI (e.g., from iio_info -s), you can use that.
import adi
import numpy as np
import time
import sounddevice as sd

# Try to connect to PlutoSDR via USB.
# If this fails, you might need to find its URI, e.g., "ip:192.168.2.1" or "usb:1.2.3"
# You can find URIs by running 'iio_info -s' in a terminal if libiio utils are installed.
try:
    sdr = adi.Pluto("usb:0") # Common URI if only one Pluto is connected
    print("PlutoSDR connected via usb:0")
except Exception as e:
    print(f"Failed to connect via usb:0: {e}")
    try:
        # Fallback if on network or specific USB URI
        # For network connection, PlutoSDR typically defaults to ip:192.168.2.1
        # Check your PlutoSDR's network configuration if using Ethernet
        sdr = adi.Pluto("ip:192.168.2.1")
        print("PlutoSDR connected via ip:192.168.2.1")
    except Exception as e_ip:
        print(f"Failed to connect via IP: {e_ip}")
        print("Please ensure PlutoSDR is connected and discoverable, or specify its URI.")
        exit()

# Configure SDR parameters
sdr.sample_rate = int(1e6)  # 1 MS/s
sdr.rx_rf_bandwidth = int(sdr.sample_rate * 0.8) # RF bandwidth, e.g., 80% of sample rate
sdr.rx_buffer_size = 1024 * 16 # Number of samples per rx() call
sdr.gain_control_mode_chan0 = "manual" # Use manual gain
sdr.rx_hardwaregain_chan0 = 60.0  # Set gain (0-73 dB for PlutoSDR); adjust as needed
Step 2: Defining Scanning Parameters
Set the frequency range, step size, and signal detection threshold.
# Scanning parameters
start_freq = int(144e6)  # 144 MHz (start of 2m band segment)
stop_freq = int(146e6)   # 146 MHz (end of 2m band segment)
step_freq = int(12.5e3)  # 12.5 kHz (common channel spacing for NBFM)
dwell_time = 0.1         # Seconds to listen on each frequency
signal_threshold_db = -50 # dB; adjust based on noise floor and desired sensitivity
Step 3: Implementing the Scanning Loop
The core logic involves iterating through frequencies, tuning the SDR, and collecting samples.
def scan_frequencies(sdr, start_f, stop_f, step_f, dwell_t, threshold_db):
    print(f"Scanning from {start_f/1e6:.2f} MHz to {stop_f/1e6:.2f} MHz...")
    current_freq = start_f
    while current_freq <= stop_f:
        sdr.rx_lo = current_freq  # Tune to the current frequency
        time.sleep(0.05) # Allow PLL to settle

        # Collect samples
        samples = sdr.rx() # Returns complex64 samples

        # Basic signal detection (average power)
        power = np.mean(np.abs(samples)**2)
        power_db = 10 * np.log10(power + 1e-9) # Add small epsilon to avoid log(0)

        print(f"Tuned to {current_freq/1e6:.3f} MHz - Power: {power_db:.2f} dB")

        if power_db > threshold_db:
            print(f"  Signal detected at {current_freq/1e6:.3f} MHz (Power: {power_db:.2f} dB)!")
            # If signal detected, demodulate and play
            demodulate_and_play_nbfm(samples, sdr.sample_rate)

        time.sleep(dwell_t) # Dwell on the frequency
        current_freq += step_f
Step 4: Basic Demodulation and Audio Playback (NBFM)
A simple FM demodulator can be implemented by looking at the phase difference between consecutive samples. The audio is then downsampled and played.
def demodulate_and_play_nbfm(iq_samples, sample_rate_hz):
    # Simple FM demodulation (phase difference)
    # y[n] = x[n] * conj(x[n-1])
    # angle(y[n]) is proportional to instantaneous frequency
    x = iq_samples
    y = x[1:] * np.conj(x[:-1])
    fm_demodulated = np.angle(y)

    # Basic filtering and decimation for audio
    # This is a very rudimentary approach. Real NBFM demod needs proper filtering.
    # For NBFM, audio bandwidth is typically ~3kHz.
    # Decimation factor to bring sample rate down to something audio card can handle (e.g., 48kHz)
    # and match NBFM bandwidth.
    audio_sample_rate = 48000
    decimation_factor = int(sample_rate_hz / audio_sample_rate)

    if decimation_factor > 1:
        # Simple decimation (can use scipy.signal.decimate for better results)
        audio_signal = fm_demodulated[::decimation_factor]
    else:
        audio_signal = fm_demodulated
        audio_sample_rate = sample_rate_hz # If no decimation needed

    # Normalize audio
    audio_signal = audio_signal / np.max(np.abs(audio_signal) + 1e-9) * 0.8

    print(f"  Playing audio at {audio_sample_rate} Hz...")
    try:
        sd.play(audio_signal.astype(np.float32), samplerate=audio_sample_rate)
        sd.wait() # Wait for audio to finish playing
        # For continuous listening, you'd stream this to an audio buffer
    except Exception as e_audio:
        print(f"  Error playing audio: {e_audio}")
Step 5: Putting It All Together (Main Execution)
Combine these parts into a runnable script.
if __name__ == "__main__":
    try:
        scan_frequencies(sdr, start_freq, stop_freq, step_freq, dwell_time, signal_threshold_db)
    except KeyboardInterrupt:
        print("Scanning stopped by user.")
    except Exception as e:
        print(f"An error occurred: {e}")
    finally:
        # It's good practice to clean up by deleting the SDR object
        # This can help release resources, though Pluto contexts are usually robust.
        if 'sdr' in locals() and sdr is not None:
            del sdr
        print("SDR resources released. Exiting.")
Note: This code provides a basic framework. Real-world SDR applications often involve more sophisticated signal processing, filtering, error handling, and potentially a graphical user interface (GUI).
Visualizing SDR Performance: A Comparative Look
Software Defined Radios vary in their capabilities. The radar chart below offers an opinionated comparison of factors you might consider when choosing an SDR for a project like this. The PlutoSDR generally offers a good balance, especially for its price and feature set relevant to ham radio experimentation.
This chart subjectively rates SDRs on a scale of 1-10 (higher is better/more). For example, 'Cost-Effectiveness' means higher score for lower price relative to features. 'Ease of Use' is for beginners. These are general opinions and your specific needs may vary.
Mapping the Project: Key Components and Workflow
The mindmap below illustrates the interconnected components and the general workflow of the Python-based PlutoSDR ham radio scanner project.
This mindmap provides a high-level overview, showing how different parts of the project connect, from the physical hardware to the software libraries and the logical steps within the Python program.
Key Ham Radio Frequency Bands for Scanning
Knowing which frequencies to scan is essential. Below is a table highlighting some common ham radio bands accessible with the PlutoSDR and typical uses. This is not exhaustive and band plans can vary by region.
| Band Name | Approximate Frequency Range (MHz) | Common Modes | Typical Uses / Characteristics |
|---|---|---|---|
| 6 Meter Band | 50 - 54 MHz | SSB, FM, CW, Digital | "The Magic Band" - unpredictable long-distance (DX) propagation, local FM. (Lower end might be outside PlutoSDR's typical 70MHz start) |
| 2 Meter Band | 144 - 148 MHz | FM, SSB, CW, Digital | Very popular for local FM repeaters, simplex, packet radio, satellite communication. |
| 1.25 Meter Band (222 MHz) | 222 - 225 MHz | FM, SSB, Digital | Less crowded than 2m, good for local FM communication. |
| 70 Centimeter Band (430/440 MHz) | 420 - 450 MHz (varies by region) | FM, SSB, CW, Digital, ATV | Local FM repeaters, simplex, satellite, Amateur Television (ATV). |
| 33 Centimeter Band (900 MHz) | 902 - 928 MHz | FM, Digital | Shared with other services, used for experimental modes, linking. |
| 23 Centimeter Band (1.2 GHz) | 1240 - 1300 MHz | FM, SSB, CW, Digital, ATV | Microwave communication, satellites, ATV, experimental. |
Always consult your local band plan for specific frequency allocations and permitted modes of operation in your region.
Enhancing Your Scanner: Advanced Features
Once you have a basic scanner working, you can explore several enhancements:
Graphical User Interface (GUI)
Instead of a command-line interface, you could develop a GUI using Python libraries like Tkinter, PyQt, or Kivy. This could display a spectrum waterfall, allow easier control of scanning parameters, and show detected signals visually.
Advanced Demodulation (SSB, Digital Modes)
The provided NBFM demodulator is basic. You could implement or integrate more complex demodulators for Single Sideband (SSB) – common on HF and VHF/UHF weak signal work – or even attempt to decode digital voice modes (like DMR, P25, though this is significantly more complex) or data modes (like FT8, APRS).
Signal Logging and Analysis
Log detected signals with timestamps, frequencies, and strength to a file. Implement a waterfall display using matplotlib or a GUI library to visualize spectral activity over time.
Multi-threading for Performance
For more responsive scanning and simultaneous processing (e.g., demodulating while continuing to scan), you could explore Python's threading or asyncio libraries.
Important Considerations and Best Practices
Antenna Choice
The antenna is arguably the most critical part of your receiving system. A poor or mismatched antenna will result in weak signals and poor scanner performance, regardless of how good your SDR or software is. For general VHF/UHF scanning, a discone antenna is a good wideband choice. For specific bands, a resonant antenna for that band will perform best.
Legal and Ethical Aspects
Listening to most radio transmissions is legal in many countries. However, be aware of regulations in your specific location. Transmitting requires an amateur radio license for ham bands. Never transmit without a license. Some frequencies may carry private or encrypted communications; intercepting and divulging these can be illegal. Always operate responsibly and ethically.
Troubleshooting Common Issues
- No PlutoSDR Detected: Check USB connections, try a different USB port/cable. Ensure drivers are installed. Verify the URI used in your Python script (e.g.,
"ip:192.168.2.1"or specific USB path). - Weak or No Signals: Check your antenna and connections. Increase RX gain (
sdr.rx_hardwaregain_chan0), but be careful as too much gain can overload the SDR with noise. Adjust thesignal_threshold_db. Try an outdoor antenna if possible. - Choppy Audio: This could be due to CPU limitations, issues in the demodulation/decimation code, or buffer underruns in the audio playback. Ensure your decimation and audio sample rates are compatible.
- Kernel Driver Conflicts (Less common with PlutoSDR via libiio, but possible): On Linux, sometimes default kernel drivers can interfere with SDR software accessing the device directly. This is more common with RTL-SDR dongles, requiring blacklisting of DVB-T drivers. For PlutoSDR, ensure libiio has proper permissions.
Video Demonstration: Getting Started with SDR
While this video features the RTL-SDR, many fundamental concepts of Software Defined Radio, such as setting up software, understanding frequencies, and the general excitement of exploring the radio spectrum, are highly relevant and transferable to working with your PlutoSDR. It provides a good visual introduction to the world you're stepping into.
"Getting Started with the RTL-SDR (Software Defined Radio)" - A helpful introduction to SDR concepts.
Frequently Asked Questions (FAQ)
Recommended Further Exploration
- How can I implement more advanced SSB demodulation in Python for my SDR project?
- What are the steps to build a graphical user interface for a Python SDR scanner using PyQt or Tkinter?
- How can I integrate GNU Radio with my PlutoSDR for more complex ham radio signal processing tasks?
- What techniques and libraries are available for decoding digital ham radio modes like FT8 or APRS using Python and an SDR?
References
Last updated May 13, 2025