
Mixing Watercolors for a Roan Horse Color
Mastering the art of blending base and white to create realistic roan hues
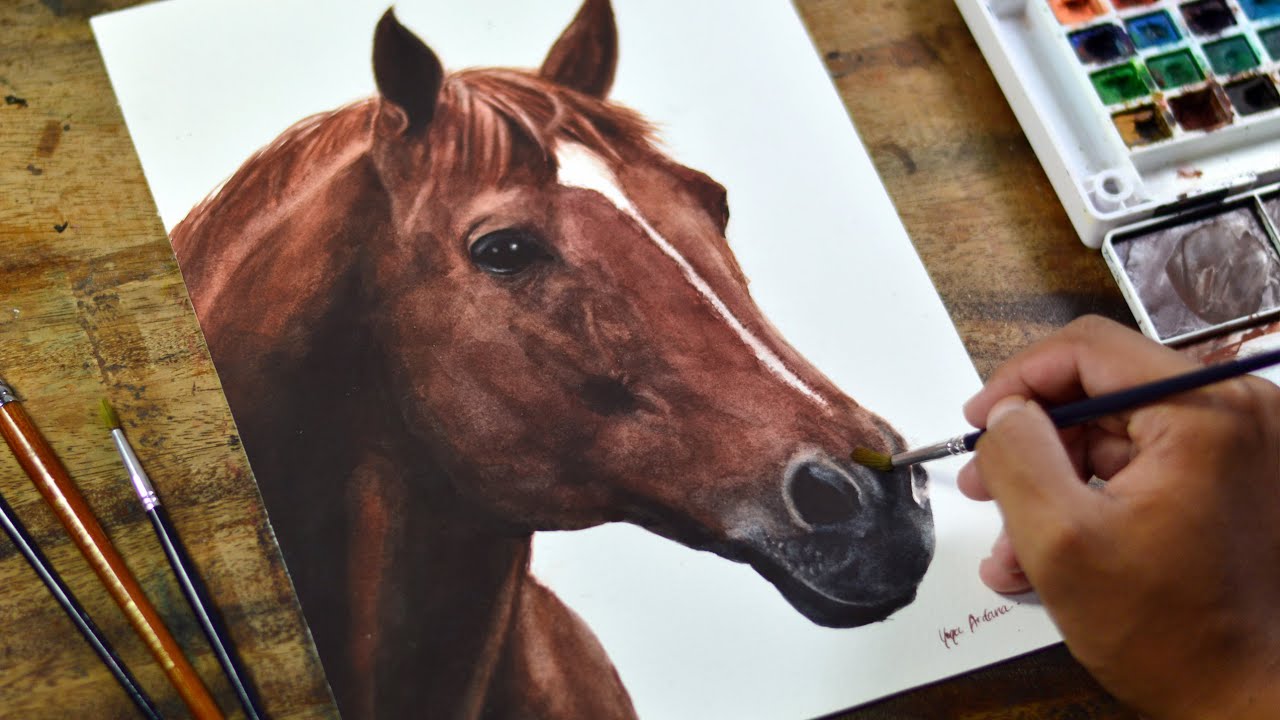
Highlights
- Essential Color Base: Utilize warm browns, cool grays, or vibrant reds as the foundation for different roan types.
- Layering and Wet Techniques: Master layering, wet-on-wet, and wash techniques to achieve the natural intermingling of white hairs.
- Custom Mixtures: Adjust the ratio of base color to white to tailor the roan effect for bay, chestnut, or blue roan horses.
Understanding the Roan Coat
The roan coat pattern is a unique phenomenon found in horses, characterized by an even intermix of white and the base color hairs throughout most of the body. Unlike a simple dilution, the roan pattern creates a mottled effect where the base color appears softened by the infusion of white. However, specific regions such as the head, lower legs, mane, and tail often retain the base hue. Although natural genetics determine the roan pattern in horses, simulating this delicate balance of tones and textures in watercolor paintings can be an exciting yet challenging task.
When portraying a roan horse, artists typically choose a base coat that corresponds to specific color types – bay, chestnut, or blue – as the starting point. Each base color requires its custom blend before integrating the scattering of white to replicate the white hairs. The resultant effect should display a subtle gradation and variability reminiscent of the natural distribution of white hairs amidst the primary coat color.
Choosing the Base Colors
Bay Roan
For a bay roan, the essential starting point is a warm, earthy tone. Typically, bay horses have a rich, brown base that can be enhanced with hints of warmth. You can achieve this by mixing:
- Burnt Sienna: Adds a deep, reddish-brown tone that is essential for a rich base.
- Sepia: Contributes a robust and earthy note that deepens the natural tone.
- Yellow Ochre: A touch of this can lighten and warm the mixture slightly.
Once the base color is mixed, the key is to balance it with varying amounts of white to mimic the natural scattering of white hairs on the horse.
Chestnut Roan
The chestnut roan takes on a slightly orange-toned, reddish-brown quality. To simulate a chestnut roan, the recommended mix involves:
- Burnt Sienna: Again serves as a core color component, laying the foundation for warmth.
- Cadmium Orange or Permanent Alizarin Crimson: These colors provide the distinct reddish hue typical of chestnut horses.
The process then involves carefully incorporating white into this mix. Adjusting the mixture gradually allows one to observe how the intensity of the roan effect changes, ensuring that the final result measures up to the delicate mottled pattern seen in nature.
Blue Roan
Blue roan horses have a cooler, slate-gray appearance created by subtly mixing dark and cool shades. For blue roan, the base is formulated with:
- Ultramarine Blue: When used in combination with deep, dark pigments contributes to the formation of a slate base.
- Payne's Gray (or a mixture of dark blue with burnt umber/sepia): This color achieves the necessary depth for the dark base, ensuring that when mixed with white, the cool tones emerge in an even, muted pattern.
The integration of white creates a mottled gray pattern reminiscent of the characteristic blue roan.
Techniques for Achieving the Roan Effect
Layering and Glazing
One of the most effective techniques to simulate a roan pattern in watercolor is through layered glazing. With this technique, you begin by applying a light wash of the base color over the area where the roan pattern will be depicted. While the first layer is still wet, you can introduce a diluted mixture of your base color and white. This helps create a soft, feathered transition between the dominant hue and the interspersed white areas.
Allow each layer to dry before moving on to the next, which ensures that the different tones do not blend excessively, preserving the mottled and variegated appearance that characterizes the roan pattern.
Wet-on-Wet Technique
The wet-on-wet technique is instrumental for creating soft edges and merging colors seamlessly on the paper. Start by moistening the area with clean water, then apply the base color wash. Before the base color fully dries, add touches of white or a diluted mix of base color with white. The flowing water allows the pigments to merge organically, producing intricate patterns with light transitions that closely mimic the natural look of roan feathers.
Dry Brush and Lifting Techniques
To add the final details that accentuate the white hairs within the roan pattern, techniques such as dry brushing and lifting can be employed. With a dry brush, you can gently flick or stipple on light patches of white or diluted white ink. Alternatively, using a sponge or a tissue to lift off some pigment can give an appearance of stray white hairs. Both approaches require a steady hand and practice to achieve a natural, scattered effect.
Experimenting with Ratios and Consistency
Achieving the ideal roan pattern is often a matter of trial and error, as the precise ratio between the base color and added white plays a significant role. Artists should prepare multiple test samples by adjusting the ratio of white to base color, enabling them to choose the mixture that provides the most realistic representation. For instance:
| Roan Type | Base Colors | White Addition Technique |
|---|---|---|
| Bay Roan | Burnt Sienna, Sepia, Yellow Ochre | Layered glaze and direct touches of white |
| Chestnut Roan | Burnt Sienna, Cadmium Orange, Permanent Alizarin Crimson | Direct mixing and lifting techniques |
| Blue Roan | Ultramarine Blue, Payne's Gray or dark mixtures with burnt umber | Wet-on-wet dilution with intermittent white applications |
Step-by-Step Process for Creating a Roan Effect
Step 1: Preparing Your Palette
Before beginning to paint, it is crucial to prepare your palette with all necessary pigments. Start by selecting the base color corresponding to the type of roan you wish to achieve. For a bay roan, arrange your Burnt Sienna, Sepia, and Yellow Ochre. For a chestnut roan, have Burnt Sienna alongside a vibrant red such as Permanent Alizarin Crimson or Cadmium Orange. For blue roan, gather Ultramarine Blue mixed with Payne’s Gray or an equivalent deep pigment.
Keep a separate section for pure white and a diluted variant. This will allow you to experiment with both direct applications and layering techniques without contaminating other colors.
Step 2: Laying Down the Base Wash
Wet your paper thoroughly and apply a light wash of your chosen base color to cover the representative area of the horse’s coat. This initial wash functions not only as the primary background but also facilitates the blending process with the white.
Depending on the desired intensity, let the wash settle into a uniform layer while you plan where the mottled effect will be most apparent.
Step 3: Introducing Variation with White
Once the base wash is in place, begin adding the white pigment in varied quantities. Using a fine brush, gently introduce spots, streaks, or dappled patterns of white directly on the damp base wash. The wet-on-wet interaction encourages natural-looking diffusion, which is key to replicating the appearance of white hairs amid the base color.
For more controlled results, you may mix a small amount of white with the base color and apply it in layers, ensuring that the transition from the base hue to the lighter tone is gradual and appears natural.
Step 4: Employing Lifting and Dry Brush
After the primary layers have dried, inspect the work for overall balance. At this stage, subtle enhancements can be made by lifting off some pigment using a damp tissue or brush, thereby revealing underlying layers of white. Alternatively, a dry brush technique can be used to highlight individual strands of white that are scattered across the surface.
This careful detailing is essential, as it prevents the white patches from looking overly uniform. Instead, each patch should ideally retain a unique shape and size, mimicking the randomness found in a naturally roan-coated horse.
Step 5: Final Adjustments and Finishing Touches
The final step is to step back and evaluate your work. At this point, it may be necessary to add finishing touches to enhance depth and vibrancy. If certain areas seem too monotonous, consider adding a further diluted wash of the base color over regions of intense white. Conversely, if the transition is too abrupt, more white or additional layers of delicate whites can be applied to soften the demarcation.
Always allow each layer to dry completely before making further adjustments. Observing the drying process can reveal natural variations that might otherwise be missed during continuous work.
Additional Considerations for a Realistic Outcome
Understanding Light and Shadow
In addition to color mixing, the interplay of light and shadow is vital in capturing the natural essence of a roan horse. Determine the light source in your artwork early on. The cooler and warmer shades used for the highlights and shadows should not only reflect the time of day but also enhance the natural patterns on the horse.
Realistic light and shadow also add a three-dimensional quality to your painting, reinforcing the texture of the coat. For instance, you might choose to emphasize cooler tones in the shadowed areas while highlighting warmer hues on the parts exposed to more light.
Mixing Consistency and Pigment Saturation
Consistency is essential when it comes to the overall coherence of your painting. The white used to simulate lighter hairs should be consistent enough to blend well with the base color. However, variation is key; not every white application should be equally intense. The goal is to produce gentle shifts in pigment saturation that yield a natural, mottled appearance.
Experiment with different dilutions of your white pigment until you achieve the correct level of transparency and brightness required for the delicate white strands on the horse.
Utilizing Dry and Layered Techniques Together
While layering and wet-on-wet techniques are effective for establishing the base and transition regions, a hybrid approach that combines dry brush detailing with precise layering is often necessary for the final touches. The precise movement of a dry brush can capture subtle variations that elevate a painting from good to exceptional. Understanding how to synchronize these techniques is critical to producing a believable roan pattern.
Always remember that the canvas (or paper) itself can act as a part of your painting. Embracing the natural texture of the surface when applying multiple layers adds an organic interaction between the pigment and the medium.
Troubleshooting Common Issues
Over-Blending
One common pitfall in watercolor painting is over-blending, where the clear distinction between the base color and the white fades too much, resulting in a muddy or uniform wash. To help avoid this, control the moisture level of your paper and work in small, deliberate segments. The key is maintaining the balance between a smooth transition and ensuring that the individual strands of white remain perceptible.
Inconsistent White Application
If the white areas become too stark or uniform, the result can appear forced and less natural. Adjusting the brush technique, employing a mix of wet-on-wet and dry methods, and frequently stepping back to assess the overall appearance can help shorten any inconsistencies. Subtle variation is paramount to mimic the organic dispersion of white hairs in nature.
Timing and Layer Drying
Timing is another critical factor. Allowing layers to dry fully before applying new techniques minimizes undesired outcomes such as dilution or unwanted blending. Patience is a virtue, especially when trying to achieve the fine details necessary for a lifelike roan coat. Experts suggest waiting for each wash or layer to dry completely, lending clarity and definition to the final composite image.
Practical Tips and Practice Exercises
Testing on a Palette
A major part of mastering watercolor techniques is testing your mixes on a separate sheet of paper. Begin by creating small swatches of various ratios of your base color to white, noting which combinations yield the most natural roan effect. These test patches will not only serve as references but will also help identify subtle differences in hue and saturation.
Gradual Experimentation
Start simple. Instead of trying to capture an entire roan horse in one go, practice with small sections like a patch of the body. Gradually work up to more complex and larger areas once you're comfortable handling the medium. This progressive approach ensures that you refine your technique without feeling overwhelmed by the intricacies of the entire subject.
Maintaining Consistent Lighting
As your palette and mixtures evolve, consider setting up a controlled lighting environment for your practice work. Consistent, natural lighting enables you to evaluate the accuracy of your colors more reliably. It also helps in understanding how your painting interacts with light and shadow, which is crucial for capturing the realistic dimensions of a roan coat.
Advanced Techniques and Creative Approaches
Hybrid Techniques Combining Gouache and Watercolor
In some instances, employing a hybrid approach that involves both watercolor and gouache can further enhance the realism of a roan horse coat. Gouache, being an opaque medium, permits you to add distinct white details that might be challenging to achieve with translucent watercolors alone. When used judiciously in combination with your existing watercolor layers, gouache can provide sharper delineation for areas where the white hairs are more pronounced.
Optical Blending
Optical blending relies on the visual perception of merged colors when viewed from a distance rather than physically blending pigments on the palette. By carefully placing tiny dabs of the base color and white in close proximity, your eyes naturally blend these elements into a cohesive roan pattern. This method can be particularly effective when attempting to create a nuanced texture, achieving a level of detail that mimics the complex structure of a horse’s fur.
Digital Planning and Sketching
Before committing to the physical painting, consider creating digital sketches or planning out the areas where the roan effect will be most dramatic. This planning phase can help in visualizing the spatial distribution of colors and ensuring proportionality. The digital phase often reveals areas requiring additional detail or subtle transitions that may not be immediately apparent during the initial sketch.
Experimentation with Different Brushes
Brush selection is essential. Experiment with a variety of brush shapes and sizes. Fine-tipped round brushes are ideal for controlled applications of white, while larger flat brushes work best for broad washes of the base color. The texture and stiffness of the brush bristles influence the final outcome, often dictating how pigments flow and blend on the paper.
Conclusion
In conclusion, mastering the watercolor techniques necessary to depict a roan horse involves a blend of precise color mixing, layering, and textural detailing. Begin with a carefully selected base color – whether it is the rich, warm browns of a bay or chestnut roan, or the cooler, slate tone of a blue roan – and work on integrating white in such a manner that the natural distribution of white hairs is convincingly mimicked. Employ a combination of wet-on-wet, layering, lifting, and dry brush techniques to achieve the distinct mottled look. Always pay attention to the interplay of light, shadow, and texture to ensure that your final painting captures the three-dimensional, life-like quality of a roan horse. With practice, patience, and a willingness to experiment with various mixing ratios and brush techniques, you can achieve a beautifully rendered, realistic roan effect in Your watercolor paintings.
This comprehensive approach not only improves your understanding of watercolor mixing and application but also significantly expands your creative potential in portraying complex subject matters like animal coats. By continuously testing and refining your mixes and techniques, you will develop a reliable process for depicting natural variations and minute details inherent in a roan coat, making your artwork genuinely captivating.
References
- Blue Roan Paints - ChronoHorse Forum
- Horse Colors Basics - All About Horses
- How to Paint Horses in Watercolor - Watercolor Academy
- Horse Coat Colors - UC Davis Veterinary Science
- Horse Color Painting - Just Us Horses
Recommended
Last updated February 21, 2025