
Unlocking the Secrets to Propagating Moth Orchids
A Comprehensive Guide to Separation and Repotting
Moth orchids, scientifically known as Phalaenopsis, are celebrated for their elegant, long-lasting blooms and are a popular choice for indoor plant enthusiasts. While they are often perceived as delicate, with the right knowledge and technique, you can successfully separate and repot them to create new plants or refresh existing ones. Unlike some other orchid types that are propagated by division of pseudobulbs, Phalaenopsis are monopodial orchids, meaning they grow from a single stem. Propagation is primarily achieved through the separation of small plantlets called keikis or, in some specific circumstances, through stem cuttings.
Key Insights for Successful Moth Orchid Separation
- Timing is Crucial: The best time to separate and repot Phalaenopsis is typically after they have finished flowering and are entering a period of vegetative growth, indicated by new leaves and roots.
- Keikis are Your Friends: The most common and reliable method for propagating Phalaenopsis is by separating keikis, which are genetic clones of the mother plant that grow on the flower spike.
- Root Health is Paramount: Healthy, firm roots are essential for the survival of separated plants. Inspect and trim away any dead or damaged roots before repotting.
Understanding Moth Orchid Growth and Propagation
Phalaenopsis orchids have a monopodial growth habit, meaning they grow vertically from a single main stem. Leaves emerge from the top of this stem, and flower spikes and aerial roots can appear from the nodes along the stem. This growth pattern differs significantly from sympodial orchids, which grow horizontally and produce new shoots from rhizomes with pseudobulbs.
Due to their monopodial nature, dividing the main plant is generally not a viable or recommended method for propagating Phalaenopsis. Attempting to cut the main stem can severely damage or kill the plant. Instead, propagation is most successfully achieved through two primary methods:
Propagation via Keikis
Keikis (a Hawaiian word meaning "baby") are small plantlets that occasionally grow directly on the flower spike of a mature Phalaenopsis orchid. These are clones of the parent plant and offer a natural way to create new orchids. Keikis form when dormant buds on the flower spike are triggered to develop into a new plant rather than a flower.
Encouraging Keiki Growth
While keikis can appear spontaneously, you can sometimes encourage their development by applying a special hormone paste, known as "keiki paste," to the nodes on a spent flower spike. This paste contains cytokinins, plant hormones that promote cell division and shoot growth. To apply, carefully make a small vertical cut through the protective bract covering a node on the flower spike and apply a small amount of the paste to the exposed bud.
Identifying a Ready Keiki for Separation
A keiki is ready for separation from the mother plant when it has developed its own healthy root system and at least two or three leaves. The roots should be at least 1-2 inches long. Attempting to separate a keiki too early, before it has sufficient roots to support itself, will likely result in failure.
Propagation via Stem Cuttings (Less Common)
While less common and often less successful than keiki separation, it is possible in some cases to propagate Phalaenopsis from stem cuttings of the flower spike after it has finished blooming. This involves cutting the spike into sections containing nodes and attempting to encourage root and shoot development from these nodes in a humid environment. This method is more challenging and has a lower success rate compared to keiki propagation.
Step-by-Step Guide to Separating a Moth Orchid Keiki
Separating a keiki from its mother plant requires careful handling to minimize stress and damage. Follow these steps for a successful separation and repotting:
Preparation is Key
- Gather Your Tools: You will need clean, sharp sterilized cutting tools (like a razor blade or sharp scissors), a suitable small pot for the keiki, fresh orchid potting mix (typically a bark-based mix), and potentially some rooting hormone or a growth stimulant like KLN or SuperThrive.
- Water the Mother Plant: Water the mother orchid thoroughly a day before you plan to separate the keiki. This helps to hydrate the roots, making them more flexible and less prone to breakage during the process.
Separating the Keiki
- Identify the Separation Point: Locate the keiki on the flower spike. You will cut the flower spike about 1-2 inches above and below where the keiki is attached.
- Sterilize Your Cutting Tool: Sterilize your cutting tool with rubbing alcohol or a flame to prevent the spread of disease.
- Make the Cuts: Carefully make clean cuts through the flower spike.
- Inspect the Keiki: Examine the keiki's roots. They should be firm and ideally have green tips, indicating active growth.
Here is a visual representation of separating a keiki:
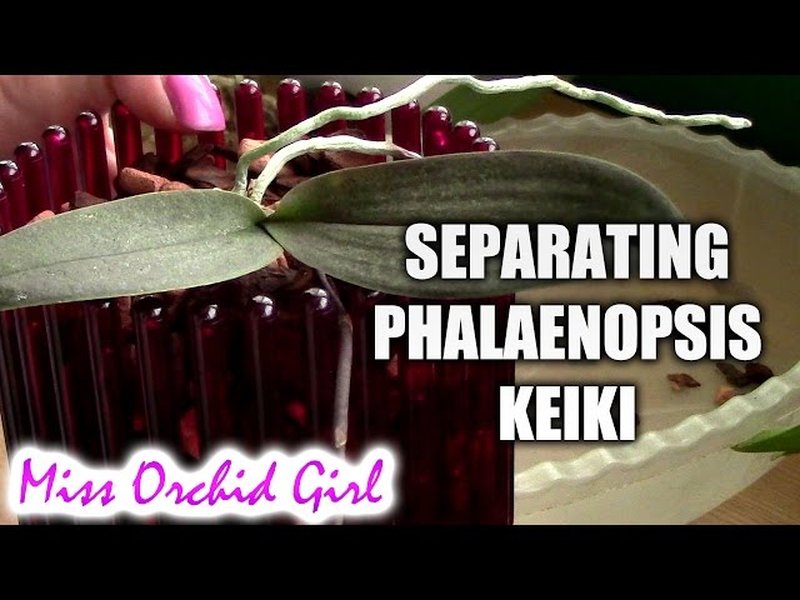
Illustrating the separation of a keiki from the mother plant.
Potting the Separated Keiki
- Choose the Right Pot: Select a small pot with good drainage holes. Clear plastic pots are often preferred for orchids as they allow you to monitor root health and moisture levels.
- Prepare the Potting Mix: Use a fresh, well-draining orchid potting mix. This typically consists of bark, perlite, and sometimes sphagnum moss. Avoid using standard potting soil, as it retains too much moisture and can lead to root rot.
- Position the Keiki: Hold the keiki in the center of the pot and gently fill around the roots with the potting mix. Ensure the base of the keiki is level with the surface of the mix, and the roots are covered.
- Secure the Keiki (Optional): If the keiki is unstable, you can use an orchid clip or stake to gently support it until it establishes itself in the new pot.
- Initial Watering: After potting, water the keiki gently to settle the potting mix around the roots. Allow any excess water to drain away completely. Avoid letting the plant sit in standing water.
Embedding a relevant video showing the keiki separation and potting process:
A helpful video guide on separating and potting a Phalaenopsis keiki.
Post-Separation Care for the Keiki
After potting the keiki, provide it with appropriate care to encourage growth:
- Light: Place the potted keiki in a location that receives bright, indirect light. Avoid direct sunlight, which can scorch the leaves. East or west-facing windows are often ideal.
- Watering: Water the keiki when the potting mix is nearly dry. The frequency will depend on your environment and the potting mix used. It's better to underwater slightly than to overwater. Ensure good air circulation around the roots.
- Humidity: Moth orchids thrive in high humidity. You can increase humidity by misting the leaves (avoiding the flowers if present) or placing the pot on a pebble tray filled with water.
- Fertilizing: Begin fertilizing the keiki with a diluted orchid fertilizer after a few weeks, once you see signs of new growth. A balanced fertilizer like 20-20-20 diluted to half or quarter strength is generally suitable. Fertilize regularly during the active growing season.
- Temperature: Maintain typical room temperatures between 60-80°F (18-28°C). Avoid exposing the keiki to temperatures below 55°F (13°C).
When to Repot a Mature Moth Orchid
Even if you are not propagating, mature Phalaenopsis orchids need to be repotted periodically. Repotting is necessary for several reasons:
- Degradation of Potting Mix: The bark-based potting mix used for Phalaenopsis breaks down over time, losing its airy structure and retaining too much moisture. This can lead to root rot. Repotting every 1-3 years in fresh mix is generally recommended.
- Outgrowing the Pot: While Phalaenopsis prefer to be slightly root-bound, they can eventually outgrow their containers, leading to excessive aerial roots and difficulty in watering.
- Root Health Issues: If you notice signs of root rot (mushy, brown roots) or other root problems, repotting allows you to address these issues and provide the plant with fresh medium.
Signs Your Orchid Needs Repotting
- The potting mix is significantly broken down and appears dense or muddy.
- There are many roots circling the inside of the pot or growing extensively outside the pot (though some aerial roots are normal).
- The plant is unstable in its pot.
- You see signs of root rot or fungal growth in the potting mix.
Here's an image showing healthy orchid roots:
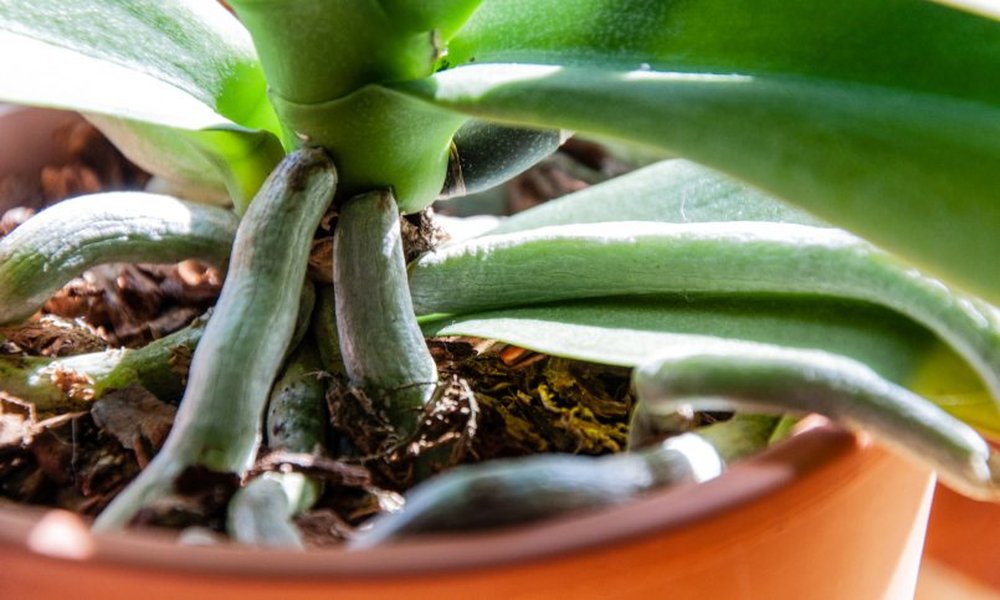
Healthy, plump orchid roots are typically white or green.
The Repotting Process for a Mature Orchid
- Choose the Right Time: Repotting is best done after flowering has finished, ideally when the plant is starting to produce new roots and leaves. Avoid repotting when the orchid is in bloom, as this can cause bud blast (dropping of flowers or buds).
- Prepare the New Pot and Mix: Select a pot that is only slightly larger than the current one. Use fresh orchid potting mix.
- Remove the Orchid: Gently remove the orchid from its current pot. You may need to gently loosen roots that are clinging to the pot.
- Clean the Roots: Carefully remove all the old potting mix from the roots. This can be done by gently shaking or using a stream of water.
- Inspect and Trim Roots: Examine the roots for any that are brown, mushy, or dried and brittle. Trim these away with sterilized cutting tools. Healthy roots will be firm and typically white or green.
- Position in New Pot: Place the orchid in the center of the new pot, ensuring the base of the plant is just below the rim.
- Add New Potting Mix: Carefully fill the pot with fresh orchid mix, working it around the roots. Gently tap the pot to settle the mix, but do not pack it down too tightly, as orchids need good air circulation around their roots.
- Watering After Repotting: Water the orchid thoroughly after repotting, allowing excess water to drain away.
An image demonstrating the repotting process:

Repotting a Phalaenopsis orchid into fresh media.
Distinguishing Between Repotting and Dividing
It's important to understand the difference between repotting and dividing, especially when it comes to Phalaenopsis. Repotting is simply moving the existing plant into a new container with fresh potting medium. Dividing, on the other hand, involves splitting a single plant into multiple separate plants.
As discussed, true division by cutting the main stem is not suitable for monopodial orchids like Phalaenopsis. When people refer to "dividing" a moth orchid, they are almost always referring to separating a keiki from the mother plant or, in rare cases, propagating from a flower spike cutting.
Sympodial orchids, such as Cattleya or Cymbidium, grow from a rhizome and produce pseudobulbs. These types of orchids can be propagated by division, ensuring each division has a minimum number of pseudobulbs (often three or more) and healthy roots.
This table summarizes the key differences:
| Feature | Repotting (Phalaenopsis) | Dividing (Sympodial Orchids) | Separating Keikis (Phalaenopsis) |
|---|---|---|---|
| Purpose | Refresh potting mix, provide space for growth, address root issues | Create new plants from existing growth | Propagate new plants from plantlets on flower spike |
| Plant Type | Monopodial | Sympodial | Monopodial (from flower spike) |
| Method | Remove from old pot, clean roots, place in new pot with fresh mix | Cut rhizome to separate growths | Cut keiki from flower spike |
| Minimum Requirement for New Plant | N/A (existing plant) | Multiple pseudobulbs and roots | Sufficient roots and leaves on keiki |
General Care Tips for Thriving Moth Orchids
Successful separation and repotting are just part of keeping your Phalaenopsis healthy and encouraging future blooms or keiki production. Here are some essential care tips:
-
Light: Provide bright, indirect light.
-
Watering: Water when the potting medium is nearly dry. Avoid letting the plant sit in water. Watering frequency depends on your environment, pot size, and potting mix.
-
Humidity: Maintain moderate to high humidity.
-
Temperature: Keep temperatures between 60-80°F (18-28°C).
-
Fertilizing: Use a fertilizer specifically formulated for orchids, diluted according to package instructions, during the active growing season.
-
Air Circulation: Good air movement around the roots is important.
-
Post-Bloom Care: After the flowers fade, you can cut the flower spike back. Cutting it just above a node may encourage a new spike or a keiki to form. A cool temperature drop in the fall can also help trigger re-blooming.
An image illustrating healthy orchid roots in a pot:
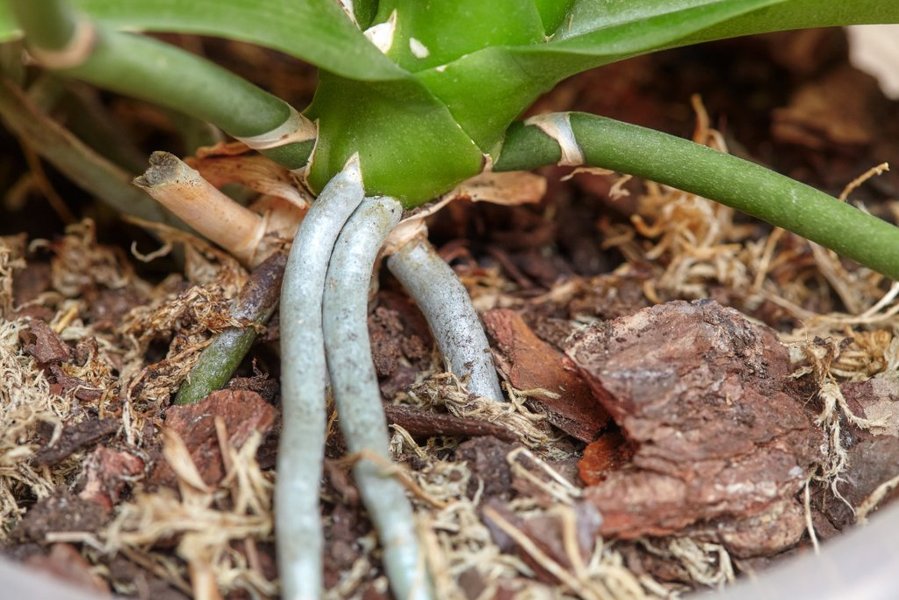
Healthy orchid roots in a transparent pot, showing good structure.
Frequently Asked Questions
Can I separate a moth orchid that doesn't have a keiki?
Generally, no. True division of the main stem is not recommended for Phalaenopsis. Propagation is primarily through keiki separation or, less reliably, from flower spike cuttings.
How long does it take for a keiki to be ready for separation?
The time it takes for a keiki to develop sufficient roots and leaves varies depending on the plant's health and growing conditions. It can take several months to a year or more.
What kind of pot is best for repotting moth orchids?
Pots with good drainage are essential. Clear plastic pots are popular as they allow you to monitor root health and moisture levels. Vented pots can also improve air circulation.
What should I do if the roots are damaged during separation or repotting?
Trim away any damaged or rotten roots with sterilized tools. Healthy roots are more resilient. After repotting, provide appropriate care to help the plant recover.
When is the wrong time to separate or repot a moth orchid?
Avoid separating or repotting when the orchid is in bloom, as this can stress the plant and cause it to drop its flowers.
References
Last updated April 28, 2025