
Setting Up a Raspberry Pi 4B with OpenWRT as a WiFi Extender Using Alfa Adapters
Maximize your network coverage by transforming your Raspberry Pi into a powerful WiFi extender with OpenWRT and Alfa adapters.
Key Highlights
- OpenWRT Installation: Learn how to install OpenWRT on your Raspberry Pi 4B.
- Alfa WiFi Adapter Configuration: Configure two Alfa WiFi adapters for optimal performance.
- WiFi Extender Setup: Set up your Raspberry Pi as a WiFi extender/repeater to boost your network coverage.
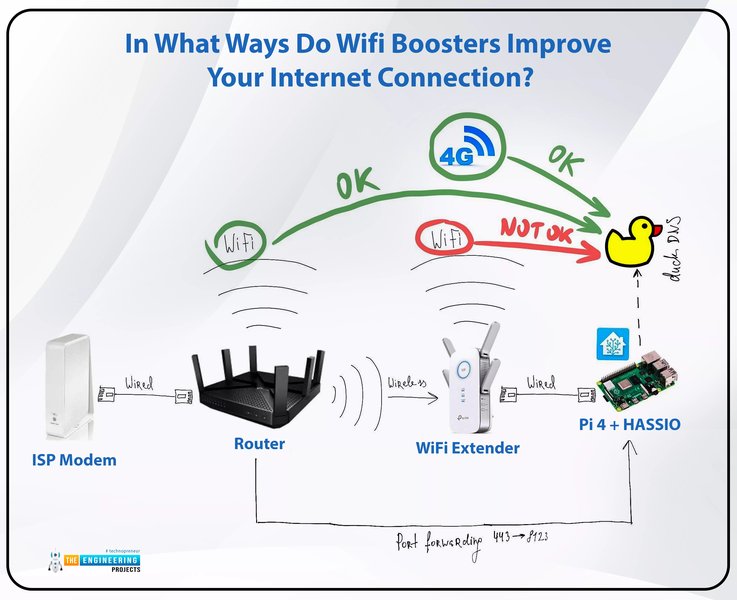
Why Use a Raspberry Pi with OpenWRT as a WiFi Extender?
Using a Raspberry Pi 4B with OpenWRT as a WiFi extender offers a flexible and powerful solution to extend your wireless network. OpenWRT provides extensive customization options and supports a wide range of hardware, making it an ideal choice for advanced networking configurations. By using Alfa WiFi adapters, you can enhance the range and stability of your extended network compared to the built-in Broadcom chip.
Prerequisites
Before you begin, ensure you have the following:
- Raspberry Pi 4B
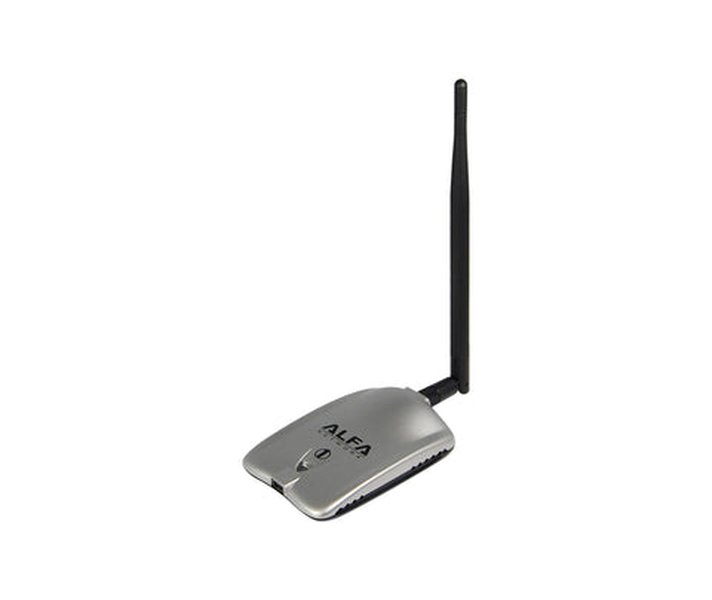
- Two Alfa WiFi USB adapters (e.g., Alfa AWUS036NH, Alfa AWUS1900)
- MicroSD card (8GB or larger)
- Ethernet cable
- Computer with internet access
- Raspberry Pi Imager or balenaEtcher
Installing OpenWRT on Raspberry Pi 4B
The first step is to install OpenWRT on your Raspberry Pi 4B. Follow these steps to get started:
Downloading the OpenWRT Firmware
Download the appropriate OpenWRT firmware image for your Raspberry Pi 4B from the OpenWRT website. Make sure to select the correct version for your device (bcm27xx).
1. Go to the OpenWRT website and download the latest firmware version for your Pi4. At the time this article was created, the only option was a snapshot version, so that’s what I am going to download here. The link that will take you to a download: OpenWRT Download Link
Flashing the Image to the MicroSD Card
Use Raspberry Pi Imager or balenaEtcher to flash the downloaded image to your MicroSD card.
- Open Raspberry Pi Imager or balenaEtcher.
- Select the OpenWRT firmware image.
- Choose your MicroSD card as the target device.
- Flash the image to the MicroSD card.
Booting the Raspberry Pi with OpenWRT
Insert the MicroSD card into your Raspberry Pi 4B and power it on. Connect your computer to the Raspberry Pi via an Ethernet cable.
Configuring OpenWRT
After booting the Raspberry Pi with OpenWRT, you need to configure it to connect to your network.
Accessing the OpenWRT Interface
By default, OpenWRT assigns the IP address 192.168.1.1 to the Raspberry Pi. Configure your computer's Ethernet interface to be in the same subnet (e.g., 192.168.1.2) and access the OpenWRT web interface (LuCI) by navigating to http://192.168.1.1 in your web browser. If there is no root password defined on this device, use the "passwd" command to set up a new password in order to prevent unauthorized SSH logins.
Installing Necessary Packages
Connect your Raspberry Pi to the internet. Since the firmware image may not include the web interface, the LuCi package, connect to the Raspberry Pi's terminal via SSH. To install necessary packages, you first need to update the package lists:
opkg update
opkg install luci
After installing LuCI, you can access the web interface. If you intend to use the Raspberry Pi as a Wi-Fi extender, you might also need to install the relayd package:
opkg install relayd
opkg install luci-proto-relay
Configuring the Alfa WiFi Adapters
Configure the Alfa WiFi adapters to connect to your existing network and to create a new wireless network for extended coverage.
Identifying the Wireless Interfaces
Use the command iwconfig to identify the wireless interfaces. The Alfa adapters should appear as wlan0 and wlan1 (or similar).
Setting Up the Client Interface (wlan0)
Configure one of the Alfa adapters (e.g., wlan0) as a client to connect to your existing WiFi network. In the LuCI interface, go to Network > Wireless and configure the wlan0 interface to connect to your existing network's SSID. Make sure to set the country code in the latest Raspberry Pi OS. Then you can go back to OpenWrt where the new country code will be used. Starting with Raspberry Pi 3 B+, the on-board WiFi won't even start if there is no country code.
Setting Up the Access Point Interface (wlan1)
Configure the other Alfa adapter (e.g., wlan1) as an access point to create a new wireless network. In the LuCI interface, create a new wireless network associated with the wlan1 interface. Set the SSID and password for this new network. For additional security, set up a new password in order to prevent unauthorized SSH logins.
Configuring the WiFi Extender
To set up the Raspberry Pi as a WiFi extender, you need to configure the network interfaces and firewall settings.
Setting Up the Bridge Interface
Create a bridge interface to bridge the client and access point interfaces. This allows devices connected to the extended network to communicate with the main network.
- Go to Network > Interfaces in the LuCI interface.
- Add a new interface with the protocol "Bridge".
- Include the
wlan0(client) andwlan1(access point) interfaces in the bridge. - Assign an IP address to the bridge interface (e.g., 192.168.2.1) in a different subnet from your main network.
Configuring the DHCP Server
Configure the DHCP server on the bridge interface to assign IP addresses to devices connected to the extended network.
- Go to Network > Interfaces and edit the bridge interface.
- Go to the "DHCP Server" tab.
- Enable the DHCP server and set the start and limit addresses for the IP address range.
Configuring the Firewall
Configure the firewall to allow traffic to flow between the main network and the extended network.
- Go to Network > Firewall in the LuCI interface.
- Create a new zone for the bridge interface.
- Allow forwarding from the bridge zone to the WAN zone.
- Allow forwarding from the WAN zone to the bridge zone.
Troubleshooting Common Issues
Setting up a Raspberry Pi as a WiFi extender can sometimes present challenges. Here are some common issues and how to troubleshoot them:
- WiFi Adapter Not Recognized: Ensure the drivers for the Alfa WiFi adapters are installed. You may need to install additional packages using
opkg install kmod-usb-core kmod-usb-net kmod-usb-rtl8812au(or the appropriate driver for your adapter). - Connectivity Issues: Double-check the IP address configurations, firewall settings, and bridge interface setup.
- Performance Issues: WiFi performance can be affected by interference and signal strength. Experiment with different locations for the Raspberry Pi and adjust the WiFi channel settings.
Alfa WiFi Adapters: Models and Compatibility
Alfa WiFi adapters are popular choices for extending WiFi networks due to their range and sensitivity. Here's a brief overview of some models and compatibility notes:
- Alfa AWUS036NH: A widely used adapter with good compatibility.
- Alfa AWUS036NHA: Another popular option, ensure you install the necessary firmware.
- Alfa AWUS1900: A high-performance adapter that may require USB3 for optimal performance.
When using Alfa adapters, ensure they are properly powered. Some adapters may require an external power source or a powered USB hub to function correctly with the Raspberry Pi.
Additional Considerations
Here are a few additional tips to enhance your WiFi extender setup:
-
Placement: Position the Raspberry Pi in a location that provides good coverage to both the main router and the extended area.
-
Security: Use strong passwords for both the main network and the extended network.
-
Updates: Keep OpenWRT and the adapter drivers updated to ensure optimal performance and security.
Summary of Steps
Here is a summary of the steps to set up your Raspberry Pi 4B with OpenWRT as a WiFi extender:
- Flash OpenWRT firmware to the MicroSD card.
- Boot the Raspberry Pi with OpenWRT.
- Access the OpenWRT interface.
- Install necessary packages (LuCI, relayd).
- Configure the Alfa WiFi adapters as client and access point.
- Set up the bridge interface.
- Configure the DHCP server.
- Configure the firewall.
Example Configuration Table
This table illustrates an example configuration for the network interfaces.
| Interface | Description | IP Address | Protocol |
|---|---|---|---|
| wlan0 | Client (Connects to existing WiFi) | N/A (DHCP Client) | DHCP Client |
| wlan1 | Access Point (Creates new WiFi) | 192.168.2.1 | Static |
| br-lan | Bridge Interface | 192.168.2.1 | Static |
Youtube: How To Build A Custom Raspberry Pi Router // OpenWrt on RPi 4
This video tutorial guides you through building a custom router using a Raspberry Pi 4 and OpenWRT. It covers the installation and configuration process, providing a visual aid to complement the written instructions. While the video focuses on setting up a router, the initial steps of installing and configuring OpenWRT are directly applicable to setting up a WiFi extender.
FAQ
Can I use the Raspberry Pi's built-in WiFi instead of Alfa adapters?
Yes, but Alfa adapters generally offer better range and performance. The built-in WiFi can be used, but the configuration steps remain similar.
Do I need a specific version of OpenWRT for this to work?
It's recommended to use the latest stable version of OpenWRT for Raspberry Pi 4B. Snapshot versions may contain newer features but might be less stable.
What if I can't access the LuCI interface?
Ensure your computer is on the same subnet as the Raspberry Pi (192.168.1.x). If you still can't access it, try reinstalling the LuCI package via SSH.
How do I update the Alfa adapter drivers?
Use the opkg update command followed by opkg install to install the appropriate kmod package for your adapter.
Can I use this setup as a travel router?
Yes, this setup can be configured as a travel router. It can very easily be set up as a wireless router, a wired router, a travel router and all of these can be easily configured to optionally use OpenVPN clients.
References
 nelsonslog.wordpress.com
Last updated April 15, 2025