
How to Make a Simple Android App
Build your first Android application with ease
Key Takeaways
- Set Up Your Development Environment: Install Android Studio and required SDKs to start building your app.
- Create and Structure Your Project: Understand the Android project structure to organize your code and resources effectively.
- Design and Implement UI and Logic: Use XML for UI design and Kotlin/Java for app functionality.
1. Set Up Your Development Environment
Installing Android Studio
Android Studio is the official Integrated Development Environment (IDE) for Android development. It provides all the necessary tools to develop, test, and debug your Android applications. To install Android Studio:
- Visit the official Android Studio website.
- Download the installer suitable for your operating system (Windows, macOS, or Linux).
- Run the installer and follow the on-screen instructions. During installation, ensure that the Android SDK, Android Virtual Device (AVD) manager, and other recommended components are selected.
- Once installed, launch Android Studio and proceed with the initial setup, which may include downloading additional components.
Installing the Java Development Kit (JDK)
While Android Studio comes bundled with its own JDK, ensuring you have the latest version can help avoid compatibility issues:
- Download the latest JDK from the Oracle website or use an open-source alternative like AdoptOpenJDK.
- Follow the installation instructions specific to your operating system.
- After installation, configure the JDK path in Android Studio by navigating to
File > Project Structure > SDK Locationand setting the JDK Location accordingly.
Setting Up an Emulator or Physical Device
Testing your app is crucial. You can either use the built-in Android Emulator or a physical device:
- Using the Android Emulator:
- Open Android Studio and go to
Tools > AVD Manager. - Click on Create Virtual Device and select a device model.
- Choose a system image (preferably the latest stable version) and proceed with the setup.
- Once created, you can launch the emulator by clicking the Play button.
- Open Android Studio and go to
- Using a Physical Device:
- Enable Developer Options on your Android device by tapping
Build Numberseven times inSettings > About Phone. - Enable USB Debugging within
Settings > Developer Options. - Connect your device to your computer via USB.
- Authorize the computer on your device when prompted.
- Enable Developer Options on your Android device by tapping
2. Create a New Project
Starting a New Project
With Android Studio installed, you're ready to create your first project:
- Open Android Studio and select Start a new Android Studio project.
- Select a Project Template. For beginners, Empty Activity is recommended as it provides a minimal setup.
- Configure your project details:
- Name: Enter a name for your app (e.g., "MyFirstApp").
- Package Name: A unique identifier in the format
com.yourname.appname. - Save Location: Choose where to save your project on your computer.
- Language: Select Kotlin (preferred) or Java.
- Minimum SDK: Choose the lowest Android version your app will support (e.g., API 21: Android 5.0 Lollipop) to maximize device compatibility.
- Click Finish to create the project. Android Studio will set up the necessary files and folders.
3. Understand the Project Structure
Familiarizing yourself with the project structure is essential for efficient development. Here's an overview of the main components:
| Directory/File | Purpose |
|---|---|
| app/src/main/java | Contains your Kotlin or Java source code, including activities, fragments, and other classes. |
| app/src/main/res | Houses resources such as layouts, strings, images, and styles.
|
| AndroidManifest.xml | Defines essential information about your app, such as activities, permissions, and app components. |
| build.gradle | Gradle build scripts that manage dependencies and build configurations for your project and modules. |
| gradle | Contains Gradle-related files and wrappers. |
4. Design the User Interface
Using the Layout Editor
Designing the UI is a crucial step. You can design your layout visually or by writing XML code directly:
- Navigate to app > res > layout > activity_main.xml in the Project pane.
- Choose between the Design view or the Code view:
- Design View: Utilize drag-and-drop components from the palette to build your UI.
- Code View: Manually write or edit the XML layout for finer control.
- Add UI elements such as
TextView,Button, andEditText. For example, to add a TextView displaying "Hello, World!":
<TextView
    android:id="@+id/textView"
    android:layout_width="wrap_content"
    android:layout_height="wrap_content"
    android:text="Hello, World!"
    app:layout_constraintBottom_toBottomOf="parent"
    app:layout_constraintLeft_toLeftOf="parent"
    app:layout_constraintRight_toRightOf="parent"
    app:layout_constraintTop_toTopOf="parent" />
Ensure that UI components are properly constrained or positioned to accommodate different screen sizes and orientations.
Understanding Layouts
Layouts define the structure and organization of UI elements. Common layouts include:
- LinearLayout: Arranges elements in a single row or column.
- RelativeLayout: Positions elements relative to each other or the parent.
- ConstraintLayout: Offers more flexibility and performance by allowing complex layouts with flat view hierarchies.
Example: Creating a simple UI with a TextView and a Button using ConstraintLayout:
<androidx.constraintlayout.widget.ConstraintLayout xmlns:android="http://schemas.android.com/apk/res/android"
    xmlns:app="http://schemas.android.com/apk/res-auto"
    xmlns:tools="http://schemas.android.com/tools"
    android:layout_width="match_parent"
    android:layout_height="match_parent"
    tools:context=".MainActivity">

    <TextView
        android:id="@+id/textView"
        android:layout_width="wrap_content"
        android:layout_height="wrap_content"
        android:text="Hello, World!"
        android:textSize="18sp"
        app:layout_constraintTop_toTopOf="parent"
        app:layout_constraintStart_toStartOf="parent"
        app:layout_constraintEnd_toEndOf="parent"/>

    <Button
        android:id="@+id/button"
        android:layout_width="wrap_content"
        android:layout_height="wrap_content"
        android:text="Click Me"
        app:layout_constraintTop_toBottomOf="@id/textView"
        app:layout_constraintStart_toStartOf="parent"
        app:layout_constraintEnd_toEndOf="parent"
        android:layout_marginTop="20dp"/>

</androidx.constraintlayout.widget.ConstraintLayout>
5. Implement App Functionality
Writing Code in Kotlin
Kotlin is the preferred language for Android development due to its modern features and seamless integration with Android Studio. To add functionality to your app:
- Open MainActivity.kt located under app > src > main > java > [your package name].
- Link UI elements to your code using
findViewByIdor view binding. - Add event listeners to handle user interactions. For example, changing the text of a TextView when a Button is clicked:
package com.example.myfirstapp

import android.os.Bundle
import android.widget.Button
import android.widget.TextView
import androidx.appcompat.app.AppCompatActivity

class MainActivity : AppCompatActivity() {
    override fun onCreate(savedInstanceState: Bundle?) {
        super.onCreate(savedInstanceState)
        setContentView(R.layout.activity_main)

        val textView = findViewById<TextView>(R.id.textView)
        val button = findViewById<Button>(R.id.button)

        button.setOnClickListener {
            textView.text = "Button Clicked!"
        }
    }
}
This code sets up a click listener for the button, which updates the TextView's text when the button is pressed.
Using View Binding
View Binding is a feature that allows you to more easily write code that interacts with your views. To enable View Binding:
- Open build.gradle (Module: app).
- Add the following inside the
androidblock:android { ... buildFeatures { viewBinding true } } - Sync your project.
- Modify your MainActivity.kt to use View Binding:
package com.example.myfirstapp

import android.os.Bundle
import androidx.appcompat.app.AppCompatActivity
import com.example.myfirstapp.databinding.ActivityMainBinding

class MainActivity : AppCompatActivity() {
    private lateinit var binding: ActivityMainBinding

    override fun onCreate(savedInstanceState: Bundle?) {
        super.onCreate(savedInstanceState)
        binding = ActivityMainBinding.inflate(layoutInflater)
        val view = binding.root
        setContentView(view)

        binding.button.setOnClickListener {
            binding.textView.text = "Button Clicked!"
        }
    }
}
View Binding reduces boilerplate code and makes your code safer by ensuring references to views are type-safe.
6. Run and Test Your App
Using the Emulator
To run your app on the Android Emulator:
- Ensure you have created an AVD (Android Virtual Device) in the AVD Manager.
- Click the Run button (green play icon) in Android Studio.
- Select the emulator you wish to use and click OK.
- The emulator will launch, and your app will be installed and executed on it.
Using a Physical Device
To run your app on a connected physical device:
- Connect your device via USB and ensure USB debugging is enabled.
- Click the Run button in Android Studio.
- Select your device from the list of available deployment targets and click OK.
- Your app will be built and installed on the device.
Troubleshooting Deployment Issues
- Emulator Not Starting: Ensure your system meets the hardware requirements and that virtualization is enabled in your BIOS.
- Device Not Recognized: Verify that USB drivers are correctly installed for your device and that USB debugging is enabled.
- Build Failures: Check the Build Output for error messages and resolve any dependency or configuration issues.
7. Debug and Refine
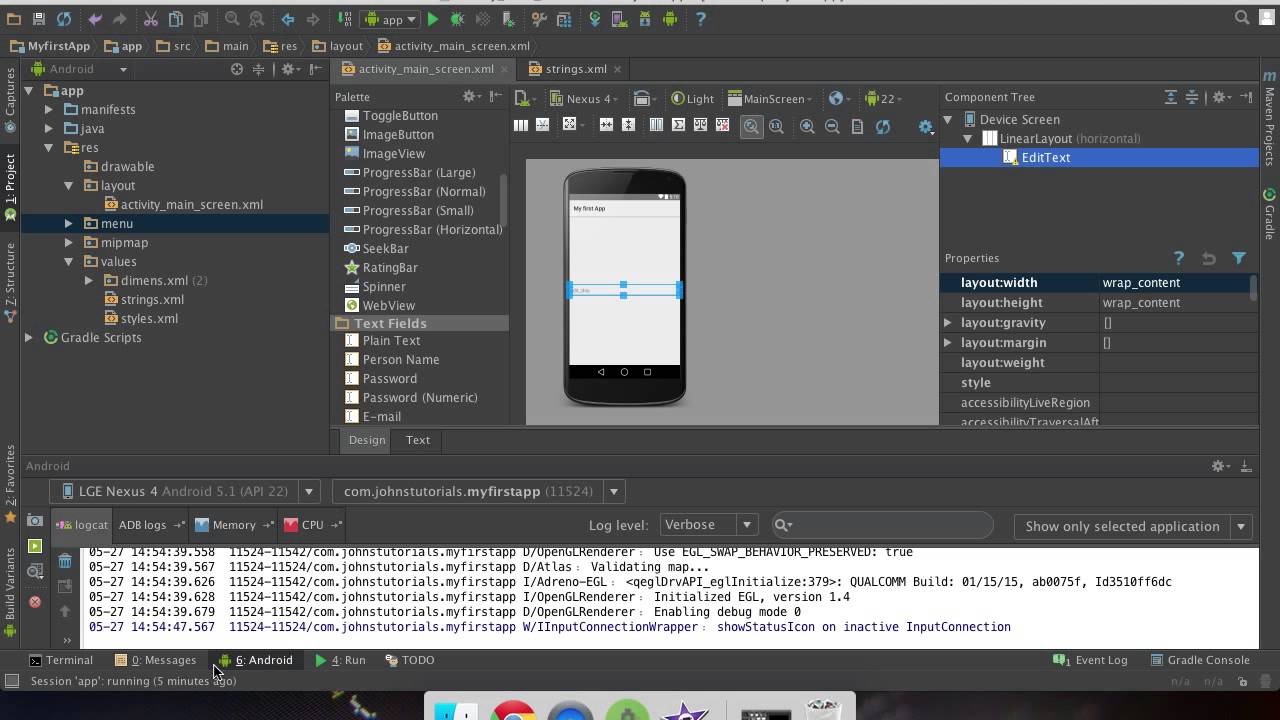
Using Logcat
Logcat is a powerful tool for debugging your app:
- Run your app on an emulator or physical device.
- Open the Logcat window in Android Studio by navigating to
View > Tool Windows > Logcat. - Use Logcat to monitor system messages, including stack traces when your app throws exceptions.
- Filter Logcat messages by your app's package name to focus on relevant logs.
Testing on Different Devices and Screen Sizes
Ensure your app performs well across various devices:
- Use different AVDs with varying screen sizes and resolutions.
- Test on physical devices if available, covering different Android versions and hardware specifications.
- Use Android Studio's Layout Inspector and Layout Validation tools to visualize your UI on multiple devices simultaneously.
Refining Your App
- Optimize your code by removing unnecessary variables and functions.
- Enhance the UI for better user experience by following Material Design guidelines.
- Implement additional features incrementally, ensuring each addition maintains app stability.
- Seek feedback from users or peers to identify areas for improvement.
8. Publish Your App (Optional)
Preparing for Release
Before publishing your app, ensure it's ready for distribution:
- Review and optimize your app's performance and UI.
- Remove any debug code and test thoroughly.
- Generate a signed APK or App Bundle:
- Navigate to
Build > Generate Signed Bundle / APK. - Select Android App Bundle or APK and follow the prompts to create a signing key.
- Navigate to
- Update the AndroidManifest.xml with necessary permissions and app metadata.
- Create app icons and other graphics adhering to Google Play's guidelines.
Publishing to Google Play Store
- Create a Google Play Developer Account by visiting the Google Play Console and paying the registration fee.
- Within the Play Console, select Create App and fill in the required details, including app name, description, and category.
- Upload your signed APK or App Bundle under the Release section.
- Provide necessary information such as app screenshots, feature graphics, and promotional material.
- Set your app's pricing and distribution regions.
- Review and submit your app for review. Google will evaluate your app for compliance with its policies before making it available on the Play Store.
For detailed instructions, refer to the official Android publishing guide.
Additional Tips
-
Master Different Layouts: Understanding various layout managers like
ConstraintLayout,LinearLayout, andRelativeLayoutis essential for creating responsive designs. -
Practice XML: Since UI customization heavily relies on XML, becoming proficient in writing and understanding XML layouts will streamline your development process.
- Android Developers Guide
-
Explore Material Design: Adhering to Material Design principles ensures your app provides a consistent and intuitive user experience.
- Stack Overflow
-
Version Control: Use systems like Git to manage your codebase, track changes, and collaborate with others effectively.
-
Continuous Learning: Android development is a rapidly evolving field. Stay updated with the latest tools, libraries, and best practices by following official blogs and participating in developer communities.
References
Last updated January 23, 2025