
Creating a 3D Game in C# with Unity
A comprehensive guide for building your first Unity project
Key Highlights
- Step-by-Step Workflow: Begin with project setup, move on to scene creation, scripting, physics, and finally build your game.
- Unity Essentials: Understand the Unity interface, GameObjects, components, assets, and the use of C# to control game logic.
- Learning and Resources: Benefit from official tutorials, community resources, and practical code examples to refine your development skills.
Introduction to Unity and C# 3D Game Development
Unity is one of the most popular and powerful game development environments available today. It supports both 2D and 3D game development and uses C# as its primary scripting language. Whether you want to create a simple interactive experience or a complex 3D game with advanced physics, Unity provides a versatile platform packed with features and robust tools to get you started. This guide will walk you through all the essential steps to create a 3D game using C# in Unity.
Setting Up Your Environment
Installing Unity Hub and Visual Studio
The first step in creating a 3D game is setting up your software environment. Unity Hub is the official manager for Unity projects and installations. Download Unity Hub from the Unity website, install it, and then use it to download the latest version of the Unity Editor. Additionally, install Visual Studio, a comprehensive development environment that integrates seamlessly with Unity for editing and debugging your C# scripts.
Download and Installation Steps
1. Visit the official Unity website to download Unity Hub.
2. Install Unity Hub and use it to select and install the latest stable Unity Editor version.
3. During installation, ensure you also install the Visual Studio Community Edition, which is normally offered as part of the Unity installation process.
Creating a New Unity Project
Project Initialization
With Unity Hub installed, start by creating a new project. Select the “3D” template to ensure your project is configured for 3D game development.
Steps to Create a Project
1. Launch Unity Hub.
2. Click “New Project” and choose the “3D” template.
3. Enter a project name and select a location to save your project files.
4. Click “Create” to set up the initial project structure.
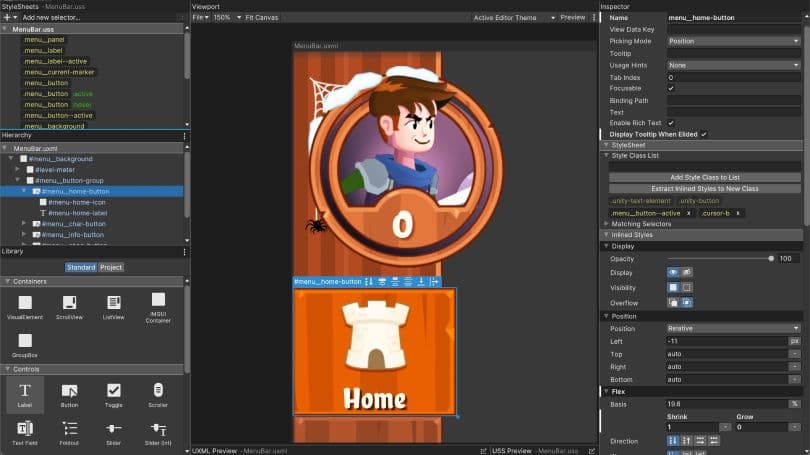
Understanding the Unity Interface
Navigating the Editor
Upon creating your project, familiarize yourself with the Unity interface. The main components include:
- Scene View: The interactive area where you build and arrange your game elements.
- Game View: The view used to simulate and test your game as it runs.
- Hierarchy: A structured list of all GameObjects present in your scene.
- Inspector: The panel that shows properties and components for selected GameObjects.
- Project Window: A repository for all your project assets including scripts, models, textures, sounds, and more.
Building Your 3D Game
Step 1: Scene Setup and Object Creation
Begin by constructing your game scene. Add GameObjects like terrain, buildings, characters, or obstacles. Unity allows you to create basic 3D shapes like cubes, spheres, and planes using the GameObject → 3D Object menu. You can also import custom 3D models from software like Blender or Maya.
Tips for Designing Your Scene
- Create a flat terrain to serve as your game’s ground.
- Add lighting effects for depth and atmosphere using directional, spot, or point lights.
- Place environmental objects to create an engaging game world.
Step 2: Scripting with C#
Scripting is essential to bring your game to life. C# scripts allow you to define behaviors, control objects, and implement game mechanics. Within Unity, you can create a new C# script by right-clicking in the Project window, selecting "Create → C# Script", and naming it (e.g., PlayerController).
Example: Basic Player Movement
The following code demonstrates a simple script to control player movement:
// This script moves the player using input axes
using UnityEngine;

public class PlayerController : MonoBehaviour
{
    public float speed = 5f;

    void Update()
    {
        // Get input for movement on horizontal and vertical axes
        float moveHorizontal = Input.GetAxis("Horizontal");
        float moveVertical = Input.GetAxis("Vertical");

        // Create a direction vector based on player input
        Vector3 movement = new Vector3(moveHorizontal, 0.0f, moveVertical);

        // Translate the player's position according to input
        transform.Translate(movement * speed * Time.deltaTime);
    }
}
Attach this script to the player GameObject by dragging it onto the player or using the "Add Component" button in the Inspector.
Step 3: Integrating Physics and Collisions
In order to create realistic interactions in your game, Unity's physics engine is used. To enable physics:
- Add a Rigidbody component to your dynamic GameObjects (especially the player) to allow physics simulation.
- Assign colliders (like Box Collider, Sphere Collider, or Mesh Collider) to objects to detect collisions and respond accordingly.
Adjust physics settings in the Rigidbody component to control behaviors such as gravity and drag. This step is crucial if you plan to incorporate features like jumping, falling, or collision detection with enemies and obstacles.
Step 4: Enhancing Your Game with Assets
To enrich your game, enhance the visual appeal and interactivity by importing assets such as textures, materials, and animations. Unity's Asset Store offers an extensive collection of free and premium assets that can accelerate your development process.
Importing and Configuring Assets
- 3D Models: Import models created in external programs like Blender. Use these as players, enemies, or environment details.
- Materials and Textures: Customize the look of your models by assigning materials. Modify colors, transparency, and reflective properties.
- Animations: Use Unity’s Animator component and Animation Controller to bring characters to life with smooth movement sequences.
Organizing Your Game Development Workflow
A Structured Development Process
Organizing your game development process greatly simplifies managing various tasks. Breaking down the project into manageable components—such as scene design, game logic, asset integration, and testing—helps ensure steady progress.
Development Workflow Table
| Stage | Description | Key Activities |
|---|---|---|
| Setup | Install Unity and Visual Studio, create a project | Download and install software, create new project using a 3D template |
| Scene Creation | Design the game environment | Add GameObjects, configure lighting and camera angles |
| Scripting & Logic | Program game behaviors | Create and attach C# scripts, implement player controls and physics |
| Asset Integration | Add and configure assets | Import models, textures, animations, and set up colliders |
| Testing & Polish | Run and refine the game | Playtest, debug, adjust physics, and enhance visuals |
| Build & Deployment | Compile and publish the game | Select target platform in Build Settings and build executable files |
Step 5: Testing and Iterating Your Game
Once the game logic and assets are implemented, continually test your game by pressing the “Play” button in Unity. Iteration is key: as you test, observe how the player interactions feel, if the physics are realistic, and adjust your scripts and object placements accordingly. Debugging is assisted by Unity’s Console, which displays error messages, warnings, and output that can help you troubleshoot issues.
Playtesting Best Practices
- Test each new feature immediately after implementation to ensure stability.
- Use Unity’s Debug.Log to print messages that help trace game behavior issues.
- Seek feedback from peers to gather insights and improve game mechanics.
Advanced Topics and Enhancements
Implementing Game UI and Controls
Beyond basic movement and interaction, most games benefit from a well-designed user interface (UI). Unity allows you to create interactive menus, health bars, score counters, and other elements using its UI system. Use Canvas objects to structure and display your UI components.
UI Implementation Tips
- Create a Canvas from the GameObject → UI menu.
- Add Text, Buttons, and Images to the canvas, then modify their properties and scripts as needed.
- Link UI events with your game logic to create interactive menus and in-game notifications.
Integrating Audio and Animations
Audio effects and character animations add life and immersion to your 3D game. Unity supports audio clips for background music, sound effects, and voice overs. Use the Audio Source component to attach sound files to various GameObjects and manage them via scripting.
Audio and Animation Best Practices
- Organize your audio files in a dedicated "Audio" folder within your project directory.
- Synchronize animations with game events by using triggers in the Animator component.
- Ensure that audio levels and transitions are balanced for a pleasing gameplay experience.
Building and Publishing Your Game
After thorough testing and refinement, the final step is to build your game for the target platform, which may be PC, mobile, or consoles. In Unity, navigate to File → Build Settings, select the desired platform, and click “Build.” Unity compiles your project into a standalone executable or app package.
Final Build Considerations
- Adjust player settings for optimal performance on your target platform.
- Test the build on actual hardware to catch platform-specific issues.
- Review Unity’s documentation for release management and publishing guidelines.
Resources and Further Learning
As you advance in your game development journey, numerous online resources and tutorials can further increase your skills:
- Unity Learn – Official tutorials and courses for beginners to advanced developers.
- Udemy courses – Comprehensive courses on Unity 3D and C# game development.
- YouTube – Video tutorials covering everything from basic navigation to advanced scripting techniques.
- Unity Documentation – Detailed guides and reference materials on every Unity component and feature.
- Community Forums – Join discussions with fellow developers to exchange tips and solve problems.
References
- Creating a 3D Endless Runner Game - Unity Discussions
- Full Guide To Unity 3D & C# - Udemy
-
Beginning 3D Game Development - Unity Learn
- Quickstart 3D Create - Unity Manual
- How to Make a Simple Game in Unity 3D - Instructables
Recommended Queries
- Explore optimization strategies for 3D game performance in Unity
- Learn advanced C# scripting techniques to enhance game mechanics
- Dive into integrating VR/AR functionalities with Unity 3D
- Discover best practices for designing interactive game UIs in Unity
- Understand the steps required to build and publish a Unity game
Last updated March 11, 2025