
The World of Vermicomposting: Turning Waste into Garden Gold
A Comprehensive Guide to Getting Started with Worm Composting
Vermicomposting, also known as worm composting, is a fascinating and effective method of recycling organic waste into a valuable soil amendment. This process utilizes specific types of earthworms, primarily red wigglers (Eisenia fetida or Eisenia andrei), to break down food scraps and other organic materials, producing nutrient-rich vermicompost (worm castings) and a liquid byproduct called vermiwash.
Key Highlights of Vermicomposting
- Resourceful Recycling: Vermicomposting offers an excellent way to divert organic waste from landfills, reducing methane gas emissions and promoting sustainability.
- Nutrient-Rich End Product: The resulting vermicompost is a highly valuable soil amendment, rich in water-soluble nutrients, beneficial microorganisms, and plant growth regulators, significantly improving soil health and plant growth.
- Accessible for Many: Vermicomposting can be done in relatively small spaces, making it suitable for apartments, homes with limited outdoor space, and even larger-scale operations.
What is Vermicomposting?
At its core, vermicomposting is a natural process accelerated by the digestive power of composting worms. These worms consume organic materials, breaking them down into a finely-textured, dark material known as vermicast, or worm castings. This material is far more nutrient-dense and biologically active than traditional compost.
Unlike traditional hot composting, which relies on microbial heat to break down organic matter, vermicomposting is a mesophilic process, meaning it occurs at moderate temperatures. The worms and associated microorganisms work together in a symbiotic relationship to decompose the organic waste efficiently.
The Role of Worms and Microorganisms
While the worms are the visible stars of the process, a diverse community of microorganisms, including bacteria and fungi, plays a crucial role. These microbes begin the decomposition process, making the organic matter more palatable for the worms. As the worms consume the material, it passes through their digestive tracts, where it is further broken down and enriched with beneficial microbes, enzymes, and plant growth-promoting substances.
The Remarkable Benefits of Vermicompost
The end product of vermicomposting, the vermicompost, offers a wide array of benefits for both soil and plants. Its unique composition and biological activity make it a superior soil amendment compared to many other forms of compost.
Enhancing Soil Health
Vermicompost significantly improves the physical, chemical, and biological properties of soil. Physically, it enhances soil structure, increasing aeration, porosity, and water retention capacity. Chemically, it boosts the availability of essential plant nutrients like nitrogen, phosphorus, and calcium, while also improving pH and electrical conductivity. Biologically, it introduces a rich diversity of beneficial microorganisms, which can suppress plant diseases and improve overall soil fertility.
Boosting Plant Growth and Yield
Studies have shown that applying vermicompost to soil can lead to enhanced seed germination rates, accelerated seedling growth, and increased overall plant growth, flowering, and yield. Beyond providing readily available nutrients, vermicompost contains plant growth regulators such as auxins, gibberellins, and cytokinins, which further stimulate plant development.
Here's an image illustrating the positive impact of vermicompost:
Comparing Turnip Growth with and without Vermicompost
This image visually demonstrates the difference in growth when vermicompost is used. The turnips grown with vermicompost are significantly larger, highlighting its effectiveness as a soil amendment.
Pest and Disease Suppression
The presence of beneficial microorganisms in vermicompost can help suppress soil-borne plant diseases. Additionally, some research suggests that vermicompost and its liquid byproduct, vermiwash, may contain enzymes like chitinase, which can help repel certain pests by degrading chitin, a major component of insect exoskeletons.
Environmental Advantages
Beyond its gardening benefits, vermicomposting plays a role in environmental sustainability. By diverting organic waste from landfills, it reduces the production of methane gas, a potent greenhouse gas. This contributes to mitigating climate change.
Getting Started with Vermicomposting: A Step-by-Step Guide
Starting a vermicomposting system is relatively simple and can be done indoors or outdoors, depending on your space and climate. Here are the key steps involved:
Step 1: Acquire a Bin
You can purchase a ready-made worm composting bin or easily construct your own. A dark plastic storage container with a tight-fitting lid is a common and effective choice. The bin should be at least eight to fourteen inches deep.
It's crucial to ensure proper aeration for the worms. Drill small holes around the upper inch or two of the bin. Groupings of three holes (1/2-inch or less) spaced about five inches apart work well. Alternatively, you can drill a larger three-inch hole and cover it with a screen to prevent pests.

Simple Homemade Worm Bin
This image shows a basic setup for a DIY worm bin using a plastic container, illustrating the necessary air holes.
Step 2: Prepare the Bedding
Worms need suitable bedding to live in. Excellent bedding materials include shredded newspaper, cardboard, coconut coir, and peat moss. Avoid using glossy paper or magazines. The bedding should be fluffed to allow for air circulation.
Adding Bedding to a Worm Bin
This image depicts the addition of bedding material to a worm bin, an essential step before introducing the worms.
Step 3: Moisten the Bedding
The bedding needs to be consistently moist, similar to a wrung-out sponge. Add water and mix it thoroughly into the bedding material until it reaches the appropriate moisture level. Avoid making it too wet, as this can create anaerobic conditions that are harmful to the worms.
Step 4: Add the Worms
The most recommended worms for vermicomposting are red wigglers (Eisenia fetida). They are well-suited to the composting environment and reproduce quickly. You can purchase them online, from local worm farms, or sometimes in the fishing section of retail stores.
Introduce the worms to their new home by gently placing them on top of the moistened bedding. They will burrow down into the bedding as they acclimate.
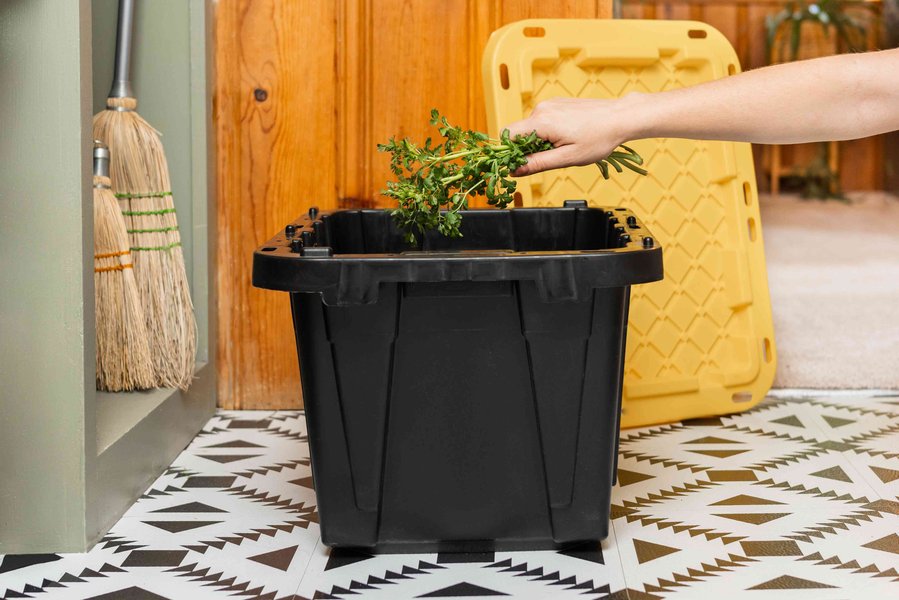
Step 5: Bury Food Scraps
Begin feeding your worms small amounts of appropriate food scraps. Bury the food scraps under the bedding to help prevent fruit flies and other pests. Gradually increase the amount of food as your worm population grows and becomes established.
Step 6: Maintain the Bin
Regular maintenance is key to a healthy worm bin. Monitor the moisture level and add water if the bedding appears dry. Gently turn the bedding occasionally to improve aeration. Avoid overfeeding, which can lead to foul odors and attract pests.
Here's a helpful video demonstrating how to fill a worm bin and get started:
Starting a New Worm Bin: A Visual Guide
This embedded YouTube video provides a simple, step-by-step tutorial on setting up a new worm bin from scratch, offering visual guidance for beginners.
What to Feed Your Composting Worms
Composting worms can eat a variety of organic materials, but some are better than others. It's important to feed them a balanced diet to keep them healthy and productive.
Acceptable Food Scraps
Worms will happily consume most fruit and vegetable scraps, coffee grounds, tea bags, shredded paper, and cardboard. Crushed eggshells can also be added in moderation as grit to help the worms' digestion.
Materials to Avoid
There are certain materials that should not be added to a worm bin as they can harm the worms or create problems. Avoid adding meat, dairy products, oily foods, and excessive amounts of citrus fruits. Pet waste should also be avoided.
Troubleshooting Common Vermicomposting Issues
While generally straightforward, you might encounter a few common issues with your worm bin. Understanding how to address them will ensure a thriving system.
Fruit Flies
Fruit flies can be attracted to exposed food scraps. To prevent them, always bury food scraps under the bedding material.
Bad Odor
A foul odor in your worm bin usually indicates anaerobic conditions, often caused by too much moisture or overfeeding. Ensure adequate aeration by gently turning the bedding and avoid adding too much food at once.
Overfeeding
Adding too much food can overwhelm the worms and lead to odor and pest issues. Start with small amounts of food and observe how quickly the worms consume it before adding more.
Harvesting Vermicompost
Once your bin is full of rich, dark vermicompost, it's time to harvest. This typically takes anywhere from one to four months, depending on the size of your bin and the number of worms.
Methods for Harvesting
There are several methods for separating the worms from the castings. One common method is the "migrate" method, where you move the finished vermicompost to one side of the bin and add fresh bedding and food to the other. The worms will gradually migrate to the new food source, allowing you to collect the finished vermicompost.
Another method is the "light" method. Since worms are sensitive to light, you can expose the vermicompost to light. The worms will burrow down, allowing you to skim off the top layer of castings. Repeat this process until you reach the bottom of the bin.
Utilizing Your Vermicompost
The harvested vermicompost is a valuable resource for your garden and potted plants.
As a Soil Amendment
Mix vermicompost into your potting mix for containers or incorporate it into your garden soil. Its rich nutrient content and beneficial microbes will significantly improve soil fertility and structure.
Creating Vermiwash
Vermiwash, the liquid collected from the bottom of some worm bins, is also a nutrient-rich liquid fertilizer. It contains water-soluble nutrients and beneficial microorganisms. You can dilute it with water and use it to water your plants.
Comparing Vermicomposting and Traditional Composting
While both vermicomposting and traditional composting are methods of recycling organic waste, they differ in several aspects:
| Feature | Vermicomposting | Traditional Composting |
|---|---|---|
| Primary Agents | Earthworms and microorganisms | Microorganisms (bacteria and fungi) |
| Process Speed | Faster (weeks to months) | Slower (months to a year) |
| End Product | Vermicompost (worm castings) | Compost |
| Nutrient Content | Higher concentration of water-soluble nutrients, plant growth regulators | Nutrient content varies depending on materials |
| Suitable for | Food scraps, some paper/cardboard | Yard waste, food scraps, other organic materials |
| Requires | Worm bin, specific worms, consistent moisture/temperature | Compost pile/bin, regular turning, sufficient moisture/aeration |
Comparison of Vermicomposting and Traditional Composting
This table highlights the key differences between vermicomposting and traditional composting, making it easier to understand which method might be best suited for your needs.
FAQ About Vermicomposting
What types of worms are best for vermicomposting?
Red wigglers (Eisenia fetida or Eisenia andrei) are the most commonly recommended worms for vermicomposting due to their efficiency in processing organic waste and their rapid reproduction rate.
How often should I feed my worms?
Start with small amounts of food and observe how quickly the worms consume it. Generally, you can feed them once or twice a week. Avoid adding more food until the previous batch has been mostly consumed.
Can I vermicompost meat and dairy?
No, avoid adding meat, dairy products, and oily foods to your worm bin. These materials can attract pests, create foul odors, and harm the worms.
How do I know when the vermicompost is ready?
Finished vermicompost will be a dark, earthy-smelling, crumbly material. You should no longer see recognizable food scraps, although some bedding material may remain.
What is vermiwash and how is it used?
Vermiwash is the liquid that collects at the bottom of some worm bins. It is a liquid fertilizer rich in water-soluble nutrients and beneficial microbes. It can be diluted with water and used to water plants.
References
Last updated April 21, 2025