
Unlock Your Dream Kitchen: Your Comprehensive Guide to Removing Non-Structural Walls!
Transform your space! Learn the essentials of demolishing non-structural walls for a stunning new kitchen, plus a quick look at your query's grammar.
Embarking on a kitchen remodel often involves reconfiguring the layout for better flow and functionality. A common step in achieving an open-concept design is the removal of existing non-structural walls. This guide provides detailed information on this process, alongside a grammatical review of your initial query.
Key Takeaways: Demolition Essentials
- Verify Before You Pry: Absolute certainty that a wall is non-load-bearing is paramount. Incorrectly removing a load-bearing wall can compromise your home's structural integrity. Always consult original building plans or a structural engineer if unsure.
- Beware Hidden Utilities: Non-structural walls can still house vital systems like electrical wiring, plumbing pipes, and HVAC ductwork. Identifying and safely managing these is crucial before demolition begins.
- Safety First, Always: Demolition is dusty and can be hazardous. Using appropriate Personal Protective Equipment (PPE) and following safety protocols protects you from injury and health risks.
Grammatical Polish for Your Project Query
Refining Your Statement
Your original query was: "Demolish the existing non-structural walls to suit the new kitchen check garmmer."
Firstly, "garmmer" is a misspelling of "grammar."
The sentence "Demolish the existing non-structural walls to suit the new kitchen" is grammatically understandable and largely correct for informal communication. However, for more formal or professional contexts, such as in project plans or communications with contractors, slight refinements can enhance clarity and precision:
- Original: "Demolish the existing non-structural walls to suit the new kitchen."
- Slightly More Formal Alternatives:
- "Demolish the existing non-structural walls to accommodate the new kitchen." (This version is often preferred in architectural or renovation contexts.)
- "Demolish the existing non-structural walls to fit the new kitchen layout."
- "Remove the existing non-structural walls to create space for the new kitchen."
These alternatives offer a more precise articulation of the wall's removal in relation to the new kitchen design. The verb "demolish" is appropriate for construction contexts. Adding "existing" and "non-structural" correctly specifies the walls in question. While your original phrasing is acceptable, the suggestions aim for optimal clarity and professionalism.
The A-to-Z of Non-Structural Wall Demolition for Your Kitchen
Removing non-structural walls, often called partition walls, can dramatically transform your kitchen, paving the way for an open-concept design, improved traffic flow, and a more spacious feel. While less complex than removing load-bearing walls, this task still requires careful planning and execution.
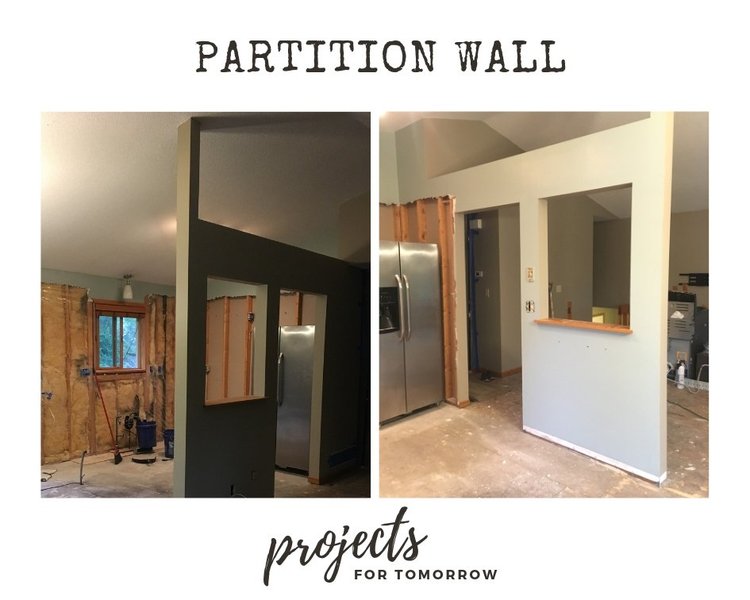
An example of a non-structural partition wall with exposed framing during a kitchen demolition.
Phase 1: Crucial Pre-Demolition Preparations
Confirming Wall Type: Non-Negotiable First Step
Before any hammer swings, you must be 100% certain the target wall is non-load-bearing. These walls only support their own weight and do not carry structural loads from the roof or upper floors. Removing a load-bearing wall without proper alternative support can lead to severe structural damage.
- Consult Blueprints: Your home's original building plans can indicate which walls are structural.
- Inspect Support Structures: Look in the basement/crawl space below and the attic above. Load-bearing walls often have continuous support structures (like beams or joists running perpendicular to them) directly beneath or above them. Non-structural walls may run parallel to joists or lack direct support linkage.
- Seek Professional Advice: When in doubt, hire a structural engineer or an experienced contractor. The cost of a consultation (often $500-$1000) is a small price for peace of mind and safety.
Identifying and Managing Utilities
Interior walls frequently conceal utilities. Accidental damage can lead to costly repairs, electrical shock, or water damage.
- Electrical Wiring: Look for outlets, switches, or light fixtures on the wall. Even if none are visible, wiring might pass through.
- Plumbing Pipes: Walls near bathrooms, kitchens, or laundry areas are more likely to contain water supply or drain pipes.
- HVAC Ducts: Ducts for heating, ventilation, and air conditioning can run through interior walls.
- Gas Lines: Though less common in typical partition walls, older homes might have them.
Probing small exploratory holes (after ensuring power is off to any suspected circuits) can help identify hidden elements. Any discovered utilities must be professionally disconnected, rerouted, or capped off before demolition.
Permits and Regulations
Many municipalities require permits for interior demolition, even for non-structural walls. Check with your local building department to understand requirements and ensure compliance. Working without necessary permits can lead to fines or issues when selling your home.
Safety Gear and Work Area Preparation
Demolition is inherently messy and potentially hazardous. Prioritize safety:
- Personal Protective Equipment (PPE): Always wear safety glasses or goggles, heavy-duty gloves, a dust mask or respirator (N95 or P100), long sleeves, and sturdy closed-toe shoes. A hard hat is advisable.
- Clear the Area: Remove all furniture, appliances, and decor from the vicinity.
- Protect Surfaces: Cover floors, nearby walls, and furniture in adjacent rooms with drop cloths or plastic sheeting. Seal off doorways to other parts of the house with plastic sheeting and tape to contain dust.
- Ventilation: Ensure good ventilation in the work area if possible.
Phase 2: The Demolition Process – Step-by-Step
Once all preparations are complete and utilities are safely managed, the physical demolition can begin.
- Shut Off Utilities: Double-check that electricity to any circuits in the wall is off at the breaker panel. Test outlets with a non-contact voltage tester. Shut off water or gas lines if relevant.
- Score Wall Edges: Using a utility knife, score deeply along the lines where the wall meets the ceiling, adjacent walls, and the floor. This helps create a clean break and prevents damage to surfaces that will remain. For plaster walls, this step is particularly important to minimize cracking.
- Remove Surface Materials:
- Drywall: Create an initial hole with a hammer or pry bar. Then, pull or pry off sections of drywall. You can cut it into manageable pieces with a drywall saw.
- Plaster and Lath: This is messier. Break through the plaster with a sledgehammer (use controlled force) or pry bar. Once the plaster is off, cut through the wooden or metal lath with appropriate tools (e.g., reciprocating saw with a suitable blade).
- Dismantle Wall Framing: With the wall covering removed, the wooden or metal studs will be exposed.
- Remove any remaining nails or screws holding the studs to the top and bottom plates (horizontal members).
- Pry or twist the studs free one by one. A reciprocating saw can be used to cut through stubborn nails or studs if necessary. Start from one end and work your way across.
- Remove the top and bottom plates if they are not integrated into other structures.
- Clean Up and Debris Management: Demolition generates significant debris.
- Bag smaller debris in heavy-duty contractor bags.
- Larger pieces may need to be broken down further.
- Dispose of debris responsibly according to local regulations. This might involve renting a small dumpster or making multiple trips to a waste disposal facility.
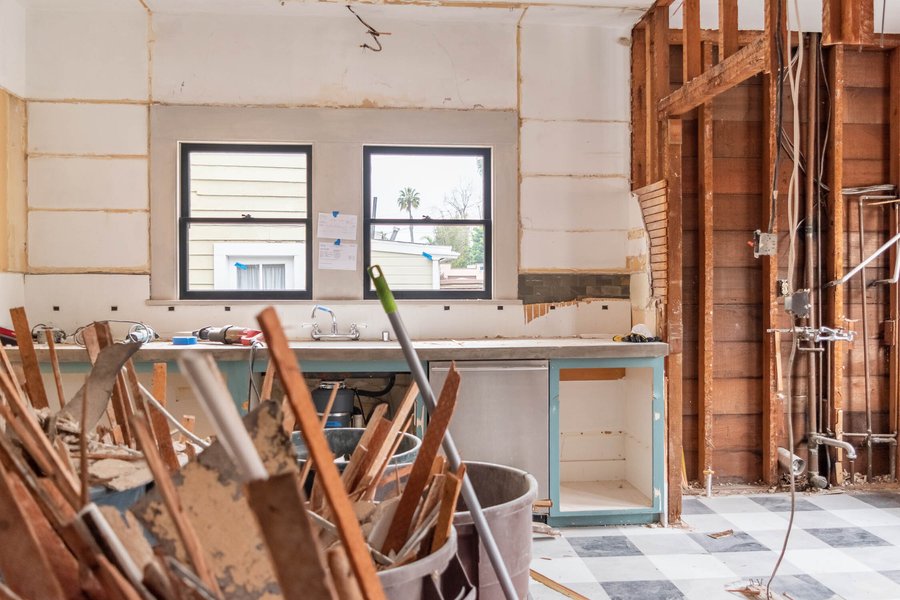
The demolition phase can be messy but is a crucial step towards a new kitchen layout.
Phase 3: Post-Demolition – Making Way for the New
Final Utility Checks and Adjustments
After the wall is gone, inspect the area for any remaining utility components (wires, pipes) that were missed or need further attention. Ensure they are safely terminated or rerouted by qualified professionals (electrician, plumber).
Repairing Adjacent Surfaces
The removal will leave unfinished areas on the ceiling, floor, and adjoining walls. These will need to be patched and finished to blend seamlessly with the existing surfaces. This may involve:
- Patching drywall or plaster.
- Taping, mudding, and sanding.
- Repairing or replacing flooring.
- Priming and painting.
Preparing for the New Kitchen
With the wall removed and surfaces repaired, the space is now a blank slate, ready for the installation of your new kitchen elements, such as cabinets, islands, and appliances, according to your redesigned layout.
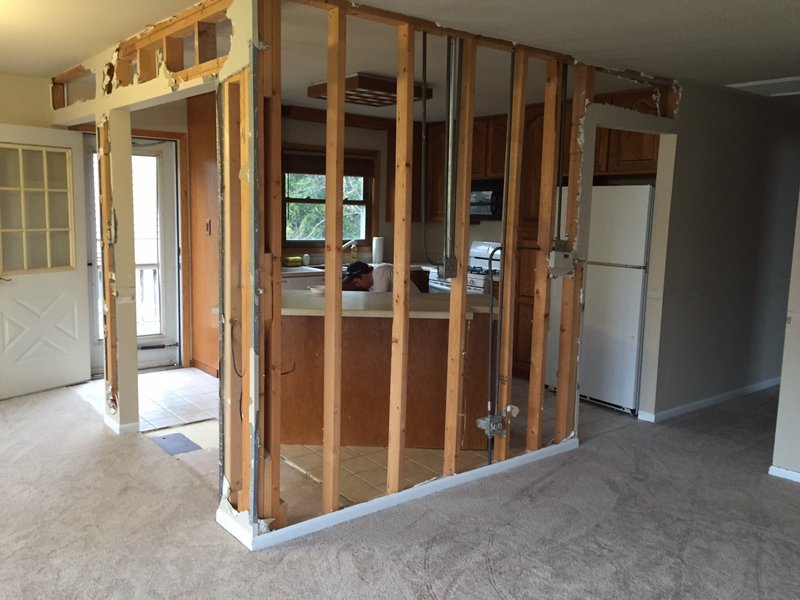
The result: An open and airy kitchen space, perfect for modern living, after removing a dividing wall.
Visualizing the Demolition Journey: Key Stages
Understanding the entire process from start to finish is crucial for a successful non-structural wall demolition. The mindmap below outlines the critical phases and tasks involved in transforming your kitchen space by removing an existing non-structural wall. It helps to visualize the interconnected steps, from initial planning and safety checks through the demolition itself to the final preparations for your new kitchen.
Walls for a New Kitchen"] id1["1. Planning & Preparation"] id1a["Confirm: Non-Load-Bearing Wall"] id1b["Identify & Plan for Utilities
(Electrical, Plumbing, HVAC)"] id1c["Secure Necessary Permits"] id1d["Assemble Safety Gear & Tools"] id1e["Prepare Work Area
(Protect surroundings, control dust)"] id2["2. The Demolition Process"] id2a["Final Utility Shut-Off & Verification"] id2b["Score Wall Edges (Ceiling, Floor, Adjoining Walls)"] id2c["Remove Wall Surface Material
(Drywall or Plaster & Lath)"] id2d["Carefully Dismantle Wall Framing
(Studs, Top & Bottom Plates)"] id2e["Systematic Debris Management & Disposal"] id3["3. Post-Demolition Work"] id3a["Professional Rerouting/Capping
of Exposed Utilities"] id3b["Repair & Finish Adjacent Surfaces
(Ceiling, Floor, Walls)"] id3c["Final Clean-up & Preparation
for New Kitchen Installation"]
This visual guide serves as a roadmap, highlighting the importance of each stage in ensuring a safe and effective demolition project that paves the way for your dream kitchen.
Understanding Wall Types: A Quick Comparison
Knowing the difference between non-load-bearing and load-bearing walls is fundamental to any interior demolition project. The table below outlines key distinctions:
| Feature | Non-Load-Bearing Wall | Load-Bearing Wall |
|---|---|---|
| Primary Purpose | Divides interior space; supports only its own weight. Often called a partition wall. | Supports significant structural weight from floors above, the roof, or other building components. |
| Impact of Removal | Minimal structural impact on the building if removed correctly. | Major structural impact. Removal requires careful engineering and installation of alternative support (e.g., beam, header). |
| Removal Complexity | Relatively straightforward for experienced DIYers, with proper precautions. | Complex and high-risk. Almost always requires professional design and execution by qualified contractors/engineers. |
| Professional Consultation | Highly recommended for verification of wall type and management of hidden utilities. | Essential for structural assessment, design of new supports, and often for the removal work itself. |
| Can it contain utilities? | Yes (commonly contains electrical wiring; may also house plumbing or HVAC elements). | Yes (can contain electrical, plumbing, HVAC, similar to non-load-bearing walls). |
| Typical Location Indicators | Often runs parallel to ceiling/floor joists. May not align with walls on floors above/below. | Often runs perpendicular to ceiling/floor joists. Typically aligns with walls or support columns on other floors. Exterior walls are usually load-bearing. |
This comparison underscores why correct identification is the critical first step. Misidentifying a load-bearing wall as non-load-bearing can have severe consequences for your home's safety and stability.
Demolition Project Factors: A Visual Analysis
When considering the removal of a non-structural wall, various factors come into play. The radar chart below offers an opinionated analysis of these factors for a typical DIY removal scenario versus a scenario where professional advice regarding structural integrity or complex utilities might be overlooked. The scales (1-10) represent increasing levels of risk, cost, time, skill, or impact.
This chart highlights that while DIY removal of a confirmed non-structural wall can offer cost savings and significant aesthetic improvements, neglecting crucial verification steps (represented by 'Hasty Removal') dramatically increases risks, particularly concerning structural integrity (if misidentified) and hidden utilities.
Visual Guide: Removing a Non-Load Bearing Wall
For those who prefer a visual walkthrough, understanding the process of removing a non-load bearing wall can be greatly enhanced by seeing it in action. The video below, from Shannon at House-Improvements.com, provides a practical demonstration and useful tips for tackling such a project. It covers key aspects from preparation to the actual removal, offering valuable insights for DIY enthusiasts.
This video serves as an excellent supplement to written instructions, illustrating techniques and potential challenges you might encounter. Remember, every project is unique, so always adapt general advice to your specific situation and prioritize safety.
Frequently Asked Questions (FAQ)
How can I be absolutely sure a wall is non-load-bearing?
The most reliable ways are to consult your home's original architectural plans or hire a qualified structural engineer or experienced contractor for an assessment. They can examine joist direction, support structures in the basement/attic, and other indicators. Never assume; always verify. Trying to determine this yourself without expertise can be risky.
What are the risks if I accidentally damage utilities in the wall?
Damaging utilities can have serious consequences:
- Electrical wires: Risk of electric shock, fire, or power outages. Repairs can be costly.
- Plumbing pipes: Water damage to floors, ceilings, and walls, potentially leading to mold growth. Emergency plumbing repairs are expensive.
- HVAC ducts: Reduced system efficiency, air leaks, and the cost of repairing or replacing ductwork.
- Gas lines: Extremely dangerous, posing a risk of explosion or gas leaks. If you suspect a gas line, evacuate immediately and call your gas company.
Do I always need a permit to remove an internal non-structural wall?
Permit requirements vary by location. Many municipalities do require permits for interior demolition, even for non-structural walls, especially if electrical or plumbing work is involved. It's crucial to check with your local building department before starting any work. Proceeding without a required permit can lead to fines, stop-work orders, and complications when selling your home.
What's the best way to deal with dust and debris during demolition?
Dust control is key. Seal off the work area from the rest of the house using plastic sheeting and tape over doorways and vents. Use drop cloths on floors. Wear a good quality dust mask or respirator. For debris, use heavy-duty contractor bags. Consider renting a small dumpster for larger projects. Clean up frequently as you work to keep the area safer and more manageable. A shop vacuum with a HEPA filter is excellent for cleanup.
Can I do this myself, or should I hire a professional?
Removing a confirmed non-structural wall can be a DIY project if you have moderate home improvement skills, the right tools, and a strong commitment to safety. However, if you're unsure about any aspect, particularly identifying the wall type or dealing with utilities, it's always best to hire professionals. The cost of professional help (typically $300-$1,000 for demolition, plus costs for utility work or engineering consultation if needed) can prevent much more expensive mistakes or safety hazards.
Recommended Next Steps
To deepen your understanding or explore related topics, consider these queries:
- How can I learn to properly identify load-bearing versus non-load-bearing walls within my specific type of house construction?
- What are the detailed steps and safety precautions for rerouting electrical wiring found in an interior wall I plan to remove?
- What are the average costs and expected timeline for a kitchen remodel that includes the removal of one or more non-structural walls?
- What are the most effective best practices for managing dust containment and handling debris disposal for interior home demolition projects?
References
This response was synthesized using information from various sources, including:
Last updated May 9, 2025