
Unlocking "Black Gold": Your Comprehensive Guide to Home Composting
Transforming Kitchen Scraps and Yard Waste into Garden Gold with Ease
Composting is a natural process that transforms organic materials like food scraps and yard waste into a nutrient-rich soil amendment known as "black gold." This biologically stable product enriches your garden soil, promotes plant growth, and reduces the amount of waste sent to landfills. It's a remarkably simple yet rewarding practice that contributes to a healthier environment and more resilient communities.
Key Insights into Composting
- Balance is Key: Successful composting hinges on maintaining the right balance of "brown" (carbon-rich) and "green" (nitrogen-rich) materials, along with adequate moisture and aeration.
- Variety of Methods: There are numerous composting methods—from simple open piles to sophisticated tumblers and vermicomposting—each suited to different spaces, lifestyles, and desired composting speeds.
- Patience and Observation: While some methods are faster, composting is a biological process that takes time. Regular monitoring and adjustment of moisture and aeration are crucial for optimal decomposition.
The Essence of Composting: A Biological Transformation
Understanding the Core Principles of Decomposition
At its heart, composting is the managed, aerobic biological decomposition of organic materials by microorganisms. These microscopic workers, alongside other digesters like worms, break down carbon-based materials such as grass clippings, leaves, yard trimmings, and food scraps. The result is compost, a stable soil amendment that dramatically improves soil health and provides essential nutrients to plants.
The success of this decomposition relies on providing the right conditions for these microorganisms. This includes a proper ratio of carbon to nitrogen, sufficient oxygen, and adequate moisture. When these elements are in harmony, the compost pile heats up, accelerating the breakdown of materials into a finished product with a balanced carbon-to-nitrogen ratio of approximately 20-25:1.
Starting Your Composting Journey: Step-by-Step Guidance
Setting Up for Success
Embarking on your composting journey is straightforward and can be adapted to almost any living situation, from a small apartment to a large backyard. The initial steps involve selecting the right location, gathering your materials, and choosing a suitable composting method.
Choosing the Ideal Composting Site
The location of your compost pile or bin is more important than you might think. An ideal spot is dry and shady, protecting the pile from excessive rain or direct sun which can dry it out. If you live in a rainy climate, avoid placing your pile under eaves. For most methods, situating your bin directly on bare soil is beneficial as it allows beneficial microorganisms and worms to access the pile and aids drainage.
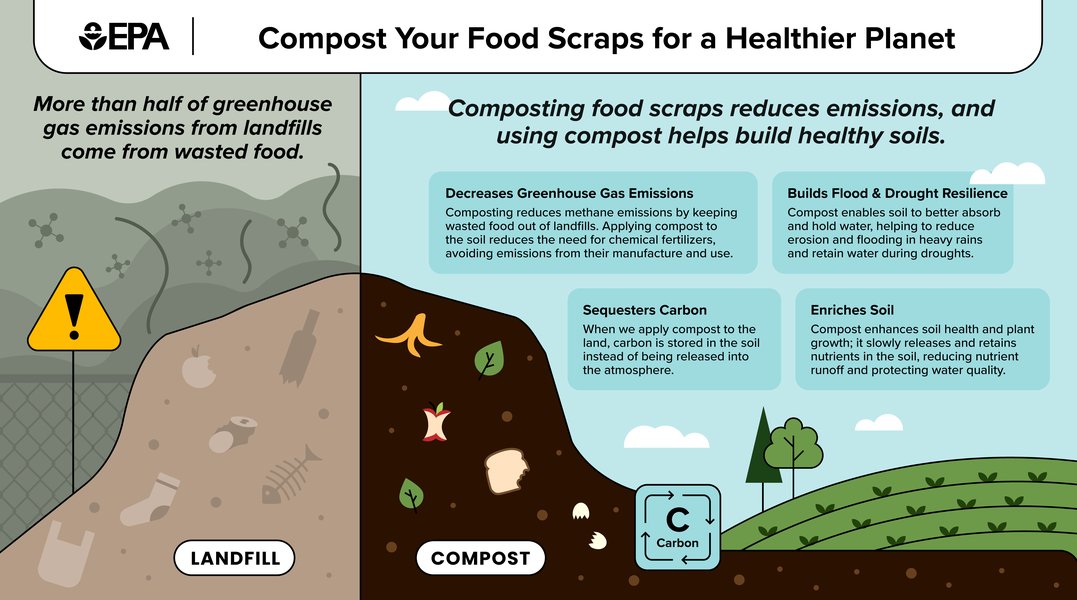
The essential ingredients for a thriving compost pile.
Selecting Your Composting Equipment
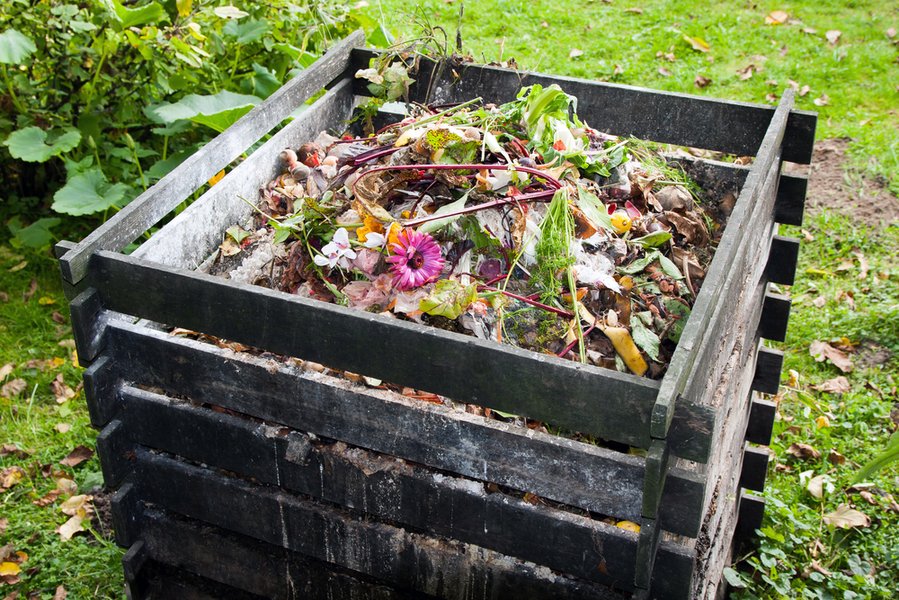
While composting can be as simple as a pile in the corner of your yard, choosing a dedicated structure can keep it neater and easier to manage. Options range from simple DIY bins to purpose-built plastic containers or tumblers.
- Open Piles/Bays: These are the simplest and often cheapest options, suitable for larger spaces. They allow for easy turning and good aeration. For optimal decomposition, a heap should be at least 1m x 1m.
- Closed Bins (e.g., "Dalek" bins): Popular for residential areas, these enclosed bins keep compost tidy and discourage pests. They retain moisture and heat well, even if smaller in size.
- Compost Tumblers: These sealed containers rotate, making turning the compost effortless and speeding up decomposition. They are excellent for managing odor and keeping pests out, though they may not allow worms to enter.
- Worm Bins (Vermicomposting): Ideal for small spaces, even indoors. Red wigglers (Eisenia fetida) efficiently break down food waste, producing nutrient-rich worm castings. This method requires a container, bedding material, and the right worms.
Gathering and Layering Your Materials
The success of your compost pile heavily depends on the mix of materials you add. Composting requires a balance of "brown" (carbon-rich) and "green" (nitrogen-rich) materials, along with water and air. The ideal ratio is often cited as 50/50 browns to greens, though some suggest up to 75% brown to 25% green if the pile becomes too wet.
Understanding Browns (Carbon-rich) and Greens (Nitrogen-rich)
Think of browns as your dry, woody materials and greens as your fresh, moist scraps.
| Category | Examples of Materials | Role in Compost |
|---|---|---|
| Browns (Carbon) | Dried leaves, wood chips, shredded newspaper, cardboard, straw, sawdust (untreated), small branches, twigs. | Provide energy for microorganisms, add bulk, improve air circulation, prevent compaction and odors. |
| Greens (Nitrogen) | Vegetable scraps, fruit peels, coffee grounds, tea bags, grass clippings, fresh plant clippings, eggshells, manure (from herbivores like cows or horses). | Provide protein for microorganisms, promote rapid decomposition, add moisture. |
It's beneficial to chop up larger materials into smaller bits to speed up the decomposition process. For example, shredding cardboard and breaking down prunings increases their surface area for microbial activity.
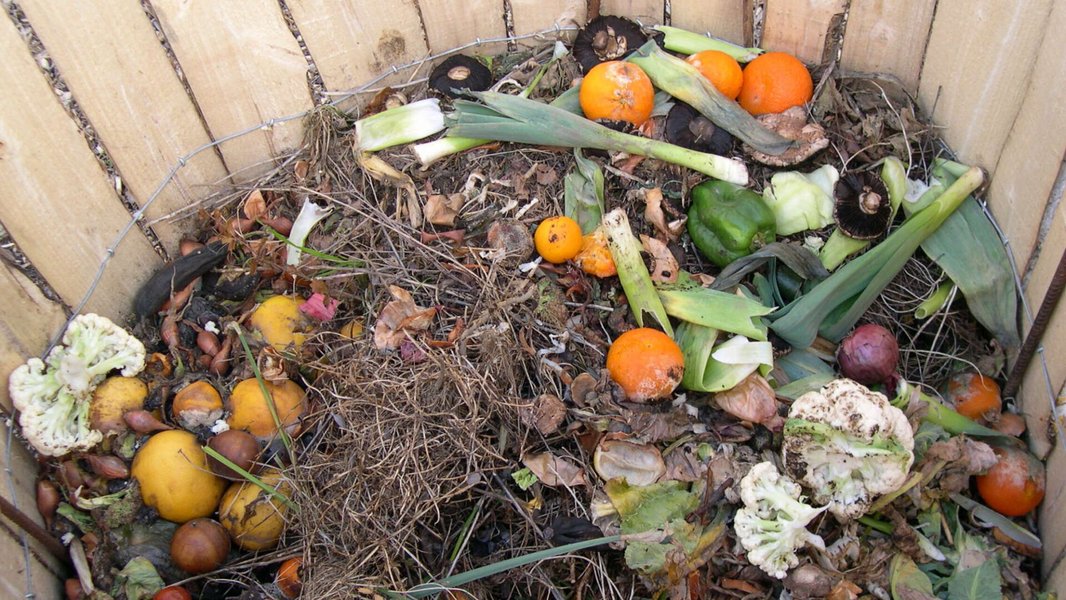
A typical home compost bin.
Building Your Compost Pile (The Layer Cake Method)
Start your pile with a four- to six-inch layer of bulky browns like twigs and wood chips at the bottom. This base helps absorb excess moisture and improves air circulation. Next, add layers of green materials, then brown materials, alternating like a layer cake. A splash of water should be added to each layer to ensure adequate moisture, aiming for the consistency of a wrung-out sponge.
While some sources suggest adding a "dash of soil" to each layer, others strongly advise against adding soil directly to the compost pile as it can slow down decomposition. The necessary microorganisms are naturally present on the organic materials themselves.
What Not to Compost
To prevent odors, pests, and ensure a healthy compost pile, certain items should be avoided:
- Meat, bones, and dairy products: Attract pests and can cause unpleasant odors.
- Oily or greasy foods: Can create anaerobic conditions and attract pests.
- Diseased plant materials: Can spread pathogens if the pile doesn't reach high enough temperatures to kill them.
- Weeds that have gone to seed: Seeds may survive the composting process and sprout in your garden.
- Pet waste (especially dog or cat feces): May contain pathogens harmful to humans. While some systems can handle dog waste, it requires specific, high-temperature conditions.
- Pressure-treated wood: Contains chemicals that are harmful to plants and soil.
- "Compostable" products not labeled "home compostable": Many commercial "compostable" bags or wipes require industrial composting facilities to break down properly and won't decompose in a home pile.
- Citrus peels, onions, and garlic: While technically compostable, some believe these can repel earthworms, which are vital to the composting process.
Managing Your Compost: Aeration, Moisture, and Temperature
The Art of Nurturing Decomposition
Once your compost pile is established, ongoing management is crucial for efficient decomposition. This involves regular aeration (turning), maintaining consistent moisture, and monitoring temperature.
Turning and Aeration
Aeration is vital for the microorganisms that break down organic matter. Turning the pile introduces oxygen, preventing it from becoming overly dense and anaerobic (lacking oxygen), which can lead to foul odors. How often you turn depends on your desired speed: for "hot composting" (fast decomposition), you might turn every few days; for "cold composting" (slower), occasional turning is sufficient. If the compost is damp and warm only in the center, it's a sign it needs to be moistened and turned.
This video from GrowVeg offers an excellent "Compost Masterclass" for making compost easily, detailing the process and maintenance for optimal results.
The video above provides a practical guide to making compost, emphasizing the importance of proper layering and aeration to achieve high-quality results. It showcases effective techniques that can simplify the composting process for beginners and experienced gardeners alike.
Maintaining Moisture Levels
Compost should be consistently moist, like a damp sponge. If the center of the pile is dry, it needs more water. Conversely, if it's too wet and smells bad, you've added too much green waste or water; mix in more dry, brown materials to absorb excess moisture and restore balance.
Temperature Management (for Hot Composting)
For faster decomposition (hot composting), the pile needs to reach and maintain high temperatures (130-150°F or 55-65°C). This heat is generated by microbial activity and helps break down materials quickly, and kill weed seeds and pathogens. Monitoring the temperature with a compost thermometer can be helpful. If the pile is no longer heating up after mixing, it indicates that decomposition is slowing, or it needs more balanced materials and turning.
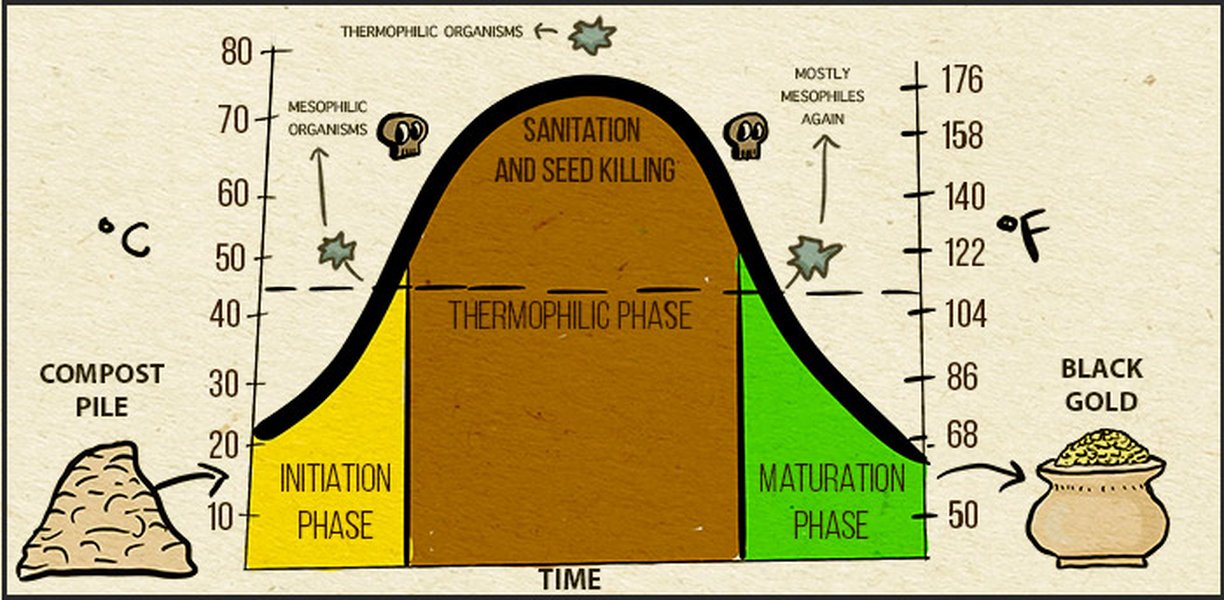
Temperature changes during the composting process.
Different Approaches to Composting
Choosing the Method That Suits You
There isn't a single "best" way to compost; the ideal method depends on your goals, available space, and desired effort level. Here's a look at common composting methods and their characteristics:
Cold Composting (Slow Composting)
This is the simplest method, involving merely piling up organic materials and letting them decompose over time without much intervention. It's often referred to as "lazy composting."
- Advantages: Requires minimal effort and no special equipment. Great for reducing waste even if you don't actively garden.
- Disadvantages: Decomposition is slow (can take six months to a year, or even longer). May not destroy weed seeds or plant pathogens. Can attract pests if not managed properly.
Hot Composting (Fast Composting)
This method requires more attention to achieve rapid decomposition, producing finished compost in a few weeks to months.
- Advantages: Faster results, generates high temperatures that kill weed seeds and pathogens, produces nutrient-rich compost quickly.
- Disadvantages: Requires regular turning, precise carbon-to-nitrogen ratios, and moisture management. Needs a larger volume of materials to build a pile at least 3 feet deep to generate heat.
Trench Composting
This involves burying organic waste directly in the soil in holes or trenches. It's an in-situ method where nutrients are released directly where plants will grow.
- Advantages: Out of sight, minimal effort after burying, ideal for single applications, no bin required.
- Disadvantages: Slower decomposition (around 12 months), finished compost cannot be harvested, requires continuous digging of new trenches.
Vermicomposting (Worm Composting)
Utilizes composting worms (like red wigglers) to break down food scraps into nutrient-rich vermicompost (worm castings).
- Advantages: Excellent for small spaces, can be done indoors, produces highly beneficial soil amendment, handles a wide range of food scraps (excluding meat/dairy).
- Disadvantages: Requires managing a worm colony, sensitive to extreme temperatures, certain materials cannot be added.
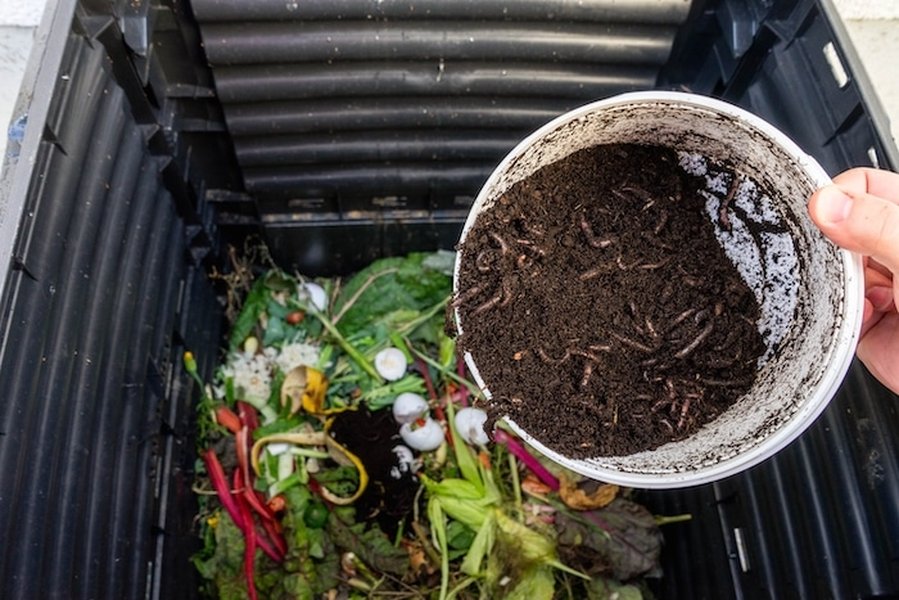
An example of a vermicomposting setup.
Sheet Mulching/Lasagna Gardening
Involves layering organic materials directly onto a garden bed to decompose in place, enriching the soil over time. Often used for building new garden beds.
- Advantages: Builds soil fertility directly, suppresses weeds, conserves moisture, no turning required.
- Disadvantages: Takes time for materials to break down, may not be suitable for immediate planting.
The Benefits of Composting: Beyond Waste Reduction
Transforming Waste into a Valuable Resource
Composting offers a multitude of benefits, extending far beyond simply diverting waste from landfills. It actively contributes to environmental health and garden vitality.
A radar chart comparing different composting methods based on key factors.
The radar chart above provides a visual comparison of different composting methods across several key performance indicators. For instance, vermicomposting excels in 'Space Efficiency' and 'Nutrient Richness' of the end product, making it ideal for urban dwellers. Hot composting, while requiring more 'Effort', offers the fastest 'Speed of Decomposition'. Cold composting demands minimal 'Effort' but is considerably slower. This chart helps in understanding the trade-offs and selecting the best method tailored to individual needs and resources.
Soil Improvement
Compost is an unparalleled soil amendment. It adds organic matter, which improves soil structure by holding sand particles together to absorb water like a sponge and creating spaces in hard clay soil for water and nutrients to flow. This enhances drainage in heavy soils and improves water retention in sandy soils.
Nutrient Provision
Finished compost contains major and minor nutrients essential for plant growth, slowly releasing them over time. This reduces the need for synthetic fertilizers, promoting healthier plant development naturally. It also applies beneficial microbes to the soil, which can suppress disease-causing fungi.
Waste Diversion
Composting significantly reduces the amount of organic waste sent to landfills. Food scraps, yard trimmings, and paper constitute a substantial portion of municipal waste. By composting at home, you divert these materials, lessening landfill burden and greenhouse gas emissions.
Weed and Pest Suppression
Applying a 3- to 6-inch layer of compost to the soil surface can act as an effective mulch, preventing water evaporation and discouraging weed growth. Properly managed hot compost can also kill weed seeds and plant pathogens.
Utilizing Your Finished Compost
Reaping the Rewards of Your Efforts
Once your compost pile is no longer heating up and visible food scraps have broken down, it's ready! Finished compost has an earthy smell and a dark, crumbly texture. It's often recommended to let it "cure" or finish for at least four weeks after active decomposition subsides.
Finished compost, ready for use.
You can screen or sift your finished compost to filter out any larger materials that didn't fully break down, returning them to a new compost pile. The rich, dark compost can then be used in various ways:
- Garden Beds: Mix 2 to 4 inches of compost into the top 6 to 8 inches of soil before seeding or transplanting.
- Top Dressing: Sprinkle a layer on top of new or established plantings, perennials, bulbs, fruit trees, or lawns.
- Potting Soil: Create an enriched potting mix by combining equal parts compost, vermiculite, and topsoil. For transplants and container plants, a 50% compost and 50% commercial soilless growing media mixture is often recommended.
- Compost Tea: Steep finished compost in water (5 parts water to 1 part compost by volume) for 1-3 days, then strain the liquid. This "compost tea" can be applied to the soil around plants or sprayed on foliage to provide beneficial microbes and nutrients.
Frequently Asked Questions About Composting
What is compost?
How long does it take to make compost?
Can I compost meat and dairy?
Why does my compost pile smell bad?
Do I need a special compost starter?
Can I compost in a small apartment without a yard?
Conclusion
Composting is a powerful, accessible, and rewarding practice that allows you to transform organic waste into a valuable resource for your garden. By understanding the balance of browns and greens, managing moisture and aeration, and choosing the right method for your lifestyle, you can successfully create nutrient-rich "black gold." This not only enriches your soil and promotes healthier plants but also makes a significant contribution to reducing landfill waste and fostering a more sustainable home environment. Start today, and watch your waste transform into a vital component of your garden's success.
Recommended Queries
- Explore the comprehensive benefits of compost for soil health and plant vitality.
- Discover various types of composting bins and systems to find the best fit for your space.
- Learn how to troubleshoot common composting issues like odors, dryness, or lack of decomposition.
- Understand the best ways to apply finished compost to your garden for maximum benefit.
References
Last updated May 22, 2025