

Key Insights for Diagnosing Ubuntu 24.04 Boot Problems
- Temporarily Disable
quiet splashin GRUB: The most immediate way to see boot messages is to edit the GRUB entry during startup by pressingeand removing "quiet splash" from thelinuxline. - Permanently Configure Verbose Boot: For ongoing diagnostics, modify
/etc/default/grubby removing "quiet splash" fromGRUB_CMDLINE_LINUX_DEFAULTand then runningsudo update-grub. - Utilize Recovery Mode and
journalctl: If normal boot fails, access recovery mode from the GRUB menu to get a root shell and usejournalctl --since todayorjournalctl -bto review detailed system logs for errors.
If Ubuntu stalls at its splash screen, try a one-time GRUB edit to see boot messages. After a successful boot, journalctl -b -1 can show the previous boot if that journal was retained.
Related reading: start Ubuntu in text mode or inspect Linux services with systemctl.
When your Ubuntu 24.04 system freezes or gets stuck on the splash screen logo during startup, it can be a frustrating experience. The default graphical splash screen, while aesthetically pleasing, hides crucial information that could help pinpoint the cause of the problem. To diagnose such issues effectively, you need to configure your system to display verbose startup messages, revealing the underlying processes and potential errors.
The Role of GRUB in Boot Diagnostics
The GNU GRand Unified Bootloader (GRUB) is the first program that runs when your computer starts, responsible for loading the operating system kernel. By modifying GRUB's configuration, you can control how Ubuntu boots, including whether it displays a graphical splash screen or detailed text-based logs.
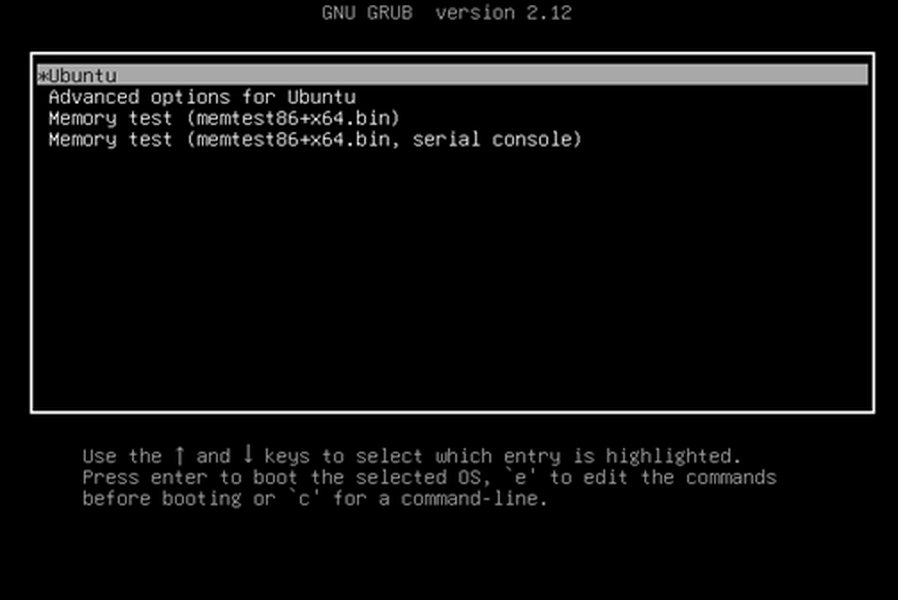
The GRUB boot menu, your gateway to boot diagnostics.
Temporarily Revealing Boot Messages
This method allows you to see the boot messages for a single startup session, which is ideal for quick diagnosis without making permanent changes to your system.
Accessing the GRUB Menu
To access the GRUB menu, you need to act quickly during the boot process:
- For BIOS systems: Repeatedly press and hold the Shift key immediately after powering on your computer.
- For UEFI systems: Repeatedly press the Esc key immediately after powering on.
If the GRUB menu doesn't appear, you might need to try a few times or consult your computer's manual for specific key presses to access the boot menu.
Editing Boot Parameters
Once you are in the GRUB menu, follow these steps:
- Use the arrow keys to select the "Ubuntu" boot entry.
- Press the
ekey to enter edit mode for the selected entry. - Navigate through the text to find the line that typically starts with
linuxand containsquiet splash. - Delete both
quietandsplashfrom this line. This will disable the silent boot and the graphical splash screen. - Optional: If you suspect graphical driver issues, you can add
nomodesetto this line. This tells the kernel to avoid loading video drivers and instead use basic VESA modes, which can help if the problem is related to your graphics card. - Press F10 or Ctrl+X to boot with these modified parameters.
Your system should now boot, displaying all the kernel messages and service startup logs instead of the splash screen. Observe these messages carefully for any error messages or points where the boot process halts, which can indicate the source of the problem.
Permanently Enabling Verbose Boot
If the temporary method helps you identify the issue and you want to always see detailed boot messages, you can make the changes permanent.
Modifying the GRUB Configuration File
Once you've successfully booted (even if it was through the temporary verbose mode or recovery mode), you can edit the GRUB configuration file:
- Open a terminal (Ctrl+Alt+T).
- Edit the GRUB configuration file using a text editor with administrative privileges.
nanois a common choice for command-line editing:
If you have a graphical environment, you might prefersudo nano /etc/default/grubgeditor another GUI editor:sudo gedit /etc/default/grub - Locate the line that reads:
GRUB_CMDLINE_LINUX_DEFAULT="quiet splash" - Change this line to:
By making it an empty string, you ensure that noGRUB_CMDLINE_LINUX_DEFAULT=""quietorsplashparameters are passed, resulting in verbose boot messages. If you addednomodesettemporarily and it helped, you could consider adding it here as well, e.g.,GRUB_CMDLINE_LINUX_DEFAULT="nomodeset". - Optional: To prevent the graphical GRUB menu theme from loading and ensure purely text-based output from the very beginning, you can uncomment or add the following line:
GRUB_TERMINAL="console" - Save the file. In
nano, press Ctrl+O, then Enter, and then Ctrl+X to exit.
Updating GRUB and Rebooting
After saving the changes to /etc/default/grub, you must update the GRUB bootloader to apply them:
- In the terminal, run:
sudo update-grub - Reboot your system:
reboot
Upon reboot, you should now consistently see detailed boot messages instead of the splash screen, which will be invaluable for ongoing diagnostics.
Deep Dive into Log Analysis with journalctl
Even with verbose boot enabled, sometimes the messages flash by too quickly, or the system still gets stuck before displaying a clear error. In such cases, journalctl is an indispensable tool for examining system logs.
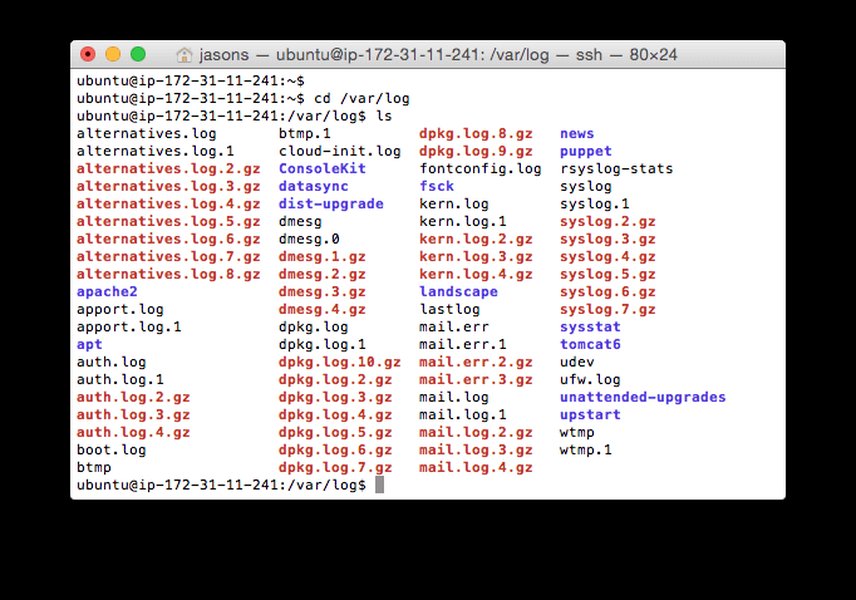
An example of log output in a terminal, crucial for identifying system events and errors.
Accessing Recovery Mode
If your system cannot boot normally even after removing quiet splash, you'll likely need to use Ubuntu's recovery mode:
- Restart your computer.
- Hold Shift (BIOS) or Esc (UEFI) to bring up the GRUB menu.
- Select "Advanced options for Ubuntu".
- Choose the entry ending with "(recovery mode)".
- From the recovery menu, select "root" or "Drop to root shell prompt" to access a command-line interface with administrative privileges.
Using journalctl to Inspect Logs
Once you have a root shell, you can use journalctl to view logs:
- To view logs from the current boot session:
journalctl -b - To view logs generated since the beginning of the current day:
journalctl --since today - To follow new log entries in real-time (useful if you suspect a specific service is causing a hang):
journalctl -f - To view the last 200 lines of the current boot's logs:
journalctl -b | tail -n 200
Look for messages marked as error, failed, or warning. These often indicate services that couldn't start, device issues, or driver problems.
Common Troubleshooting Scenarios and Solutions
Understanding the common causes of boot failures can significantly expedite the diagnostic process.
Graphics Driver Issues (nomodeset)
One of the most frequent culprits behind boot freezes or black screens is an incompatible or corrupted graphics driver. The nomodeset kernel parameter can often bypass these issues by forcing the system to use generic video drivers. If adding nomodeset temporarily allows you to boot, it strongly suggests a graphics driver problem. You can then install proprietary drivers, update existing ones, or revert to open-source alternatives.
This video explains how to fix Ubuntu freezing on boot, often related to graphics drivers.
Corrupted Packages or System Files
Updates can sometimes leave packages in an inconsistent state or corrupt critical system files. From recovery mode or a live environment, you can attempt to fix these:
- Update and upgrade packages:
sudo apt update && sudo apt upgrade - Force reinstall critical components like the desktop environment:
sudo apt install --reinstall ubuntu-desktop
Boot Configuration Corruption
In cases where GRUB itself is corrupted or misconfigured, specialized tools can help. Boot-Repair is a widely recommended utility that can automatically detect and fix many common boot problems. It's typically run from a live Ubuntu environment (e.g., from a USB stick or DVD).
Understanding the Boot Process Flow
To better grasp where a boot issue might occur, it's helpful to visualize the typical Ubuntu boot sequence.
This mindmap illustrates the sequential flow of the Ubuntu boot process, from power-on to the login screen. It highlights key stages where a system might encounter a problem, leading to a splash screen freeze.
Common Symptoms and Recommended Actions
Here’s a summary of common boot issues and the most effective diagnostic steps:
| Symptom | Likely Cause | Recommended Diagnostic Action |
|---|---|---|
| Stuck on splash screen, no visible error | quiet splash enabled, hiding output; minor service hang |
Temporarily remove quiet splash in GRUB. Observe logs. |
| Black screen after GRUB, possibly with blinking cursor | Graphics driver incompatibility (nouveau driver issues, proprietary driver problems) |
Add nomodeset to GRUB parameters. Check journalctl for graphics-related errors. |
| System freezes at specific message during verbose boot | Problem with a particular service, hardware component, or kernel module | Note the last message displayed. Use journalctl -b to find associated errors. |
| Cannot boot at all, even to GRUB menu | GRUB corruption, critical kernel failure | Boot from a live USB/DVD, use Boot-Repair. |
| Booting to a command line, not graphical desktop | Desktop environment (GDM/LightDM) issues, graphics driver failure | Reinstall ubuntu-desktop. Check journalctl for display manager errors. |
Frequently Asked Questions
What does "quiet splash" mean in GRUB?
Will removing "quiet splash" affect my system's performance?
What is nomodeset and when should I use it?
nomodeset is a kernel parameter that disables the kernel's attempt to set video modes. It forces the system to use basic VESA display modes. It's primarily used when you encounter black screens, freezes, or display issues during boot, often indicating a problem with your graphics drivers.Can I undo these changes if they don't help or cause more issues?
/etc/default/grub, you can edit the file again, restore the GRUB_CMDLINE_LINUX_DEFAULT="quiet splash" line, and then run sudo update-grub.Conclusion
Diagnosing a frozen Ubuntu 24.04 splash screen effectively hinges on gaining visibility into the boot process. By temporarily or permanently disabling the quiet splash parameters in GRUB, you can reveal the detailed messages that pinpoint the exact stage where your system encounters trouble. Coupled with powerful log analysis tools like journalctl in recovery mode, these techniques empower you to identify and resolve a wide range of boot issues, from graphics driver conflicts to corrupted system files. Always proceed cautiously when modifying system configuration files and remember that a live USB can be an invaluable lifeline for severe boot problems.
Recommended Further Exploration
- How to troubleshoot Ubuntu 24.04 black screen after a system update?
- What are the steps to fix GRUB bootloader issues on Ubuntu 24.04 using a live USB?
- How to resolve common graphics driver installation problems on Ubuntu 24.04?
- A comprehensive guide to understanding systemd boot logs in Ubuntu 24.04.