
Nail Art Poster Design for Jyoti
A creative guide to crafting an eye-catching nail art poster
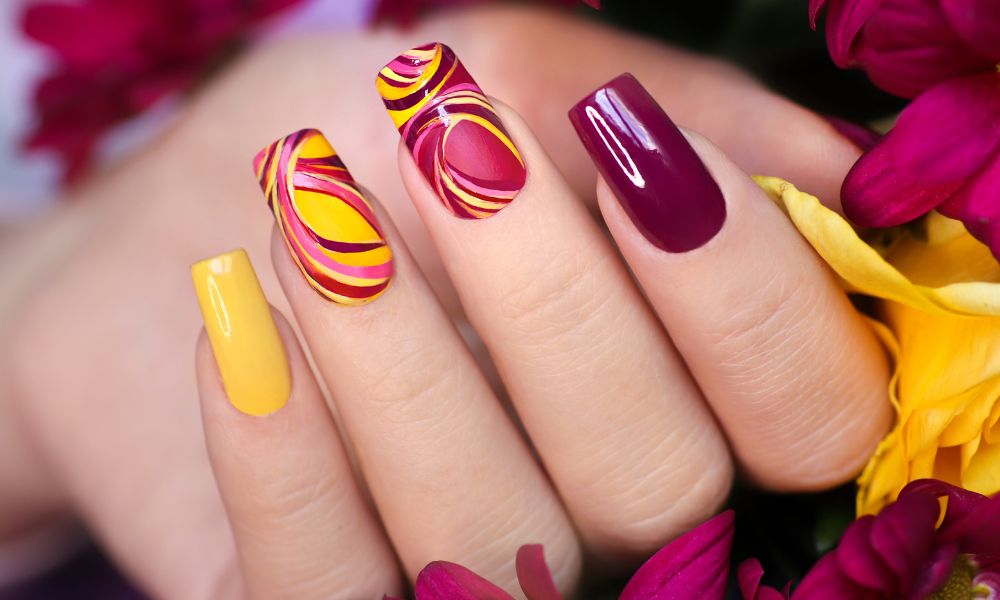
Key Highlights
- Vibrant Visuals & High-Quality Images: Select and use vivid, high-resolution images to showcase intricate nail designs.
- Distinct Branding & Typography: Utilize elegant and readable fonts that align with Jyoti’s style, making her name and services stand out.
- Clear Messaging & Call-to-Action: Incorporate compelling text and promotional elements to encourage potential clients to engage with Jyoti’s nail art offerings.
Designing the Poster: An In-Depth Guide
Crafting a compelling nail art poster featuring Jyoti involves a blend of creative flair and strategic design. The process starts with conceptualizing the layout, choosing a vibrant color palette, and aligning all elements with Jyoti’s brand identity. This comprehensive guide walks you through each step, ensuring that you create a visually appealing and functionally effective poster.
1. Concept and Planning
Before diving into design software, take time to brainstorm the core message of the poster. Determine whether the poster is designed to promote a nail salon service, serve as a portfolio piece, or offer seasonal promotions. Define the target audience—whether it is for potential customers, event attendees, or clients looking for custom nail art designs—and shape your design elements to cater to their preferences.
Identifying the Theme
The theme should reflect Jyoti’s aesthetic and the art she creates. For instance, if Jyoti’s nail art is known for its vibrant use of colors and modern techniques, your poster should reflect an energetic and contemporary vibe. Alternatively, a minimalist design can also be effective if Jyoti’s work leans towards understated elegance. Make use of the following questions to guide your creative process:
- What distinguishes Jyoti's nail art style?
- Which colors best encapsulate her artistic identity?
- What message should the poster convey to potential clients?
2. Visual Composition & Imagery
The visual aspect of the poster is arguably the most critical element. Use high-resolution images that highlight the minute details of Jyoti’s nail art. These images should capture the texture, color, and intricate designs that define her work. It is essential to balance imagery with text so that the design does not become too cluttered, while still providing all necessary information.
Photography and Image Selection
Whether you have original photographs or are using stock images, choose visuals that are crisp and well-lit. If you’re showcasing various nail art designs, consider using a collage format or a grid to display multiple images. Ensure that the images convey professionalism. Here is a table outlining different image types and their recommended usage:
| Image Type | Usage Guidelines | Purpose |
|---|---|---|
| High-Resolution Nails Shot | Ensure clarity and proper lighting | Showcases detail and technique |
| Collage/Grid of Designs | Uniform spacing and balanced layout | Exhibits variety and creativity |
| Action/Process Photos | Include behind-the-scenes moments | Builds connection and authenticity |
3. Branding and Text Elements
Central to the poster is the integration of Jyoti’s brand. Her name in an elegant, bold font should stand out, immediately drawing the viewer’s attention. This goes beyond mere aesthetics; it’s about creating an identity that resonates with her creative vision. Use typography that complements the overall design. For example, consider using a modern sans-serif for an updated vibe, or a script font for a touch of sophistication.
Incorporating Jyoti's Brand
Place Jyoti’s name strategically on the design, perhaps at the top or centrally, so that it becomes the focal point. Also include her tagline if available—something that encapsulates the spirit of her nail art. For instance, a tagline like "Where Creativity Meets Precision" reinforces her expertise.
In addition to her name, include any logos or insignias associated with her brand. Consider a layered text effect or slight shadowing to give the text depth and dynamism.
4. Color Schemes and Design Aesthetics
The choice of colors plays a pivotal role in the overall appeal and message of the poster. Selecting a vibrant palette is ideal if Jyoti’s nail art includes bold hues. Alternatively, if her style is more serene and elegant, soft pastels may be more appropriate. Harmonizing the colors in your images, text, and background can create a cohesive and attractive design.
Color Palette Suggestions
Here are a few color palette suggestions based on different design goals:
- Energetic & Bold: Neon pinks, electric blues, bright purples, and contrasting yellow accents.
- Elegant & Minimal: Soft pastels, muted grays, warm beiges, with touches of gold.
- Modern & Contemporary: Monochrome backgrounds with one or two vibrant accent colors.
Use color theory principles to ensure that the colors chosen do not clash and that they highlight rather than overwhelm the poster’s message.
5. Effective Use of Call-to-Action (CTA) and Informative Text
A professional poster never lacks a clear call-to-action. Whether encouraging viewers to book an appointment or explore Jyoti’s nail art portfolio, the CTA should be direct and unambiguous. Position the CTA in an area of high visibility—often at the bottom or a corner where the eye naturally falls after viewing the main content.
Crafting Your Message
The textual content must be concise yet informative. Begin with an engaging headline—this could be something like “Jyoti’s Nail Art: Where Creativity Meets Precision!” Below the headline, include details such as contact information, social media handles, and any current promotions. Emphasize clarity by selecting a readable font size and weight.
Consider integrating client testimonials or short, compelling reviews. These add an element of trustworthiness and can encourage prospective clients to reach out.
6. Technical Considerations and Final Touches
Once your design is ready, pay close attention to the technical details. Ensure that the final poster is high-resolution, appropriate for both digital display and physical prints. Digital posters should ideally be prepared in formats such as PNG or JPEG with a resolution of at least 300 DPI for print.
Design Software and Tools
Utilize design tools that allow for flexibility and customization. Some recommended platforms include:
- PosterMyWall – Offers a range of nail art templates.
- Pikbest – Excellent for customizable nail art poster templates.
- PhotoADKing – Provides diverse template options.
- BrandCrowd – Good for logo integrations and branding.
- MyCreativeShop – Features modern and trendy poster ideas.
When working in design software like Adobe Photoshop, Illustrator, or even Canva, ensure that you respect layering, alignment, and consistency throughout the design. Here’s a short sample code snippet illustrating basic HTML/CSS styling that could inspire the online poster layout:
/* Example CSS for a digital poster layout */
.poster-container {
    width: 800px;
    background: #fff;
    border: 1px solid #ddd;
    padding: 20px;
    font-family: 'Arial', sans-serif;
}
.poster-header {
    text-align: center;
    font-size: 36px;
    color: #cc9900;
}
.poster-image {
    width: 100%;
    height: auto;
    margin-bottom: 20px;
}
.poster-text {
    font-size: 18px;
    color: #333;
}
.poster-cta {
    text-align: center;
    background: #388278;
    color: #fff;
    padding: 10px;
    font-weight: bold;
    text-transform: uppercase;
}
These guidelines ensure you build a poster that is both visually impressive and effective in communicating the essence of Jyoti's nail art.
Integrating Design Elements for a Cohesive Experience
A successful nail art poster is more than a compilation of design elements; it is a narrative that captures the artistry behind every detail. Integrate the visual elements, branding, and information into a single narrative that tells Jyoti’s story.
Think of the poster as a visual advertisement that not only encourages bookings but also celebrates the art itself. The harmonious blending of text, images, and color will resonate with audiences, reflecting Jyoti’s passion for nail art and her commitment to quality.
To further streamline the design, consider creating multiple layout variations and seek feedback from peers or potential customers. This iterative process helps ensure that the final design is both aesthetically pleasing and functionally effective.
Additional Design Considerations
Print and Digital Versions: You may wish to create separate versions for online promotion and print media. Digital posters can include interactive elements or animations if designed for websites or social media, while print versions should focus on clarity and high resolution.
Seasonal and Thematic Variants: Depending on marketing cycles, consider adapting the poster’s color scheme or additional graphics for seasons or special events. This allows the poster to remain relevant and engaging over time.
White Space and Minimalism: It’s important to avoid overcrowding the design. Incorporating white space around key elements not only highlights those components but also creates a balanced, modern look.
Practical Steps to Create Your Nail Art Poster
Below is a step-by-step checklist to guide you through the poster creation process:
- Define the Poster’s Goal: Identify if your focus is to promote a nail salon service, showcase a portfolio, or highlight seasonal trends.
- Select a Template: Utilize online tools like PosterMyWall, BrandCrowd, or Pikbest to choose a base design that aligns with your theme.
- Choose Images: Gather high-resolution photos of chemical-free, precise, and creative nail art designs that show off Jyoti’s work.
- Decide on a Color Palette: Match vibrant hues or soft pastels with your branding.
- Add Text: Integrate Jyoti’s name, a catchy headline, contact information, and a compelling call-to-action. Ensure font styles and sizes are balanced for readability.
- Finalize the Layout: Organize images, text, and interactive elements such as social media icons. Use grid or collage layouts to maintain a structured appearance.
- Review and Edit: Check for alignment, proper spacing, and overall cohesiveness. Make sure the poster isn’t overcrowded and that key elements are emphasized.
- Export in the Right Format: Save the final design in high resolution (at least 300 DPI) for print or as optimized images for online sharing.
These steps provide a comprehensive roadmap to creating a nail art poster that is both functional and enticing.
Resources and References
For additional inspiration and design templates, consider exploring the following resources:
- PosterMyWall - Nail Art Posters
- Pikbest - Free Nail Art Templates
- PhotoADKing - Nail Poster Templates
- MyCreativeShop - Nail Salon Poster Ideas
- BrandCrowd - Nail Salon Poster Maker
Recommended Next Steps
Explore further design strategies and marketing insights to enhance your poster’s impact and refine its aesthetics:
 amazon.com
Last updated March 9, 2025